Create a Tenant Configuration File
This article explains how to create a tenant configuration file in Socotra.
Overview
What will I learn?
By the end of this tutorial, you will know how to:
Create a configuration file from a template in Socotra.
Navigate the configuration user interface of Socotra.
Add, modify, and remove data on the tenant configuration file in Socotra.
What will I need?
You’ll need a set of credentials to log into your business account. To learn more about logging into your business account, see: Log into Socotra
Key concepts
What is a tenant configuration file?
In Socotra, a tenant configuration file defines one or more insurance products.
The tenant configuration file describes all aspects of the product, including exposures and coverages. It’s also where you define billing and administrative settings.
Once created and validated, tenant configuration files are deployed to tenants.
What is a tenant?
In Socotra, a tenant is a dedicated instance of the Socotra insurance policy administration system. Tenants allow you to isolate data related to insurance products in a highly customizable container. A business account can contain one or more tenants.
We’ll cover tenants in further detail later on in this learning path. For now, it’s enough that you’re familiar with the term.
Next, let’s cover how a tenant configuration file is generally structured.
How is a tenant configuration file structured?
A tenant configuration file contains the settings for the administration of an insurance policy. The settings can be thought of as falling into four conceptual categories:
Global
Policy
Billing
Resources
For right now, let’s start by focusing on the Policy category, which defines the structure of an insurance product.
Considerations
The subsections below should give you a basic understanding of the data model of a tenant configuration file. There are broadly two ways to create a tenant configuration file:
Through the Socotra web application user interface
Manually by writing JSON code
This tutorial mostly focuses on how to use the Socotra web application user interface, but manually writing JSON code is also a common method. We’ll show some examples of how the configuration is set up in JSON below.
Don’t worry if you’re not comfortable with JSON just yet. We’re going to focus on learning how to manipulate this data with the Socotra EC web application, but it’s useful to have a general idea of how things work behind the scenes for when you learn how to use the Socotra API.
When directly editing JSON code to make a tenant configuration in Socotra, remember this basic principle: There are several directories where you can define policy, billing, and other administrative settings, and it’s possible to link these settings together to make a valid tenant configuration and insurance product(s).
Also keep in mind that the example’s we’re going to cover aren’t the only way to set up a product in Socotra. Socotra is a highly configurable, flexible platform. These examples just show you the basics.
Now, let’s cover the basics of the Socotra data model by starting with learning what an insurance product is.
What is an insurance product?
An insurance product is a data model composed of various elements that, when linked together, represent a product that can be used to create quotes and policies for account holders.
What is an account holder?
An account holder is a third-party entity (a person or a business) who is capable of being quoted for and being issued a policy for an insurance product.
What is an element?
An element is a data object that is a building block of an insurance product. All elements have two required properties:
category
type
The category defines the kind of element. There are five valid categories:
product
policyLine
exposureGroup
exposure
coverage
The type is a name that provides a human-readable description of the element.
Note: The type must start with a letter or underscore, and it must be no more than 128 characters. It also cannot have the same name as a reserved word/boolean value in the Java programming language (List of Java keywords - en.wikipedia.org)
Visualizing the configuration of an insurance product
The visual below represents one possible configuration of an insurance product, using the product, exposure, and coverage elements.
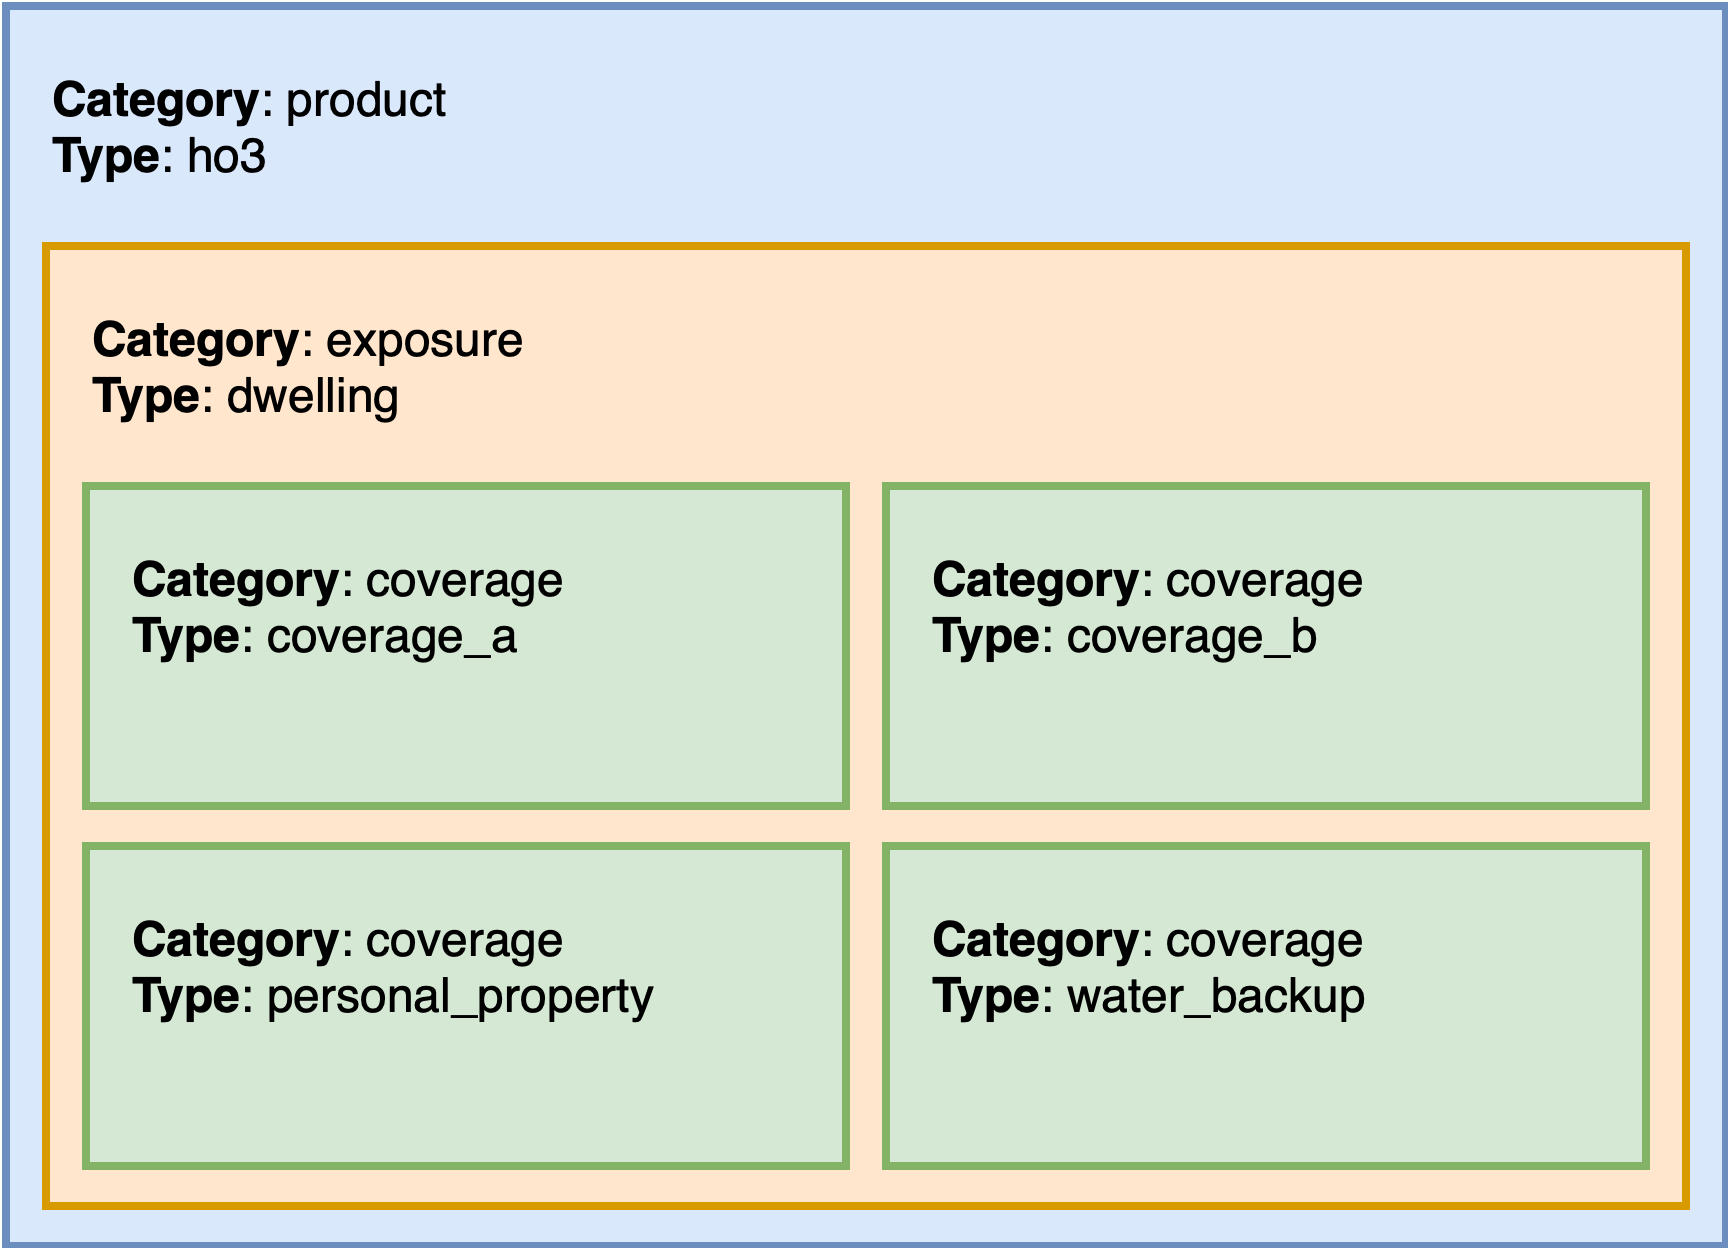
In the visual above:
Each rectangle represents an element.
Each element has two required properties:
category (the kind of element)
type (a name/description of the element)
A product element is composed of (contains) one or more exposure elements.
An exposure element contains one or more coverage elements.
Note: An exposure represents the level of risk or vulnerability held by an individual or business. This is usually what is being insured.
How does this look represented in the JSON code? The annotated screenshots below show a configuration in Visual Studio Code, though you can use any text editor to read and edit JSON.
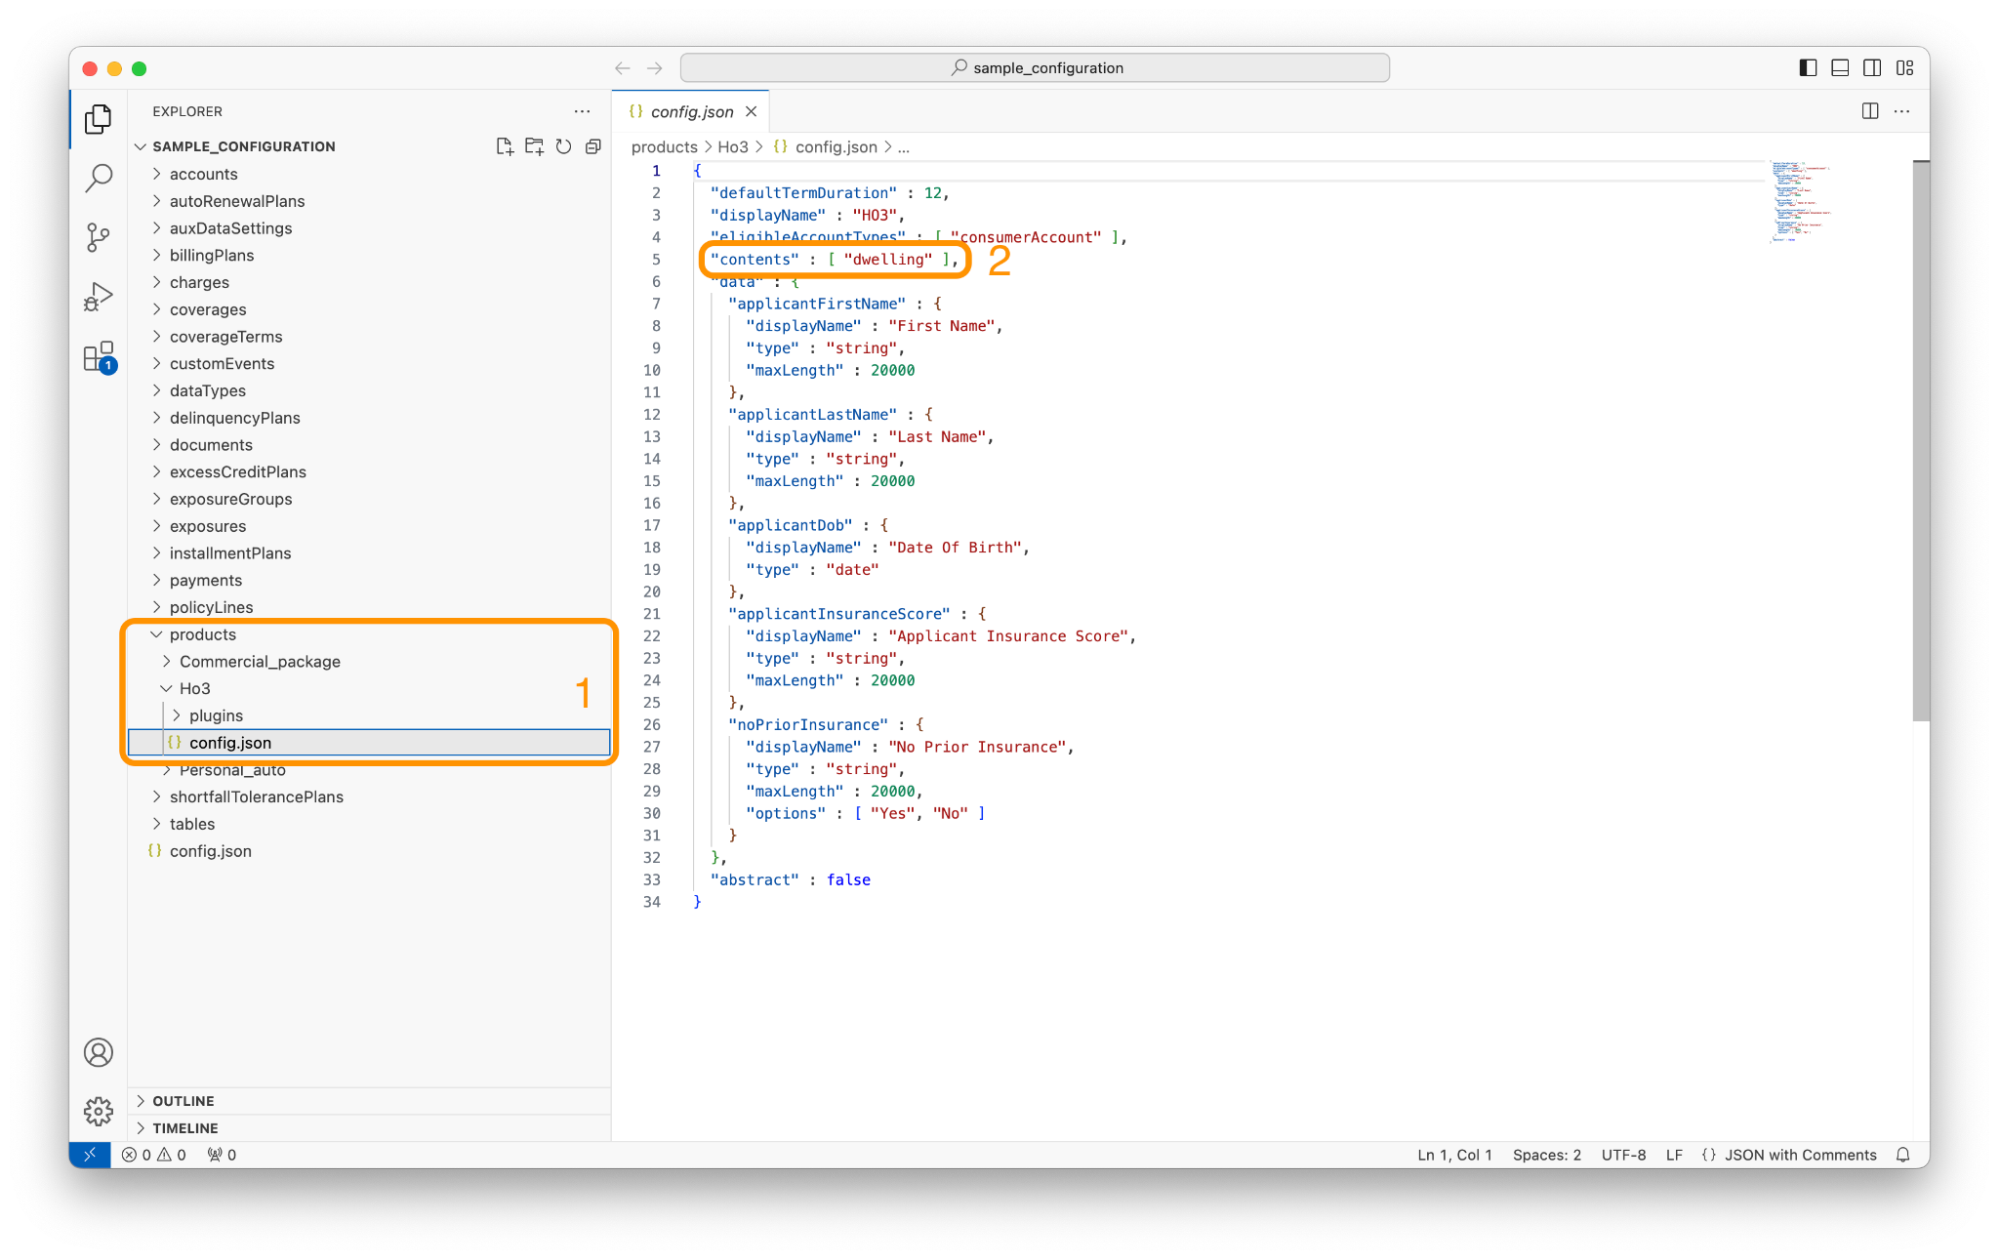
The product element “ho3” is located in the products directory.
The category of the product element is inferred by its placement in the products directory name.
The type of the product element is in the sub-directory name (products > ho3)
The
contentsarray in config.json points todwelling. This is the name of an exposure, as we’ll see in the screenshot below.
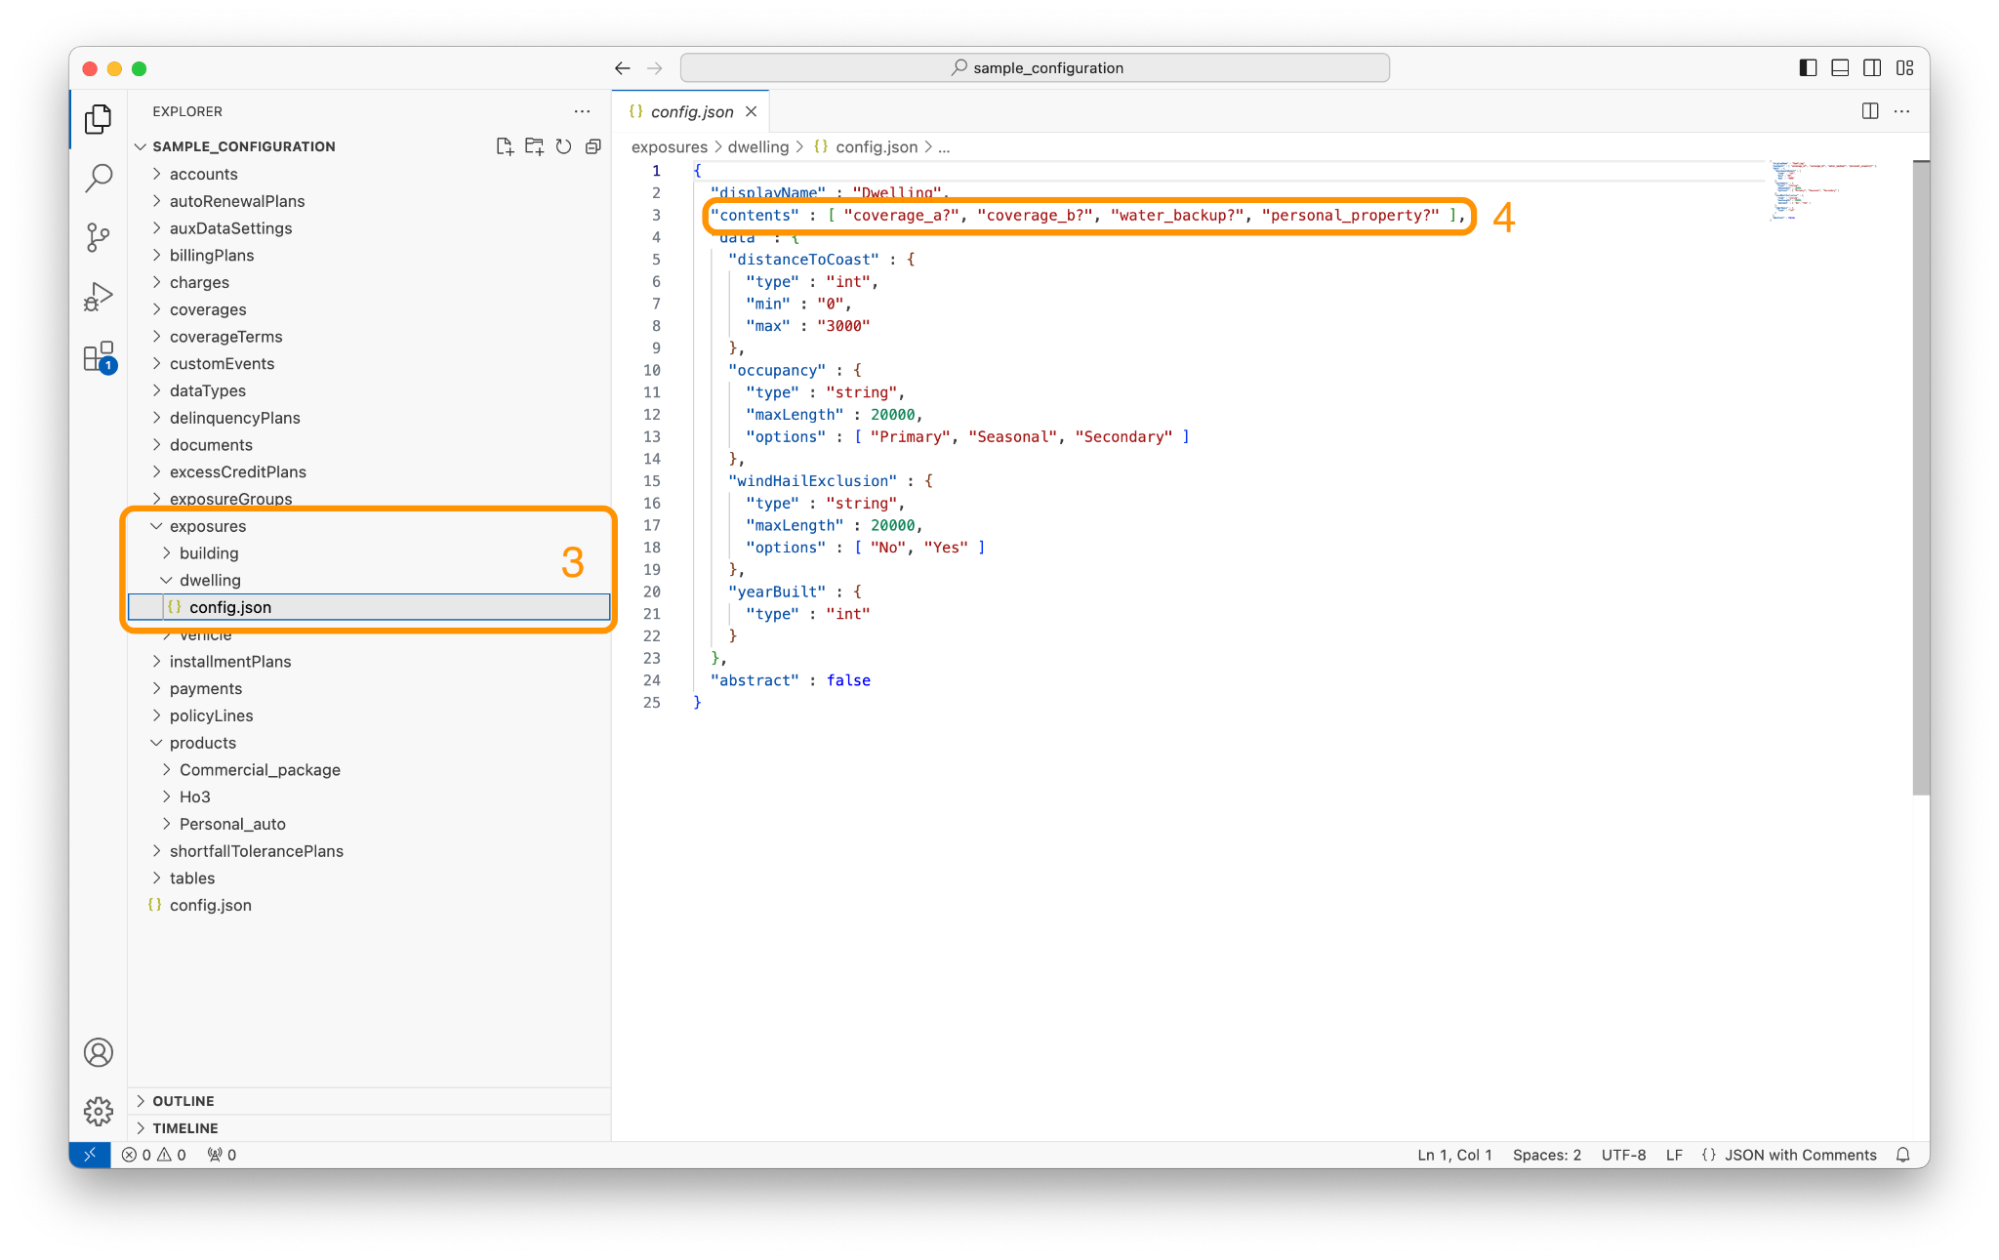
The exposures element “dwelling” is located in the exposures directory.
The category of the exposures element is inferred by its placement in the exposures directory..
The type of the exposures element is defined in the subdirectory (exposures > dwelling)
You could just as easily rename “dwelling” to “home”, and it would have the same functionality; the exposure type would now be “home”.
Be aware – when renaming in JSON, you must make sure to update all references to the old name as well.
The contents array in config.json likewise points to four coverages that we’ll see in the screenshot below.
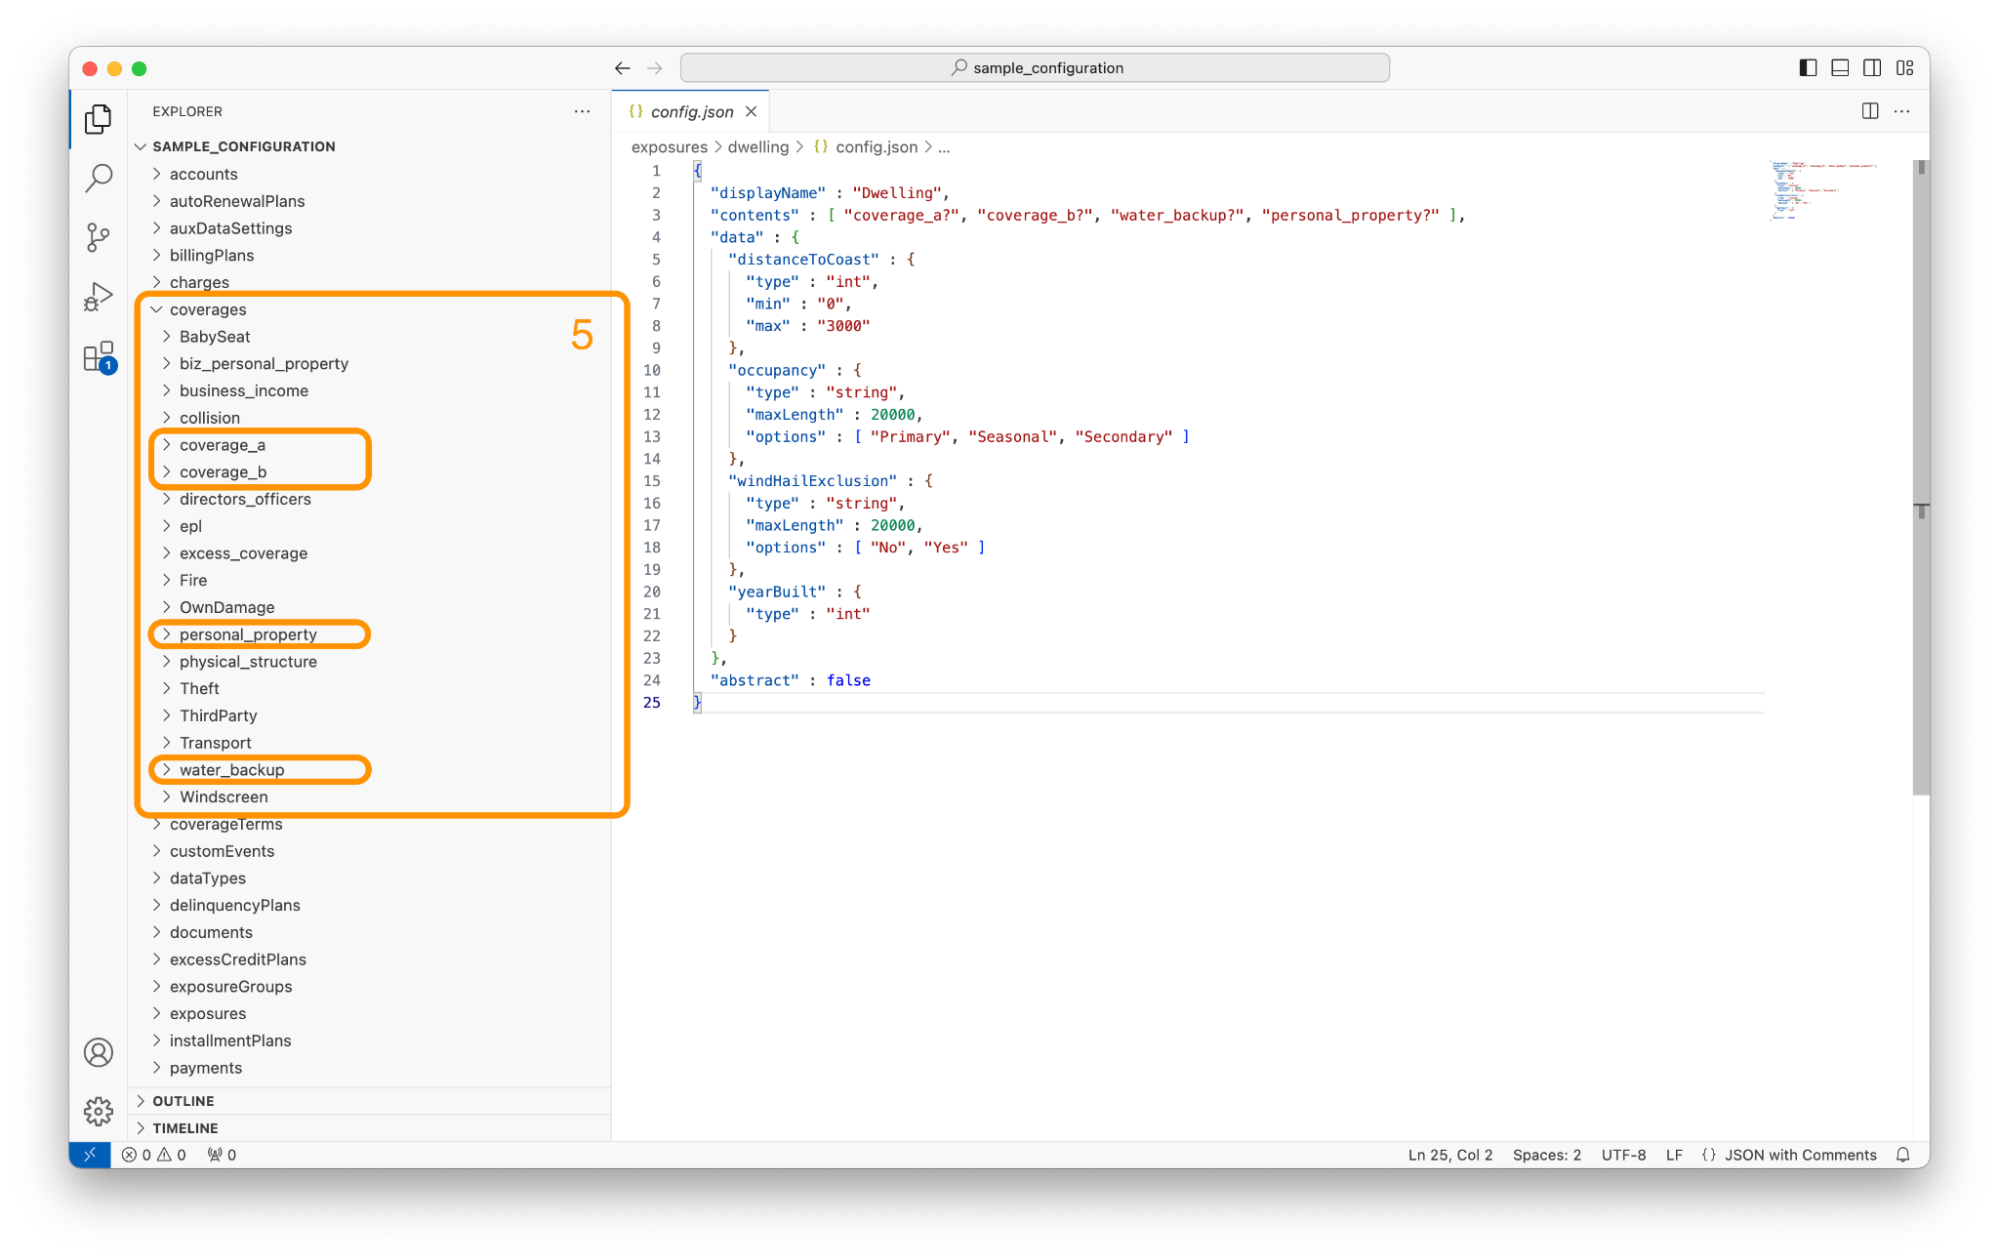
The four coverages elements “coverage_a”, “coverage_b”, “personal_property”, and “water_backup” can be found in the coverages directory.
Ready to begin?
Continue onto the next section to learn how to create a tenant configuration file for an insurance product in Socotra.
Part 1 - Creating a configuration file
First, you need to create a configuration file. There are broadly two ways to create a configuration file:
Through the Socotra web application user interface
Manually by writing JSON code
We’re going to focus on creating the configuration through the Socotra EC user interface, but we’ll cover how to directly edit the code later on in this learning path.
Socotra provides a template configuration file of a few mock insurance products. During this tutorial, you’ll use the template to learn more about navigating and modifying a configuration file.
Follow the steps below to create a configuration file from a template in Socotra.
Log into the Socotra web application.
For more information, see: Log in to Socotra
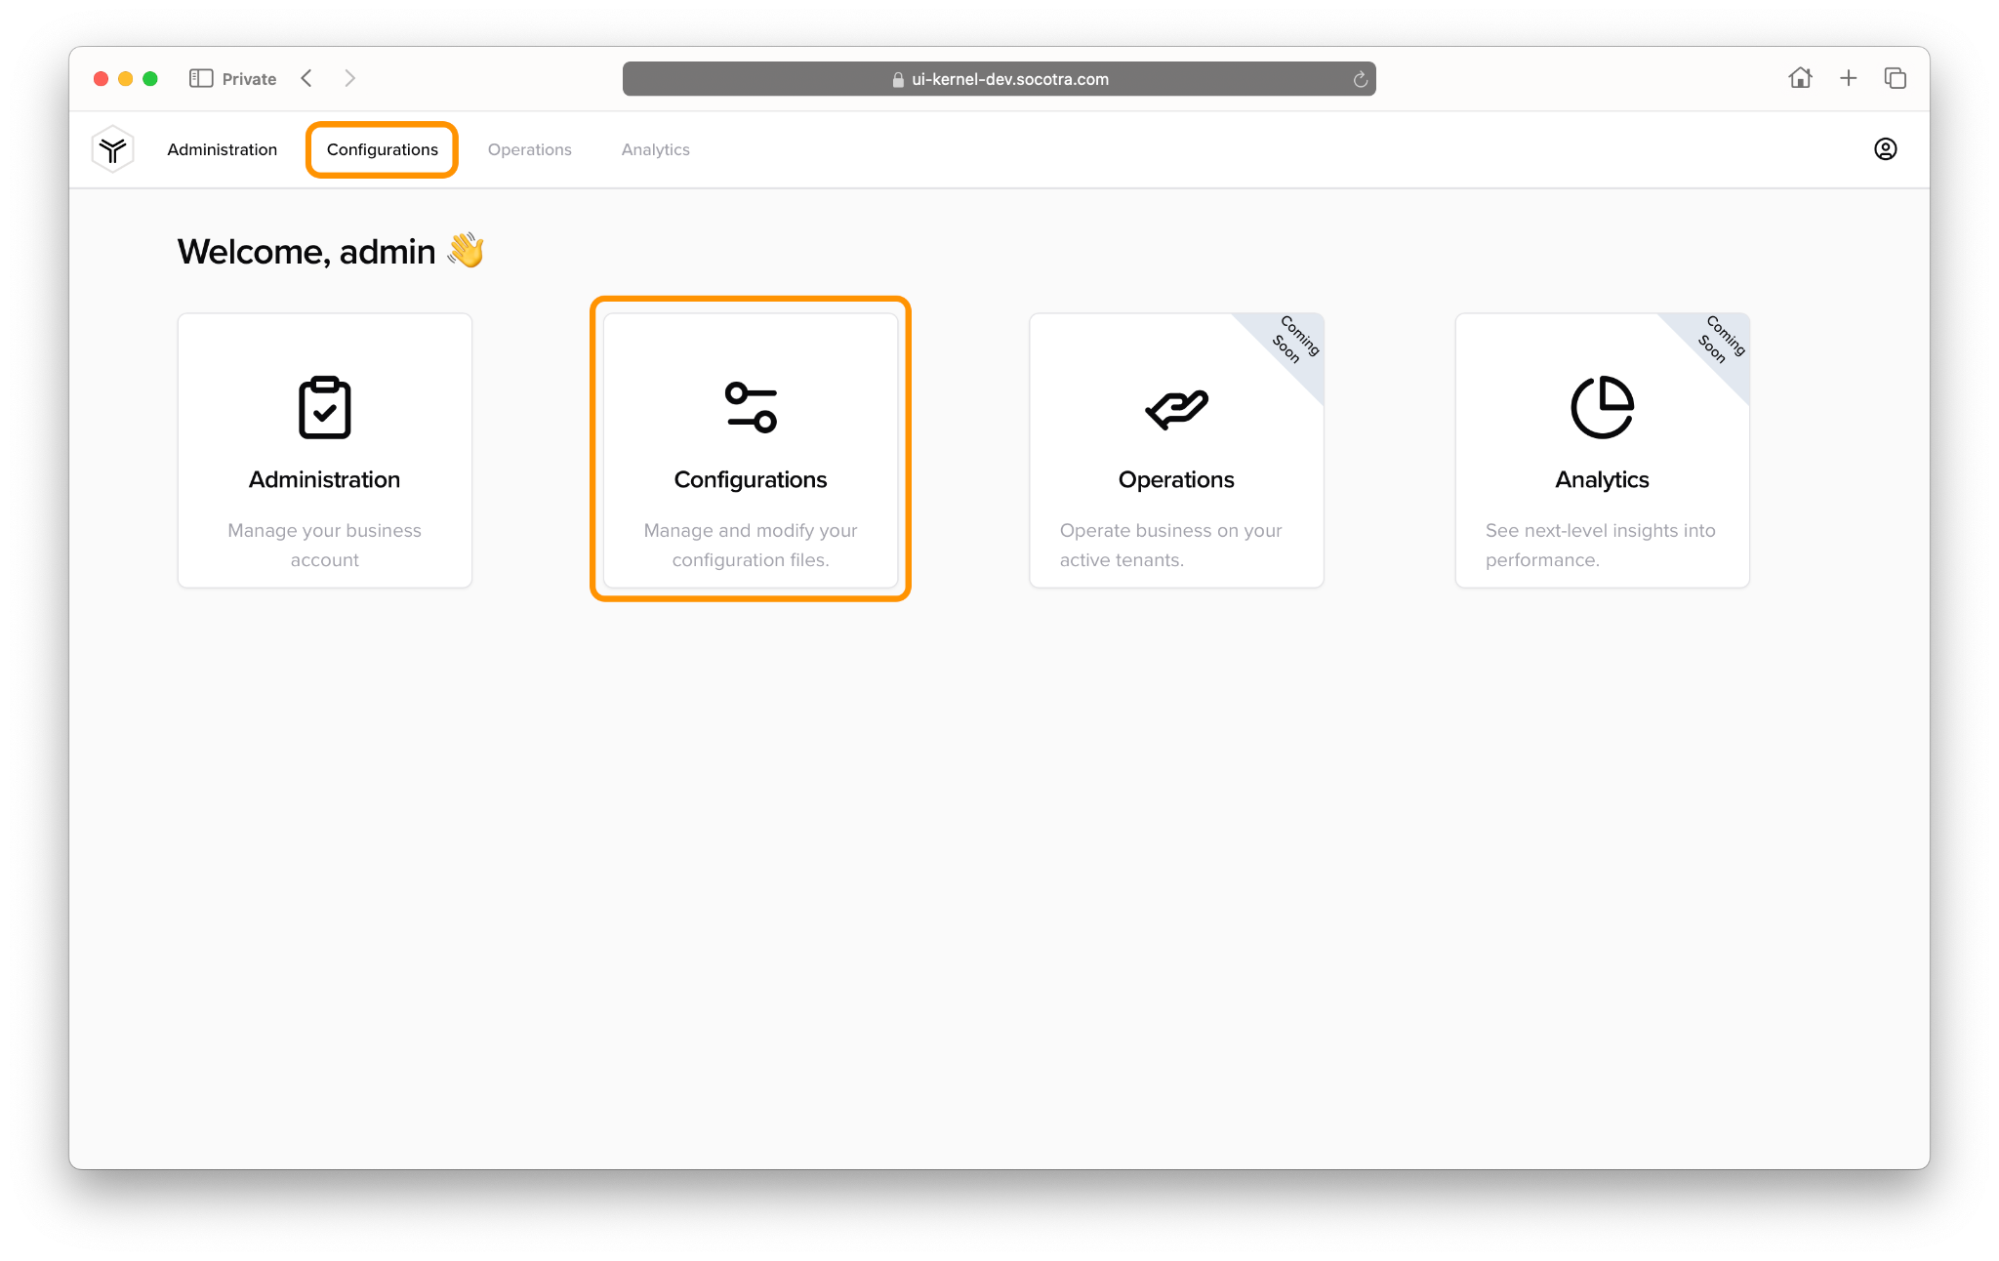
In the top-left corner of the screen, click the dropdown and select Configurations.
On the Config Files page, click Add New.
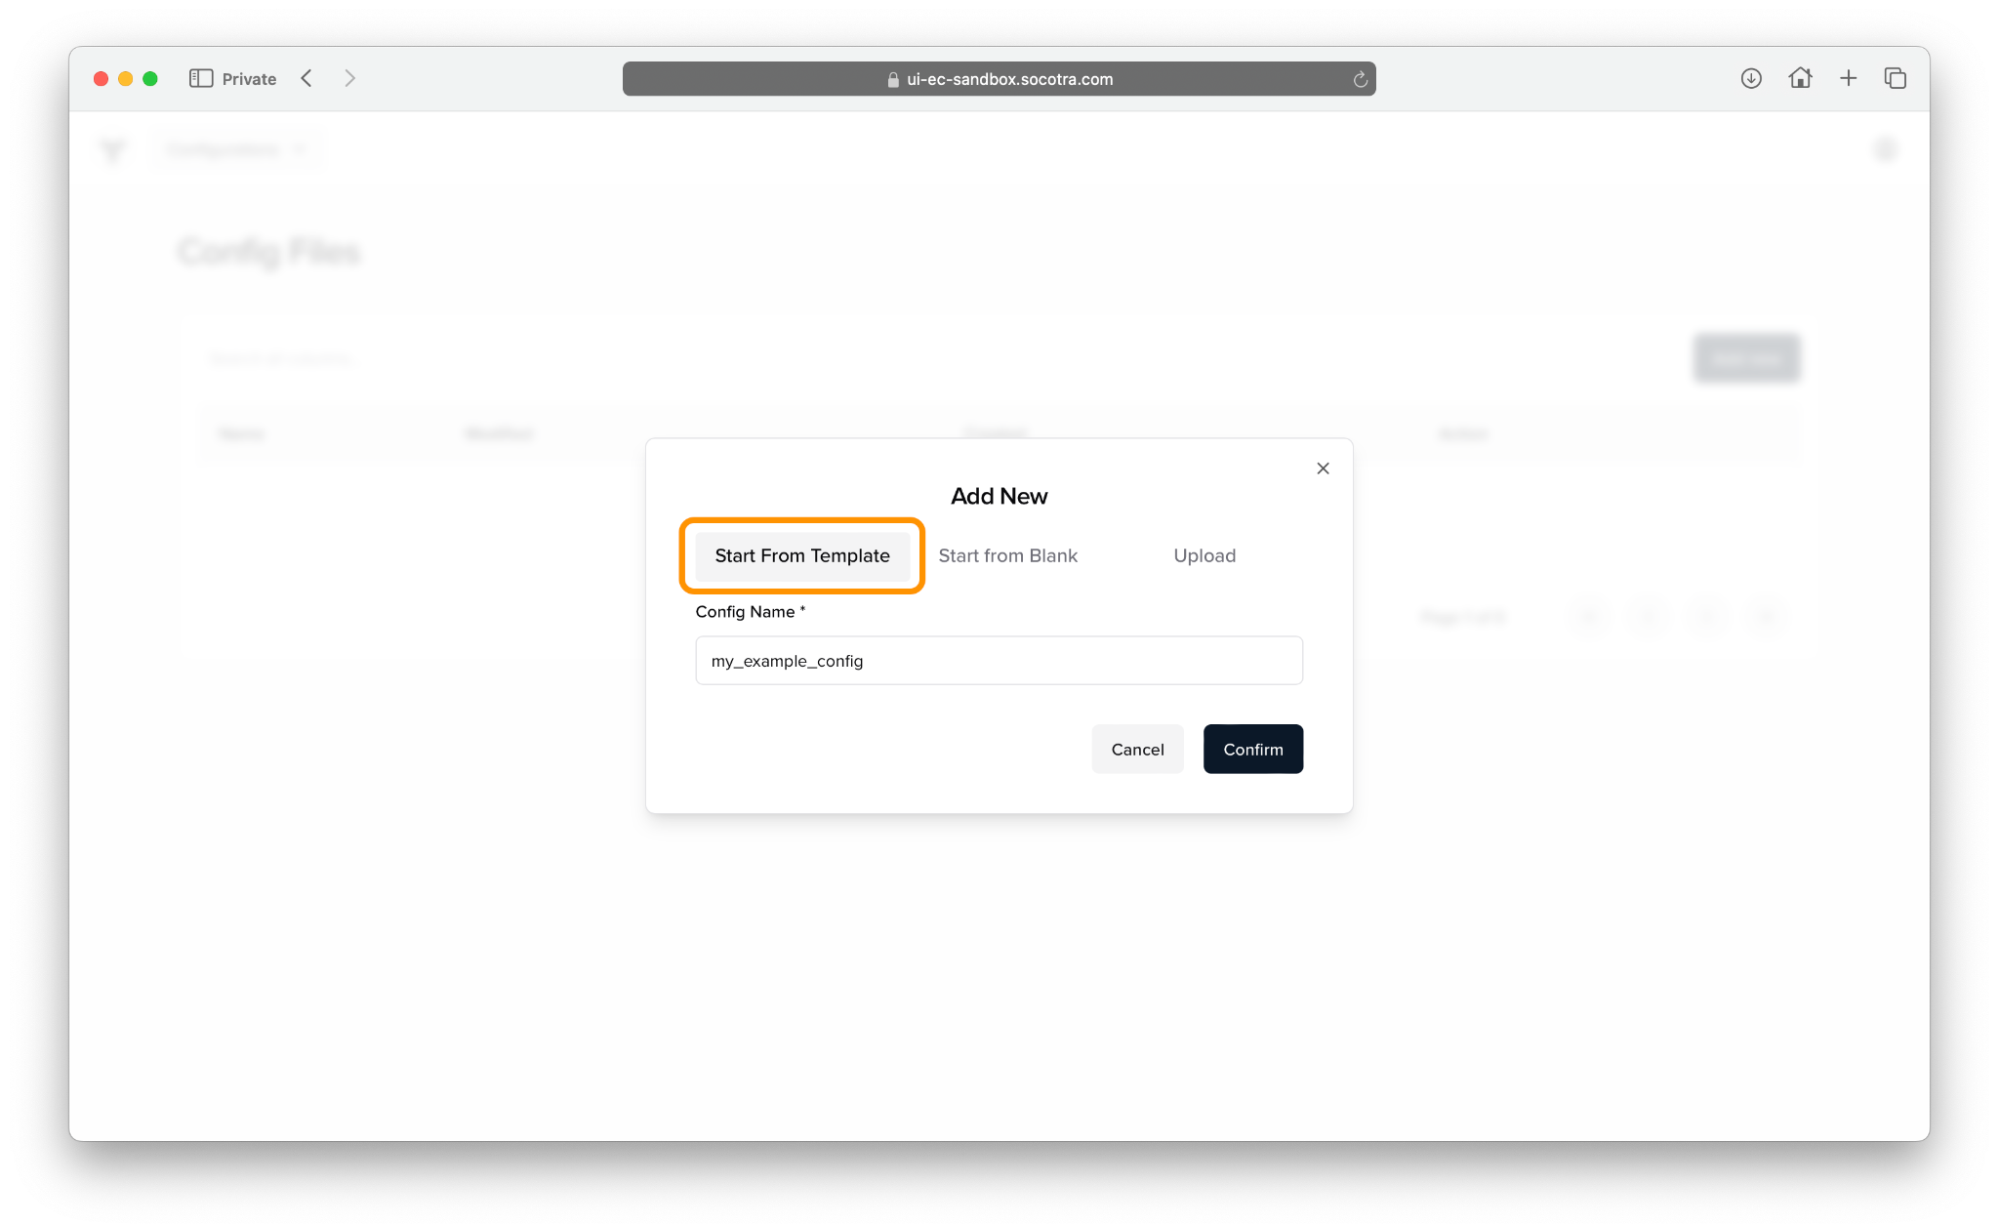
The Add New window will appear. This is where we can create a new configuration file. There are three options you can choose from:
Start from Template (an example car insurance configuration with some data pre-populated).
Start from Blank (a barebones insurance product with very little configuration).
Upload (allows you to upload an insurance product file you’ve pre-configured).
For the purpose of this tutorial, make sure to select Start From Template.
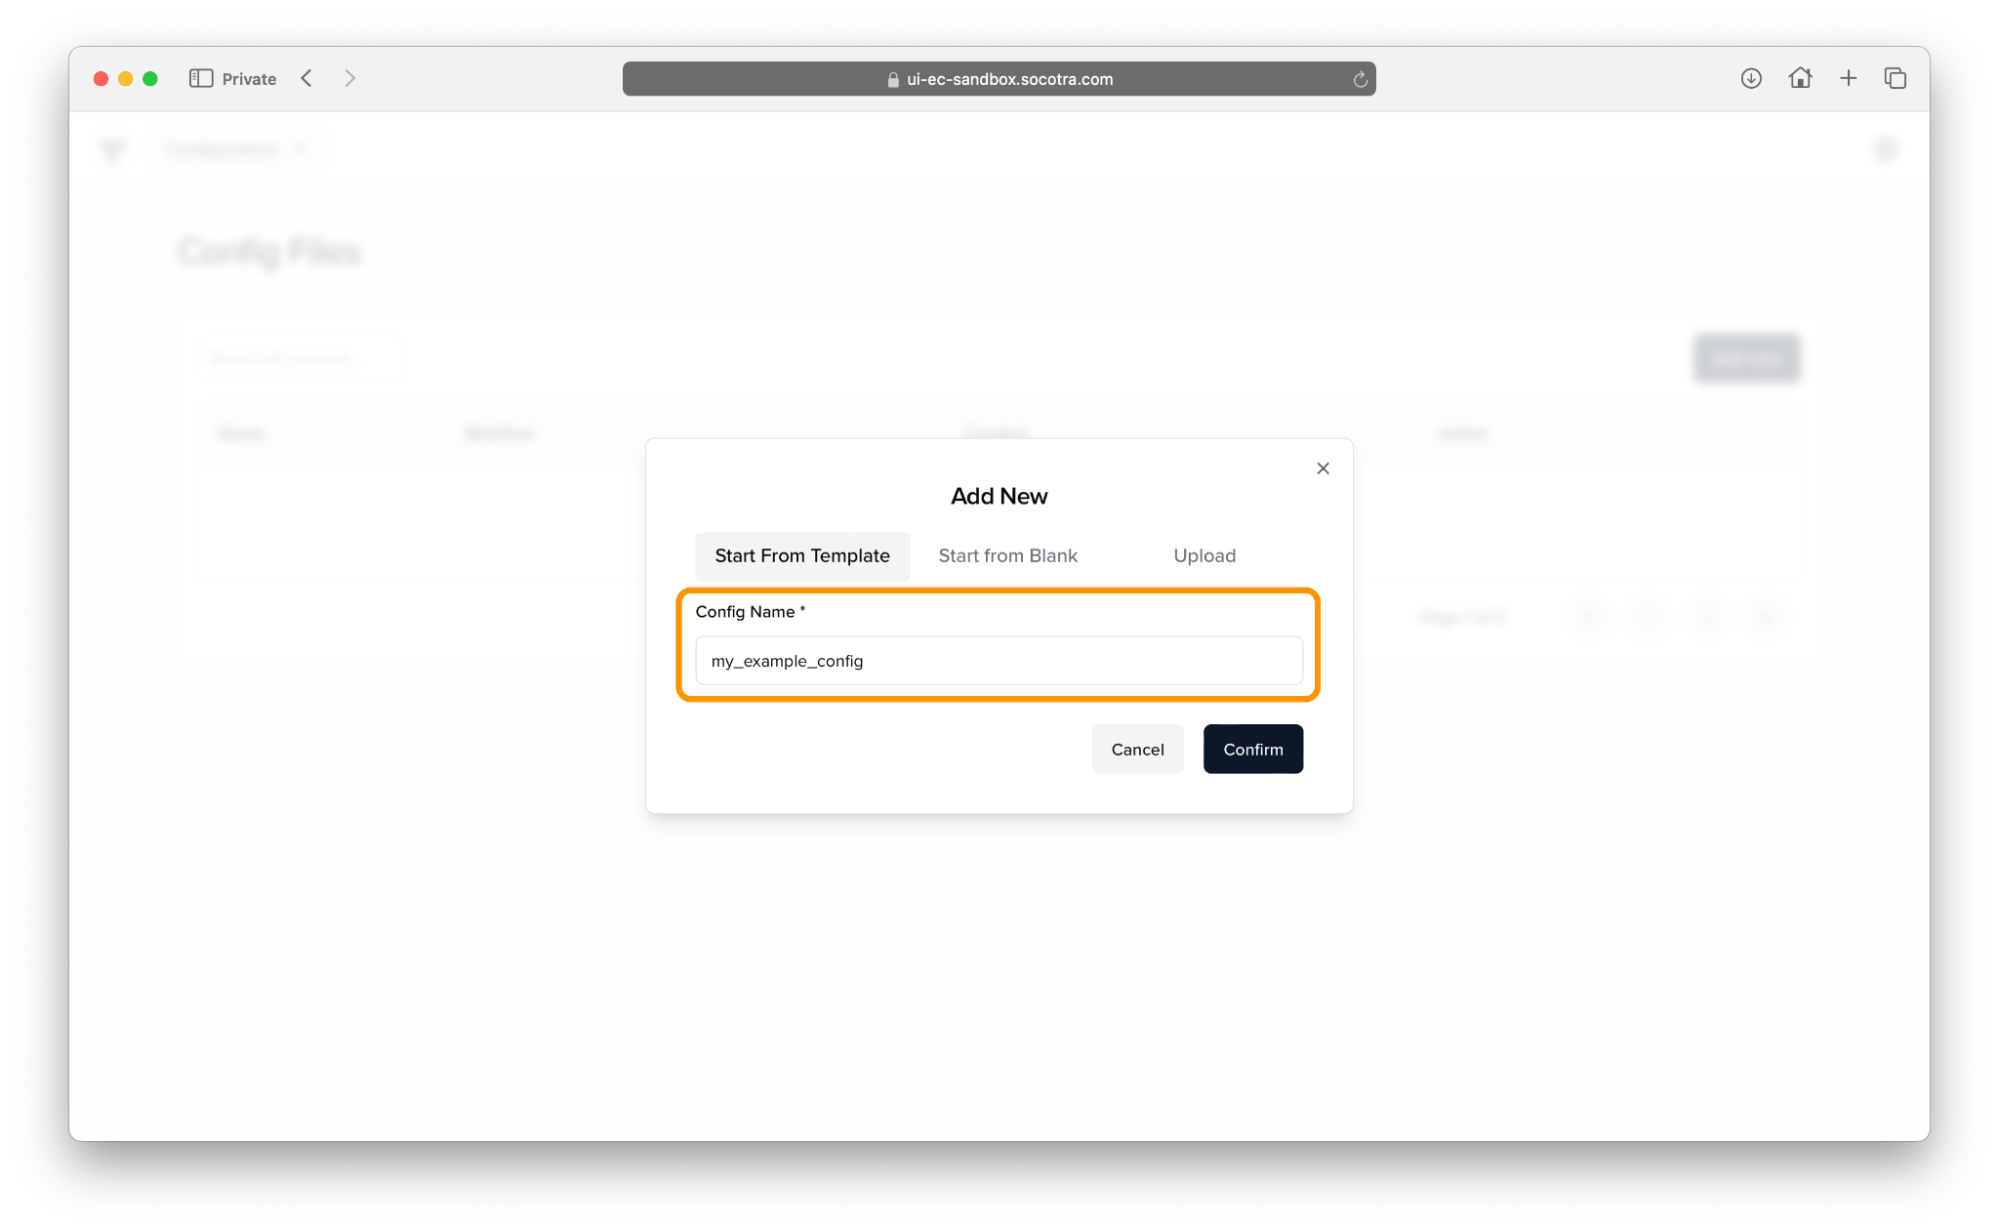
Provide a name for your configuration.
We recommend naming your configuration something easily identifiable and associated with the type of insurance product it represents.
For this tutorial, we’ll simply call it
my_example_config.
When you’re satisfied with your configuration name, click Confirm.
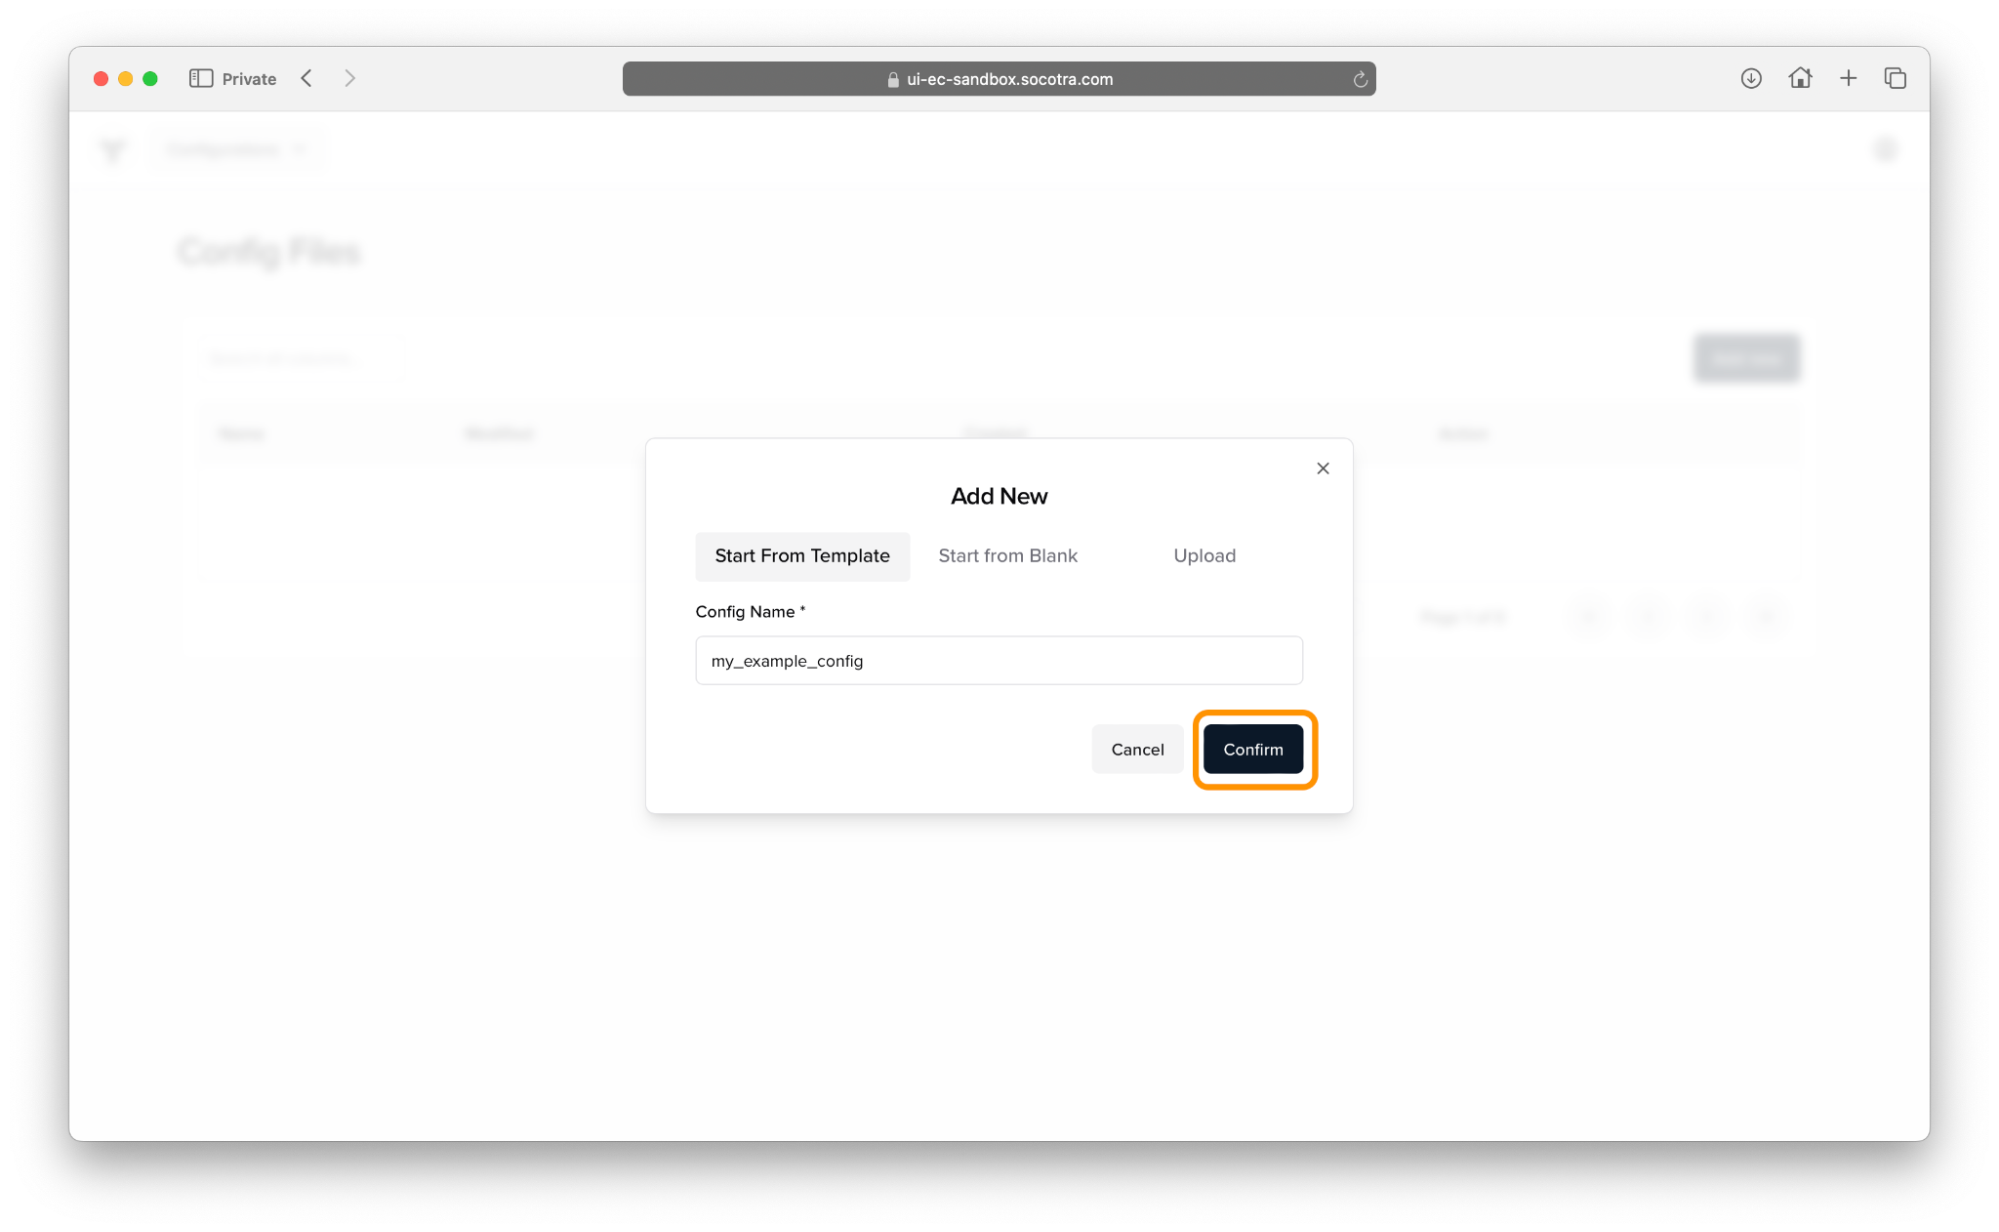
If successful, a window will appear saying the configuration was successfully added.
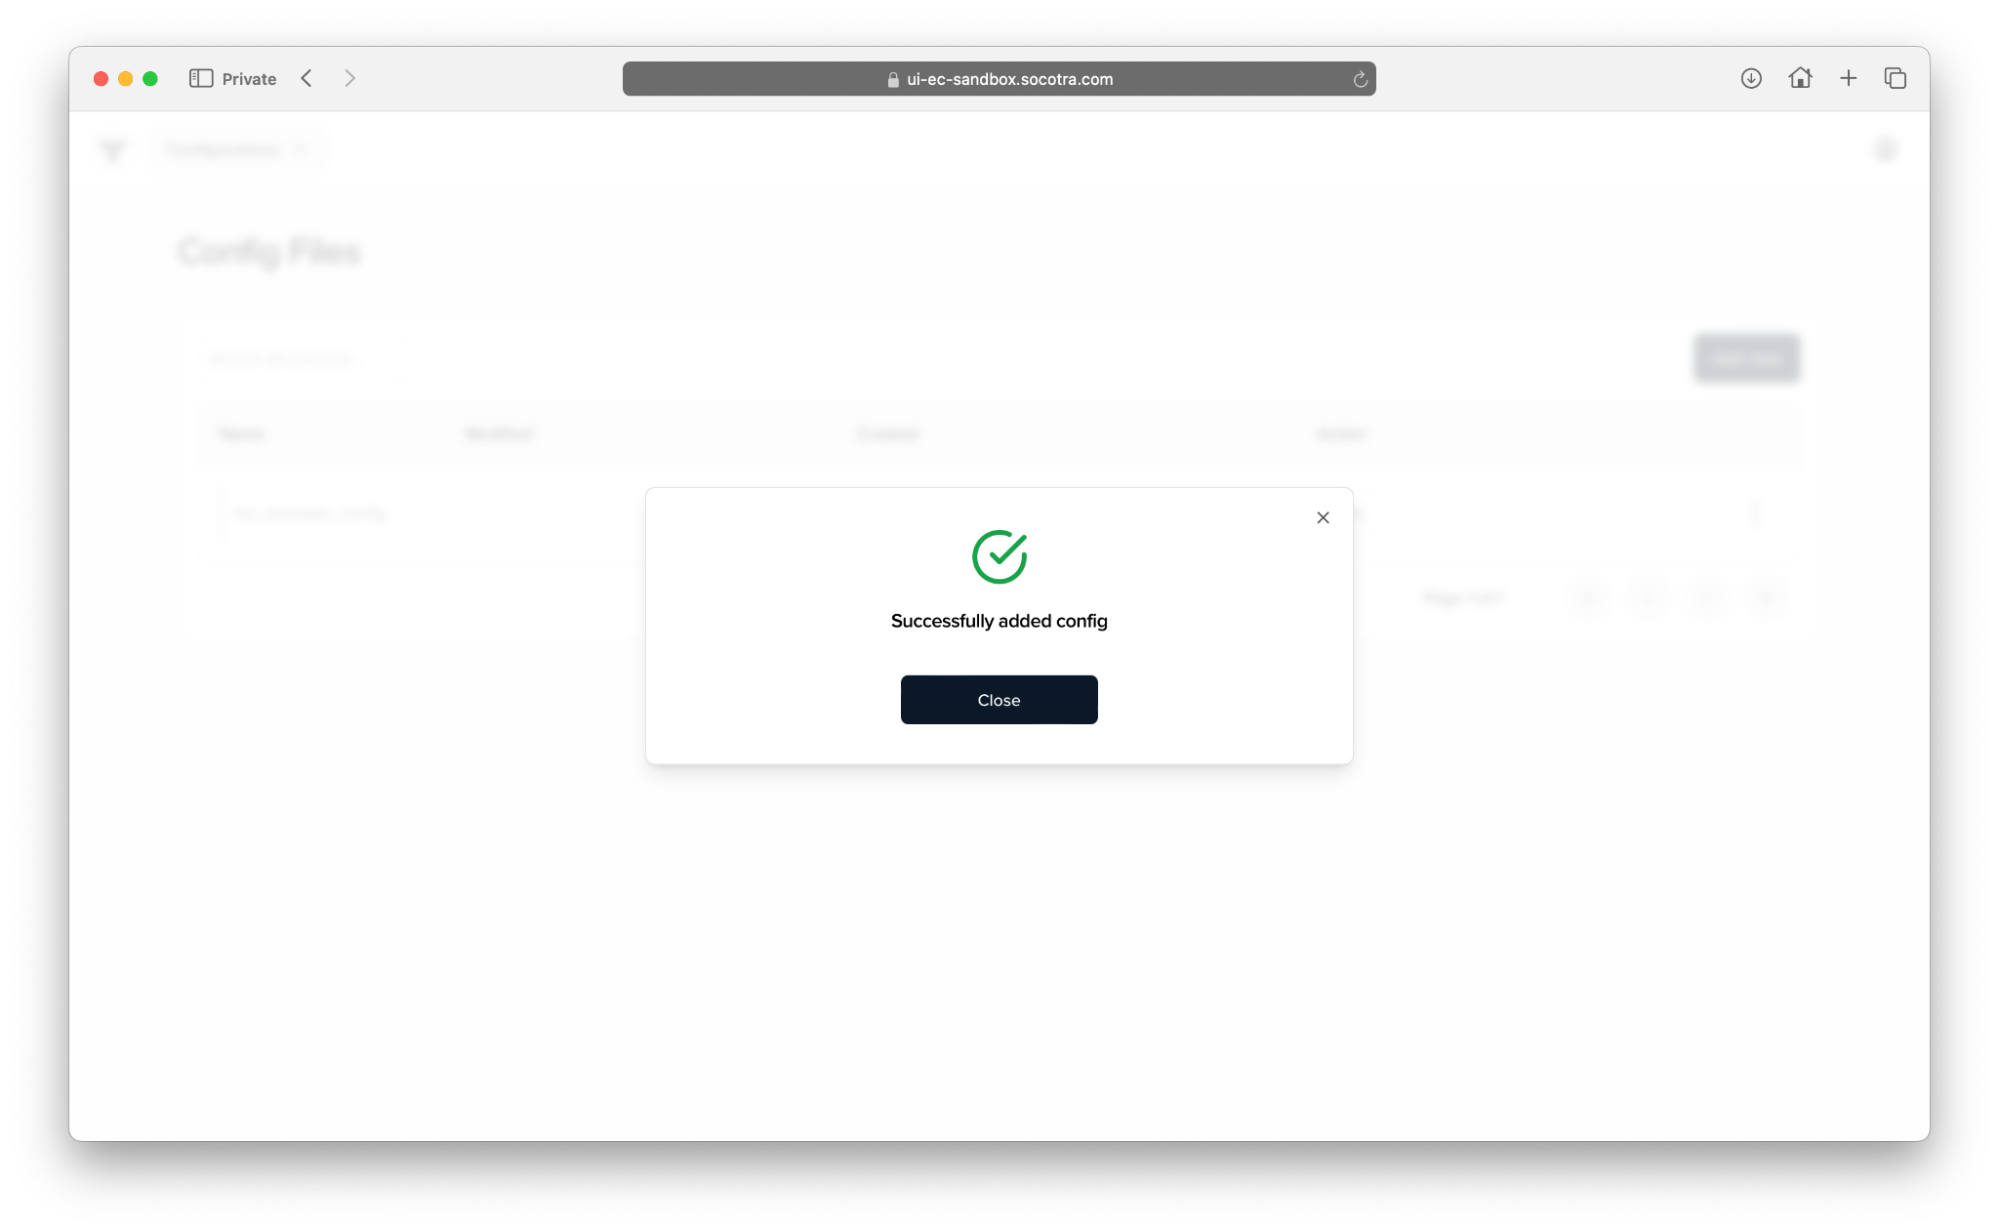
Congratulations! You’ve successfully created your first tenant configuration file in Socotra.
Continue onto the next part to learn the basics of configuring it.
Part 2 - Basic editing of the tenant configuration file
In Part 1, you learned how to create a configuration file from a template.
In Part 2, you’ll learn how to make basic edits to the tenant configuration file.
View the configuration file
In the Config Files list, locate the configuration file you created in Part 1.
Click Edit.
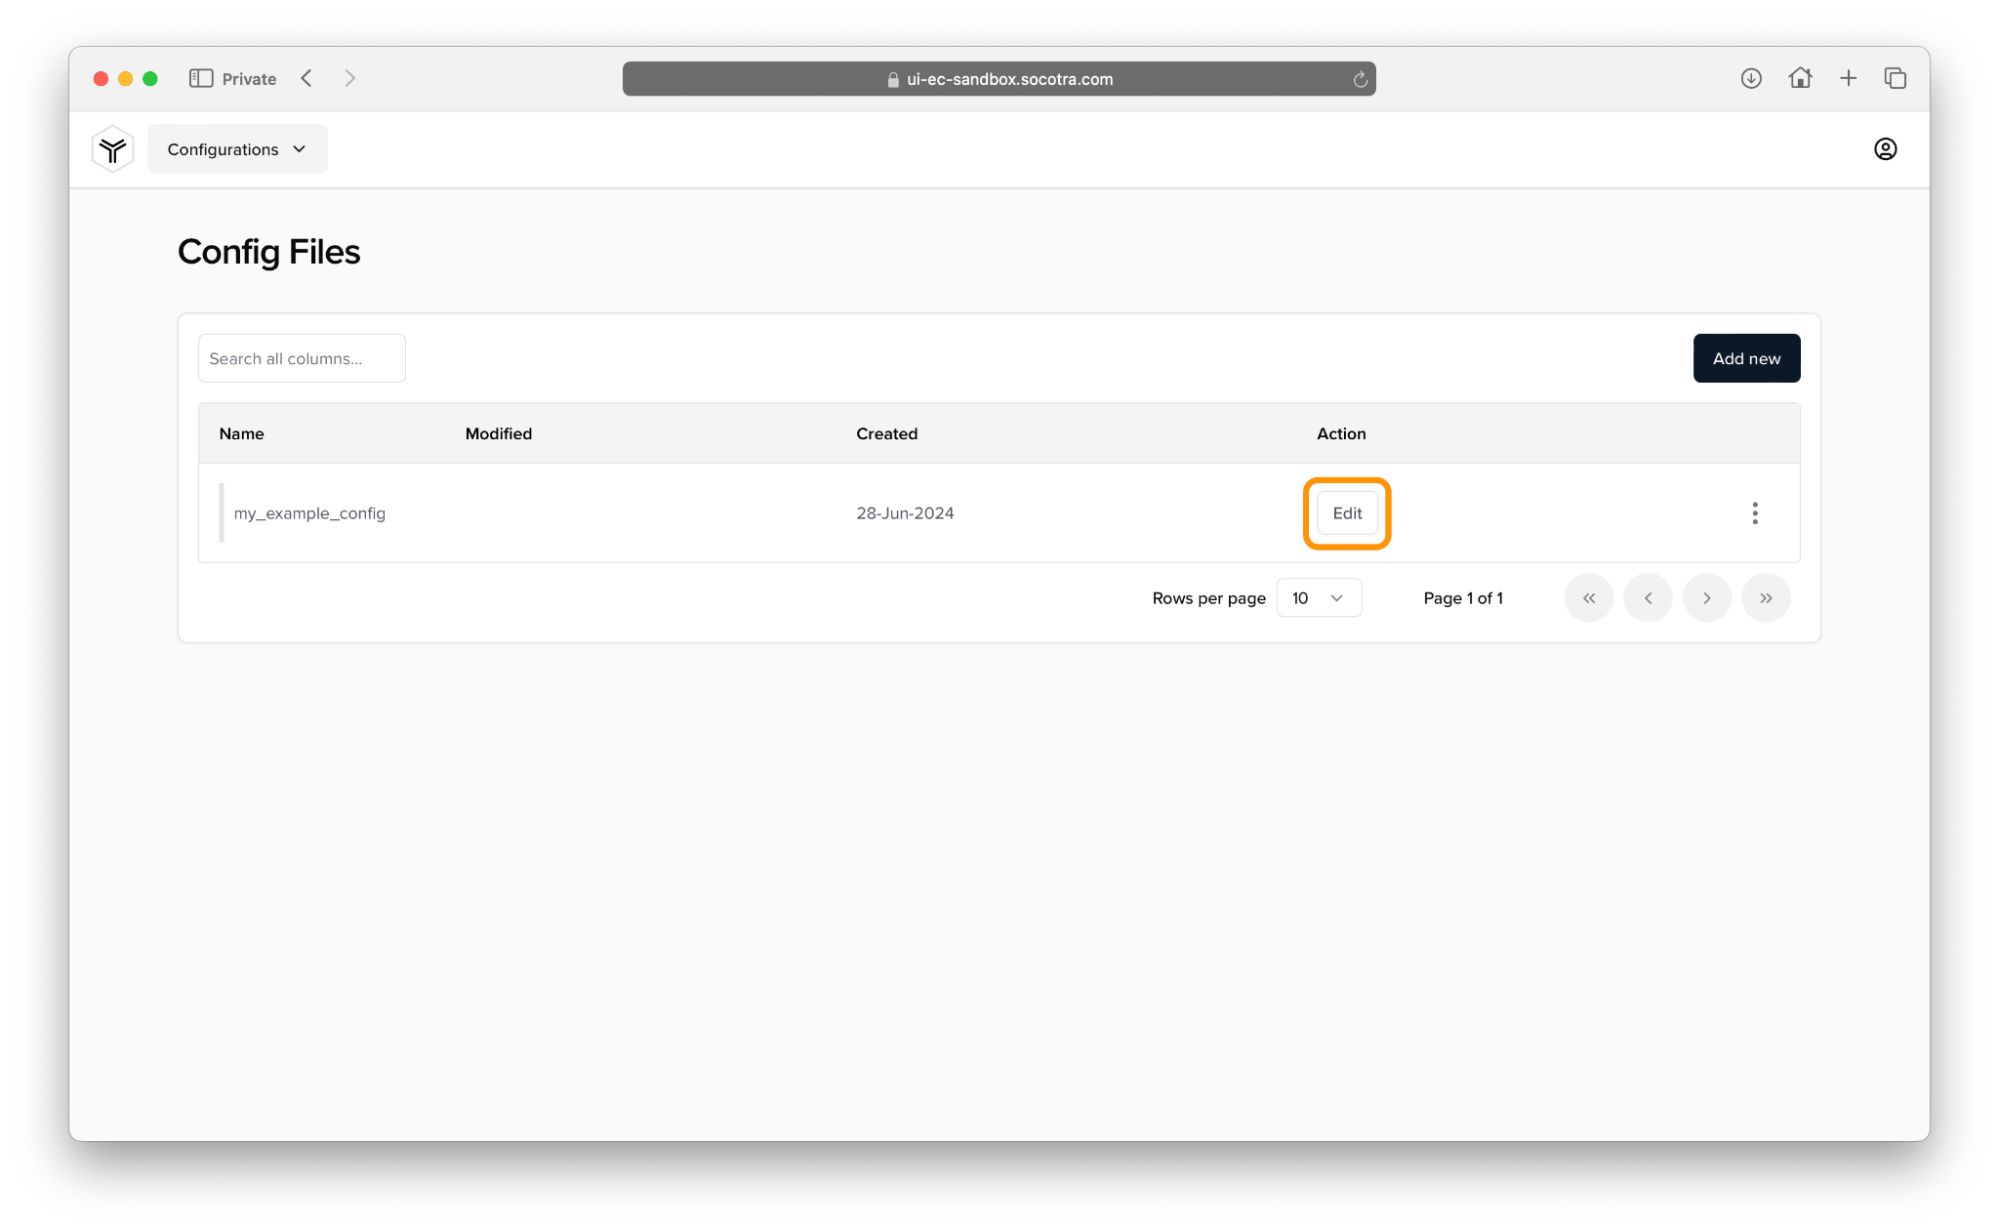
Once you click Edit, you’ll be taken to the config mapping page. This is where you can edit your tenant configuration.
Concept - Attributes
Remember that the configuration file is the definition of one or more insurance product(s).
On the left and center of the screen, you should see four categories. These are called attribute categories.

An attribute category is a logical grouping of attributes of your tenant configuration.
An attribute is a piece of data used to configure your insurance product. Attributes allow you to customize the specifics of a product, including the policy and billing.
There are dozens of nested attributes that make up an tenant configuration, but they broadly fall into four categories:
Global
Policy
Billing
Resources
We’ll briefly cover each of these categories in the table below. We’ll go further in depth on the data model of Socotra in later tutorials.
Category |
Description |
Sub-items |
|---|---|---|
Global |
Global attributes apply to the entirety of the tenant configuration. |
Custom Data Types, Accounts, Defaults, Global Plugins, Aux Data, Custom Events |
Policy |
Policy attributes are configurations for the issuance and administration of any insurance policies. |
Products, Attributes, Coverage Terms, Charges, Transaction Types, Auto-Renewal Plans |
Billing |
Billing attributes are configurations for the collection and disbursement of funds. |
Billing Plans, Installment Plans, Delinquency Plans, Payments, Disbursements, Shortfall Tolerance Plans |
Resources |
Resources contain data and document generation tools. |
Constraint Tables, Tables, Documents |
For right now, we’re going to focus on Defaults (under Global). Continue reading the section below to learn about default attributes.
Concept - Default attributes
In the context of your tenant configuration, a default attribute is an attribute in the “Global” category that sets the standard behavior of your products. Default attributes can be overwritten by more specific attribute settings.
For example, even though default attributes might set a default currency, if you want a specific insurance product to have a different currency, you can configure that product in particular to have a different currency from the default.
Default attributes make it easy to have consistent behaviors across all products, while giving you the flexibility to make changes to specific products.
See the table below for a quick reference of each of the default attributes.
Default attribute |
Description |
|---|---|
Time zone |
Defines the default time zone of the tenant |
Currency |
A three-letter currency code that represents the currency used when creating a quote. |
Installment plan |
Points to an installment plan configuration. An installment plan informs the billing system on how to divide the charges for a transaction into installments, which are then used to construct invoices. |
Term duration |
Defines a numerical value to represent a length of time. This attribute is used alongside the Duration basis attribute. This value must be a positive integer greater than or equal to 1. For example, if you want a term to be six months, set Term duration to 6 and Duration basis to Months. |
Duration basis |
Defines a unit of time for measuring the length of a term. Options include: Hours, Days, Whole Days, None, Weeks, Months, MonthE360 (months based on a 360-day calendar), Years. For example, if you want a term to be six months, set Term duration to 6 and Duration basis to Months. |
Shortfall tolerance plan |
Points to a shortfall tolerance plan configuration. A shortfall tolerance plan determines the threshold allowed for payment deficits without penalties or disruptions. A default shortfall tolerance plan can be configured for your tenant as well as for each product. Any plan can additionally be assigned to a quote upon creation. |
Auto renewal plan |
Points to an auto renewal plan configuration. Auto-renewal plans inform the system on how policies should be managed as they approach expiration. A default auto-renewal plan can be configured for your tenant as well as for each product. Any plan can additionally be assigned to a quote upon creation. |
Billing plan |
Points to a billing plan configuration. A billing plan instructs the system on how to generate invoices. In particular, it defines at what state (acceptance or issuance) that an invoice would be generated for a policy. |
Delinquency plan |
Points to a delinquency plan configuration. A delinquency plan instructs the system on how to handle invoices that go unpaid post their due date. |
Aux Data Settings |
The Aux Data setting determines the default length of time until an aux data entry will expire. A different setting/expiration can be used when creating a new aux data entry, however if no setting/expiration is included when creating a new aux data entry, it will use the default setting. |
Edit the default attributes
In this subsection, you’ll learn how to edit default attributes for your tenant configuration.
Let’s try changing the duration of any policy created using this config. Remember that changing policy duration requires changing two settings:
Term duration (the amount of time)
Term basis (the unit of time)
So, let’s suppose we want a policy to last 6 months.
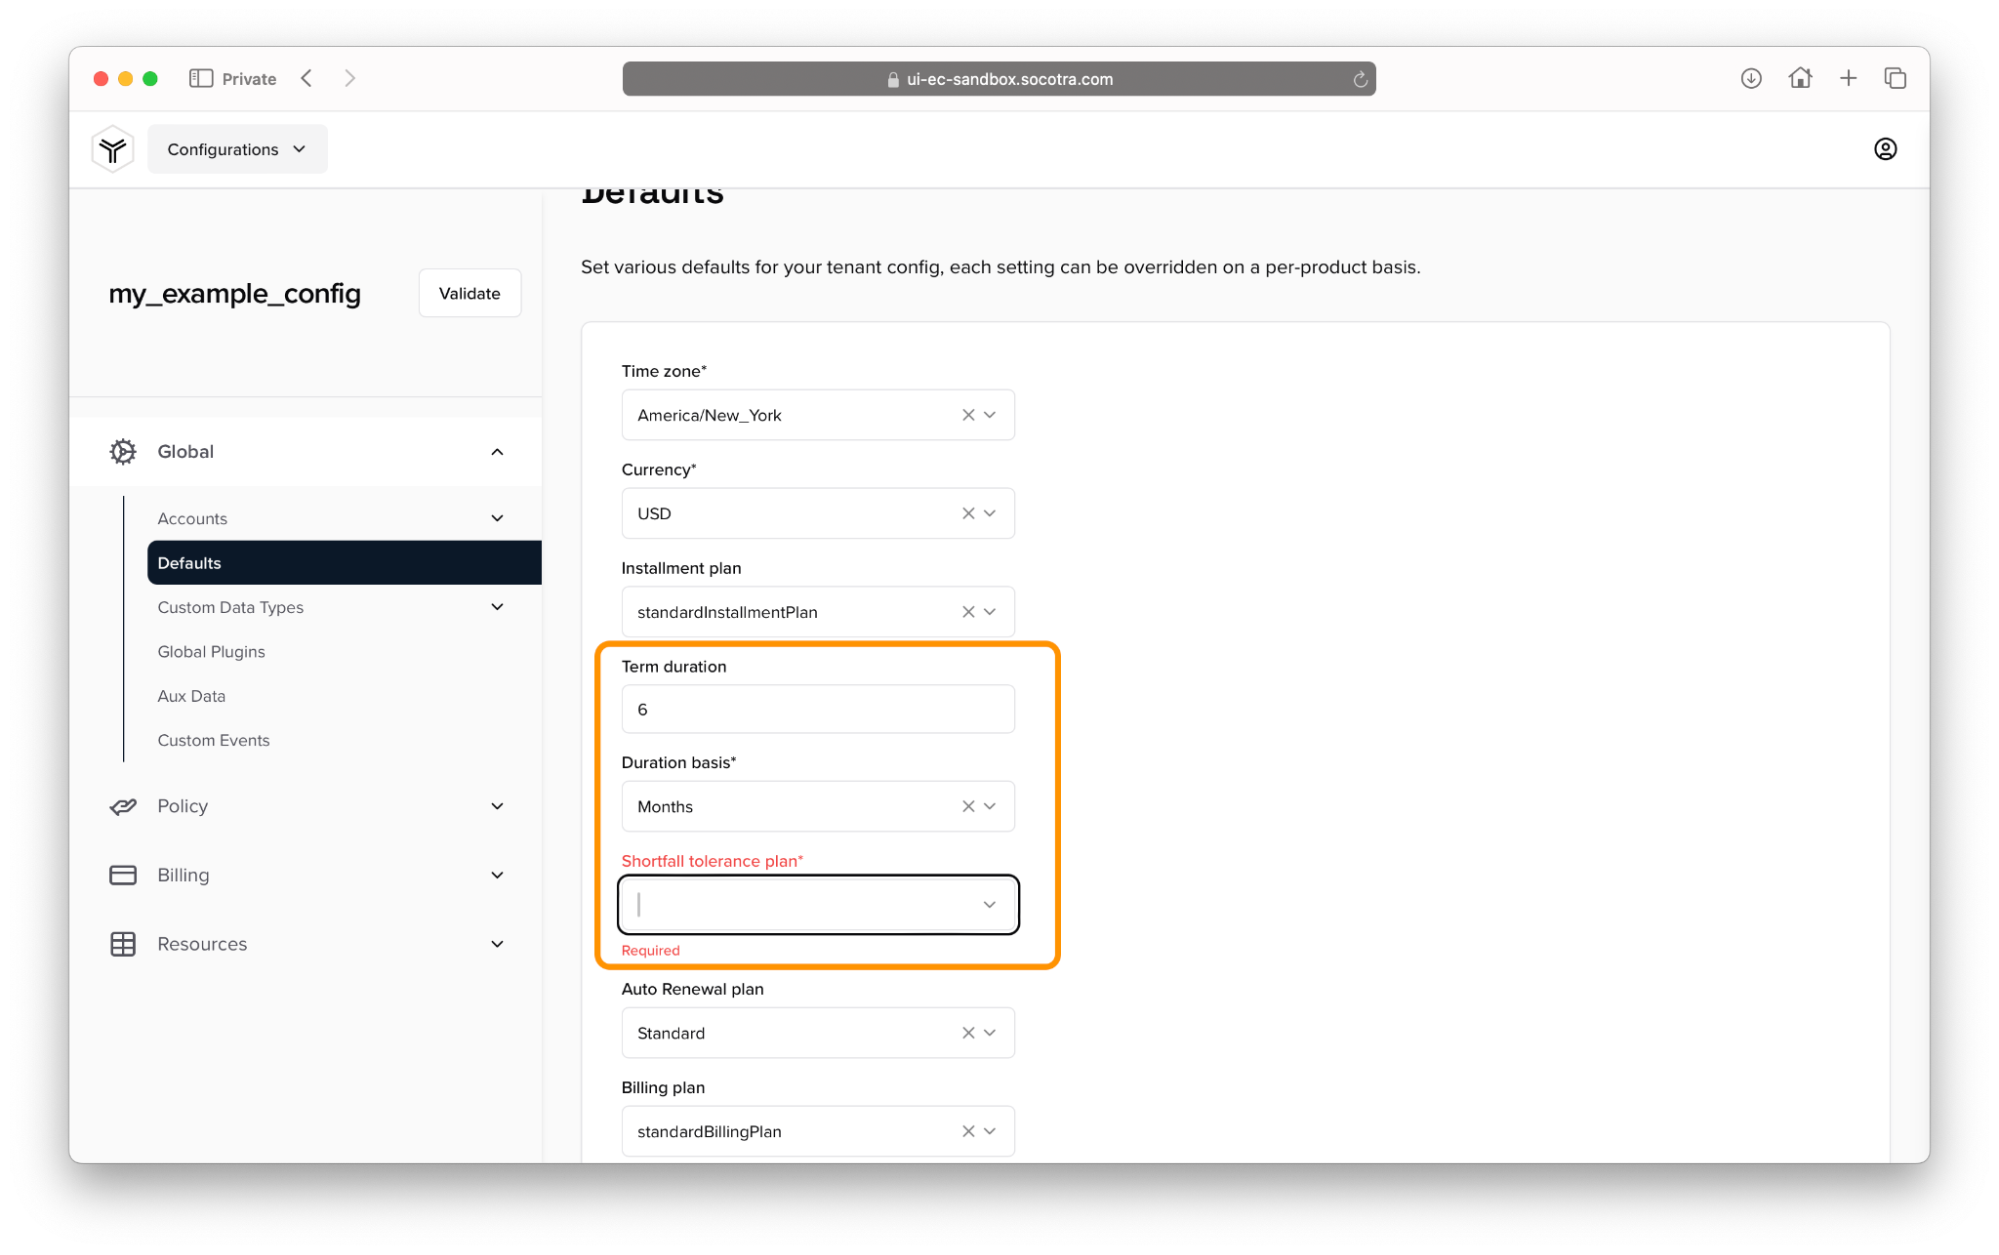
In the Term Duration field, type 6.
In the Duration Basis dropdown, select Months.
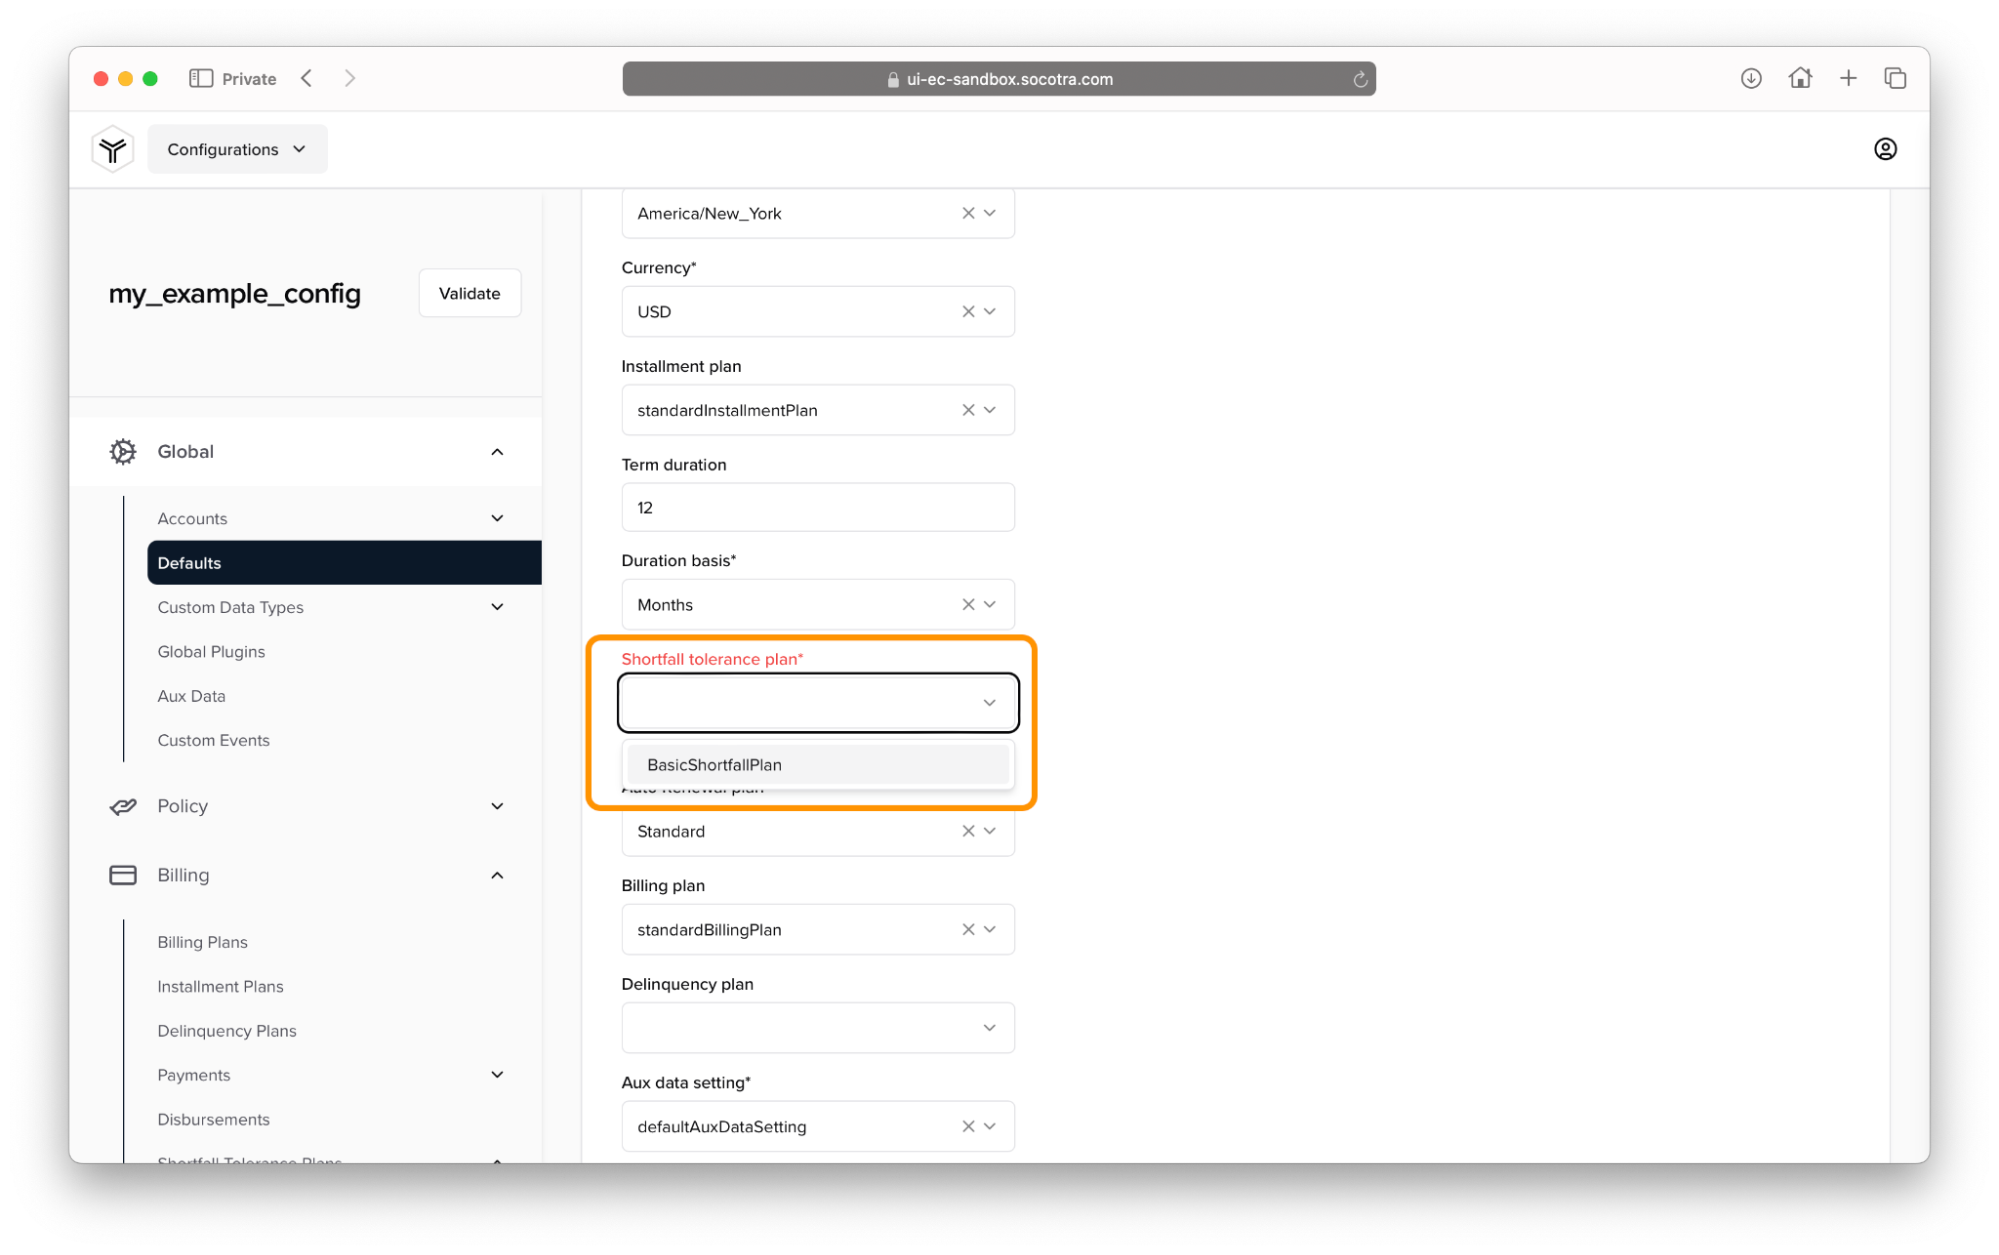
You may have noticed that, after editing these fields, a required message appears under the Shortfall tolerance plan field. Continue onto the next subsection to learn more.
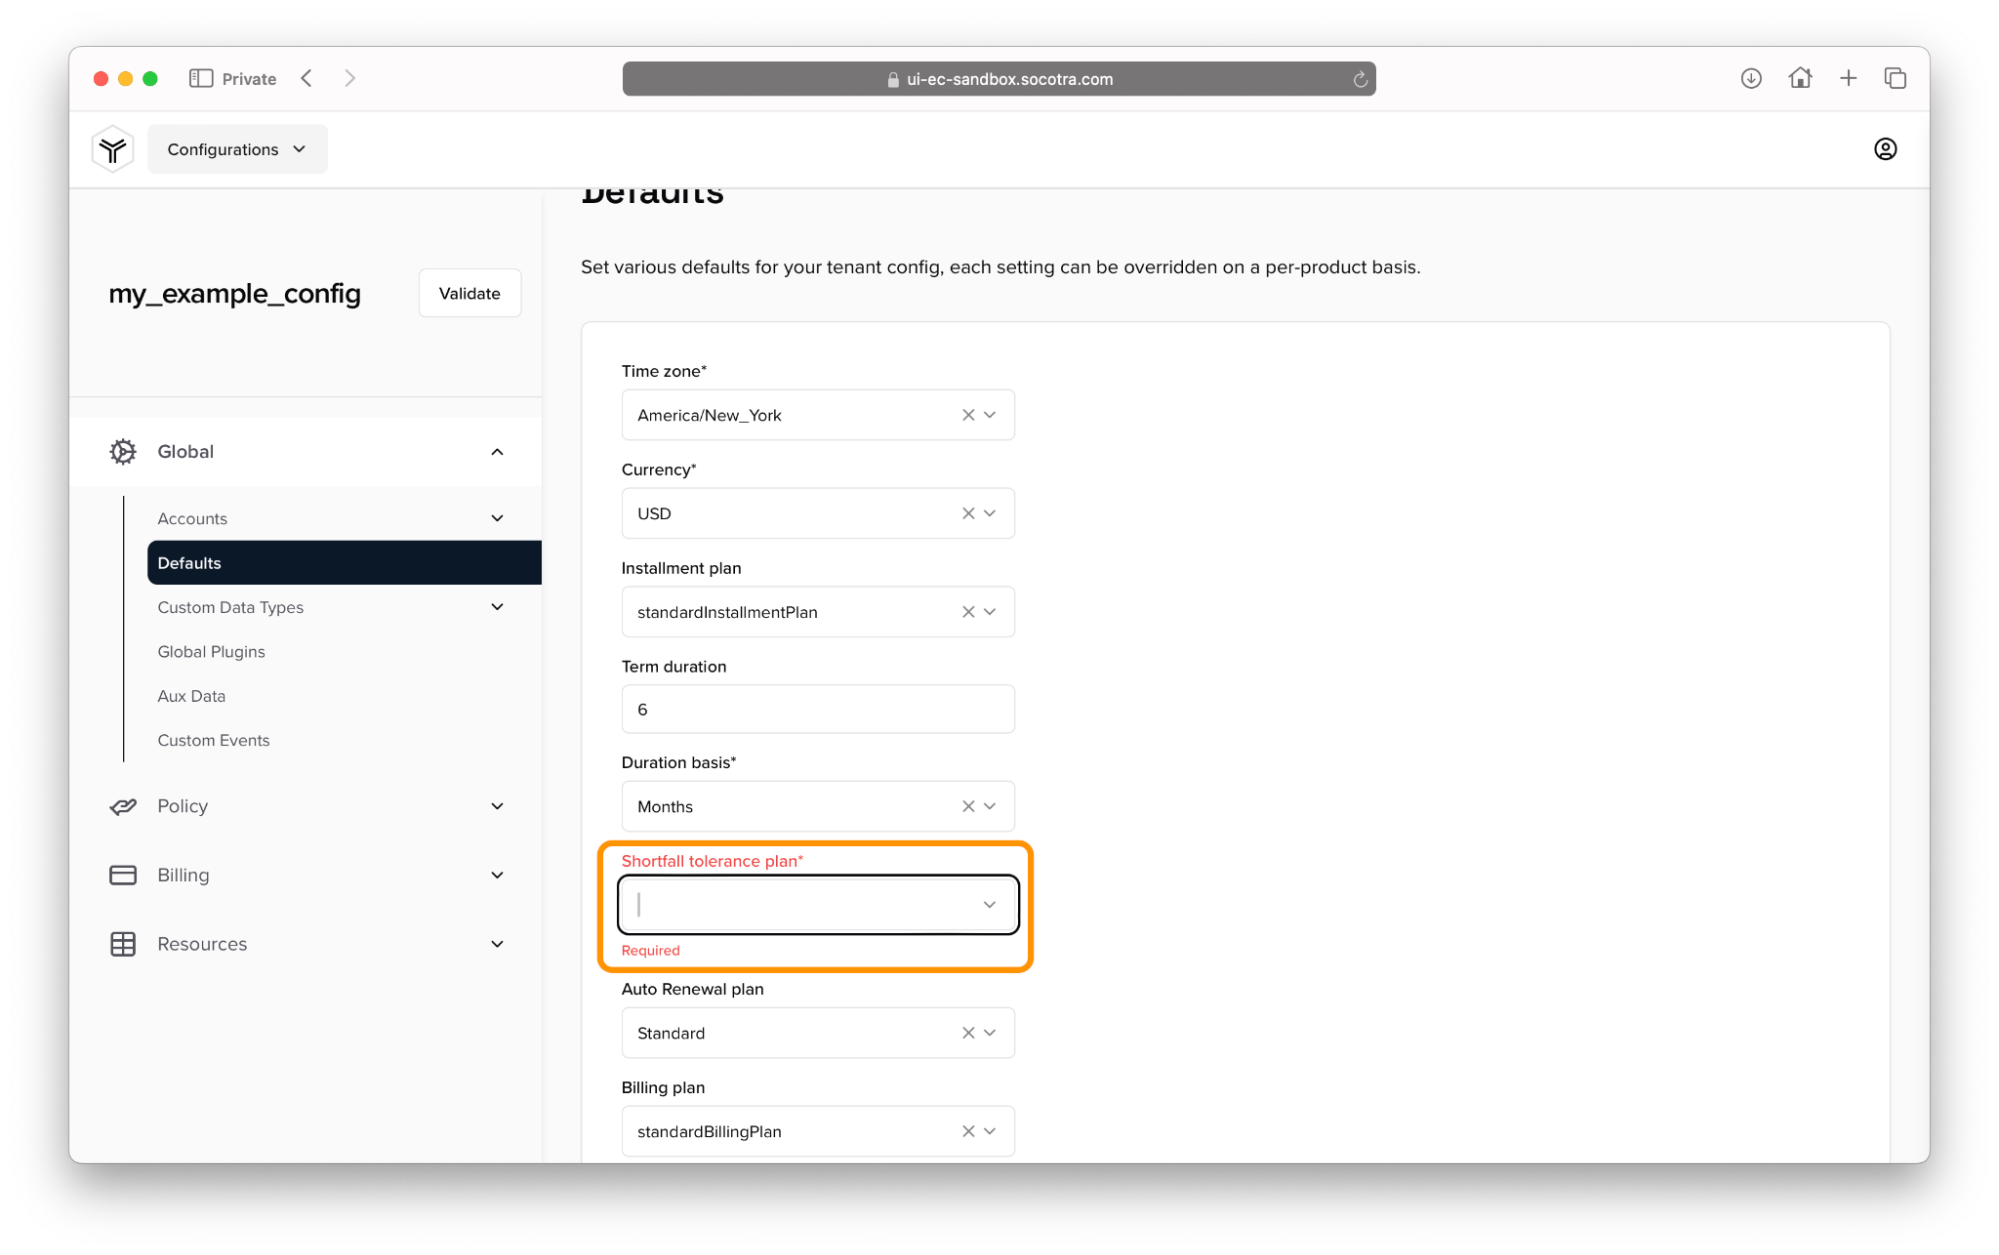
Concept - Attribute types
The Shortfall tolerance plan field might be showing as required when you try to alter some of the other settings in Defaults, preventing you from saving any changes.
The reason why this is occurring is because every default attribute field needs to have a value.
There are essentially two types of attributes:
Simple attributes
Complex attributes
A simple attribute is an attribute that only consists of one setting. Examples of simple attributes include currency, term duration, and duration basis. These all have predefined values you can select from, or are otherwise simple enough that they only accept an integer value.
A complex attribute is a more advanced configuration. Remember that the default attributes set default settings for your insurance product. So, some of the default attributes point to configurations about a certain aspect of an insurance product.
The configuration file comes with default values you can select from. To select a value for this field, click the dropdown and select a value.
When you make any change to the default values, a dialog box will appear at the top of the screen to indicate that your changes have been automatically saved.
We’ve learned about the basics of configuration files, including their attributes and how to make basic changes. In the next section, we’ll cover how to make more advanced changes to a configuration file.
Part 3 - Advanced editing of the tenant configuration file
In Part 2, you learned about attributes in the configuration file, including how to set default attributes and create new attributes.
In Part 3, you’ll learn how to make more substantive changes to an insurance product.
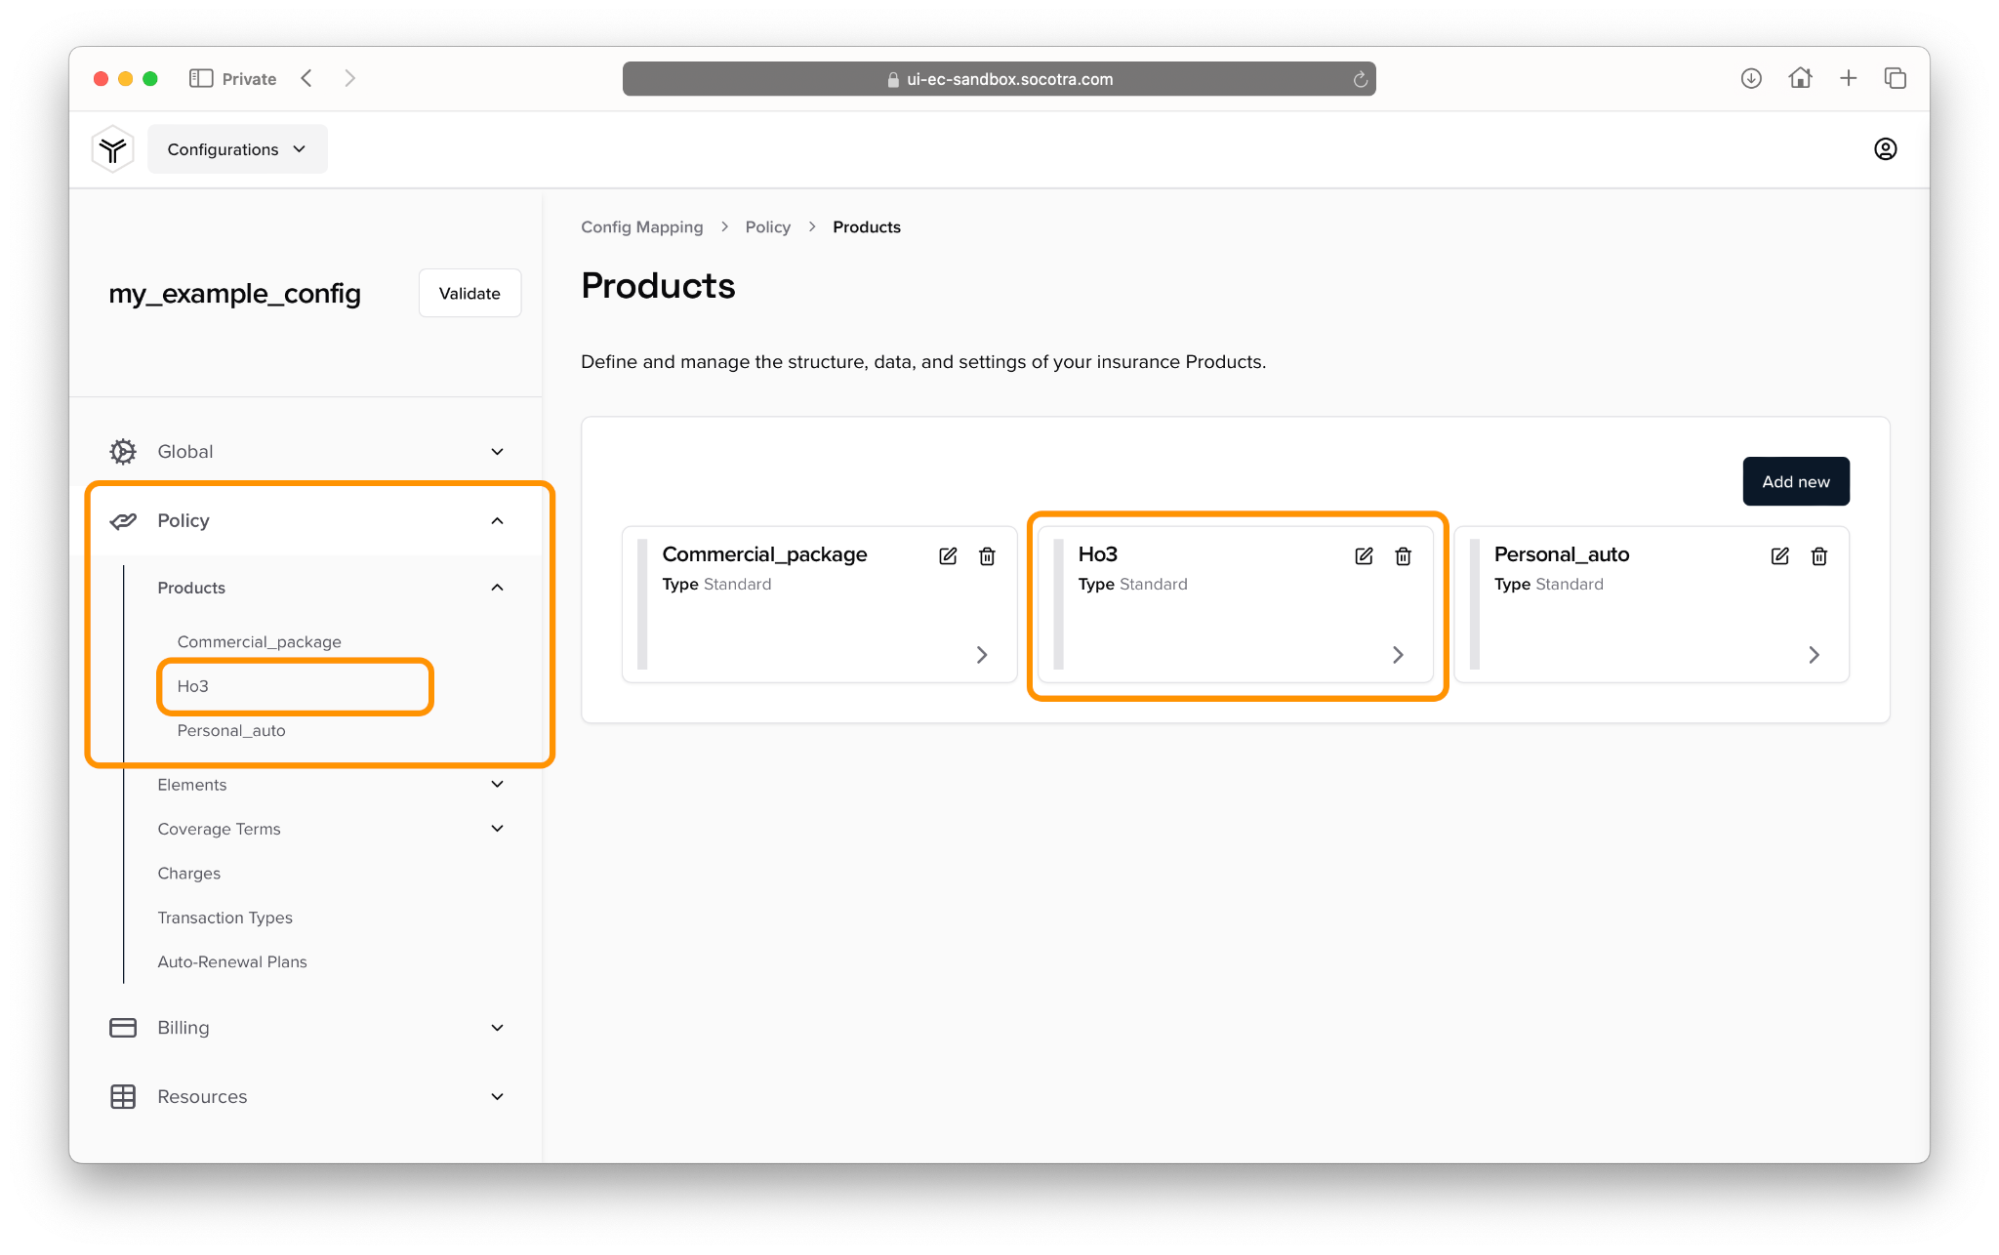
View the Products menu
Start by viewing the Product menu. This is where individual insurance products are defined.
 Navigate to the Ho3 (homeowner) product in Policy > Products
> Ho3
Navigate to the Ho3 (homeowner) product in Policy > Products
> Ho3
In the left sidebar, navigate to Policy > Products > Ho3.
You should now be viewing the Ho3 (homeowner) product.
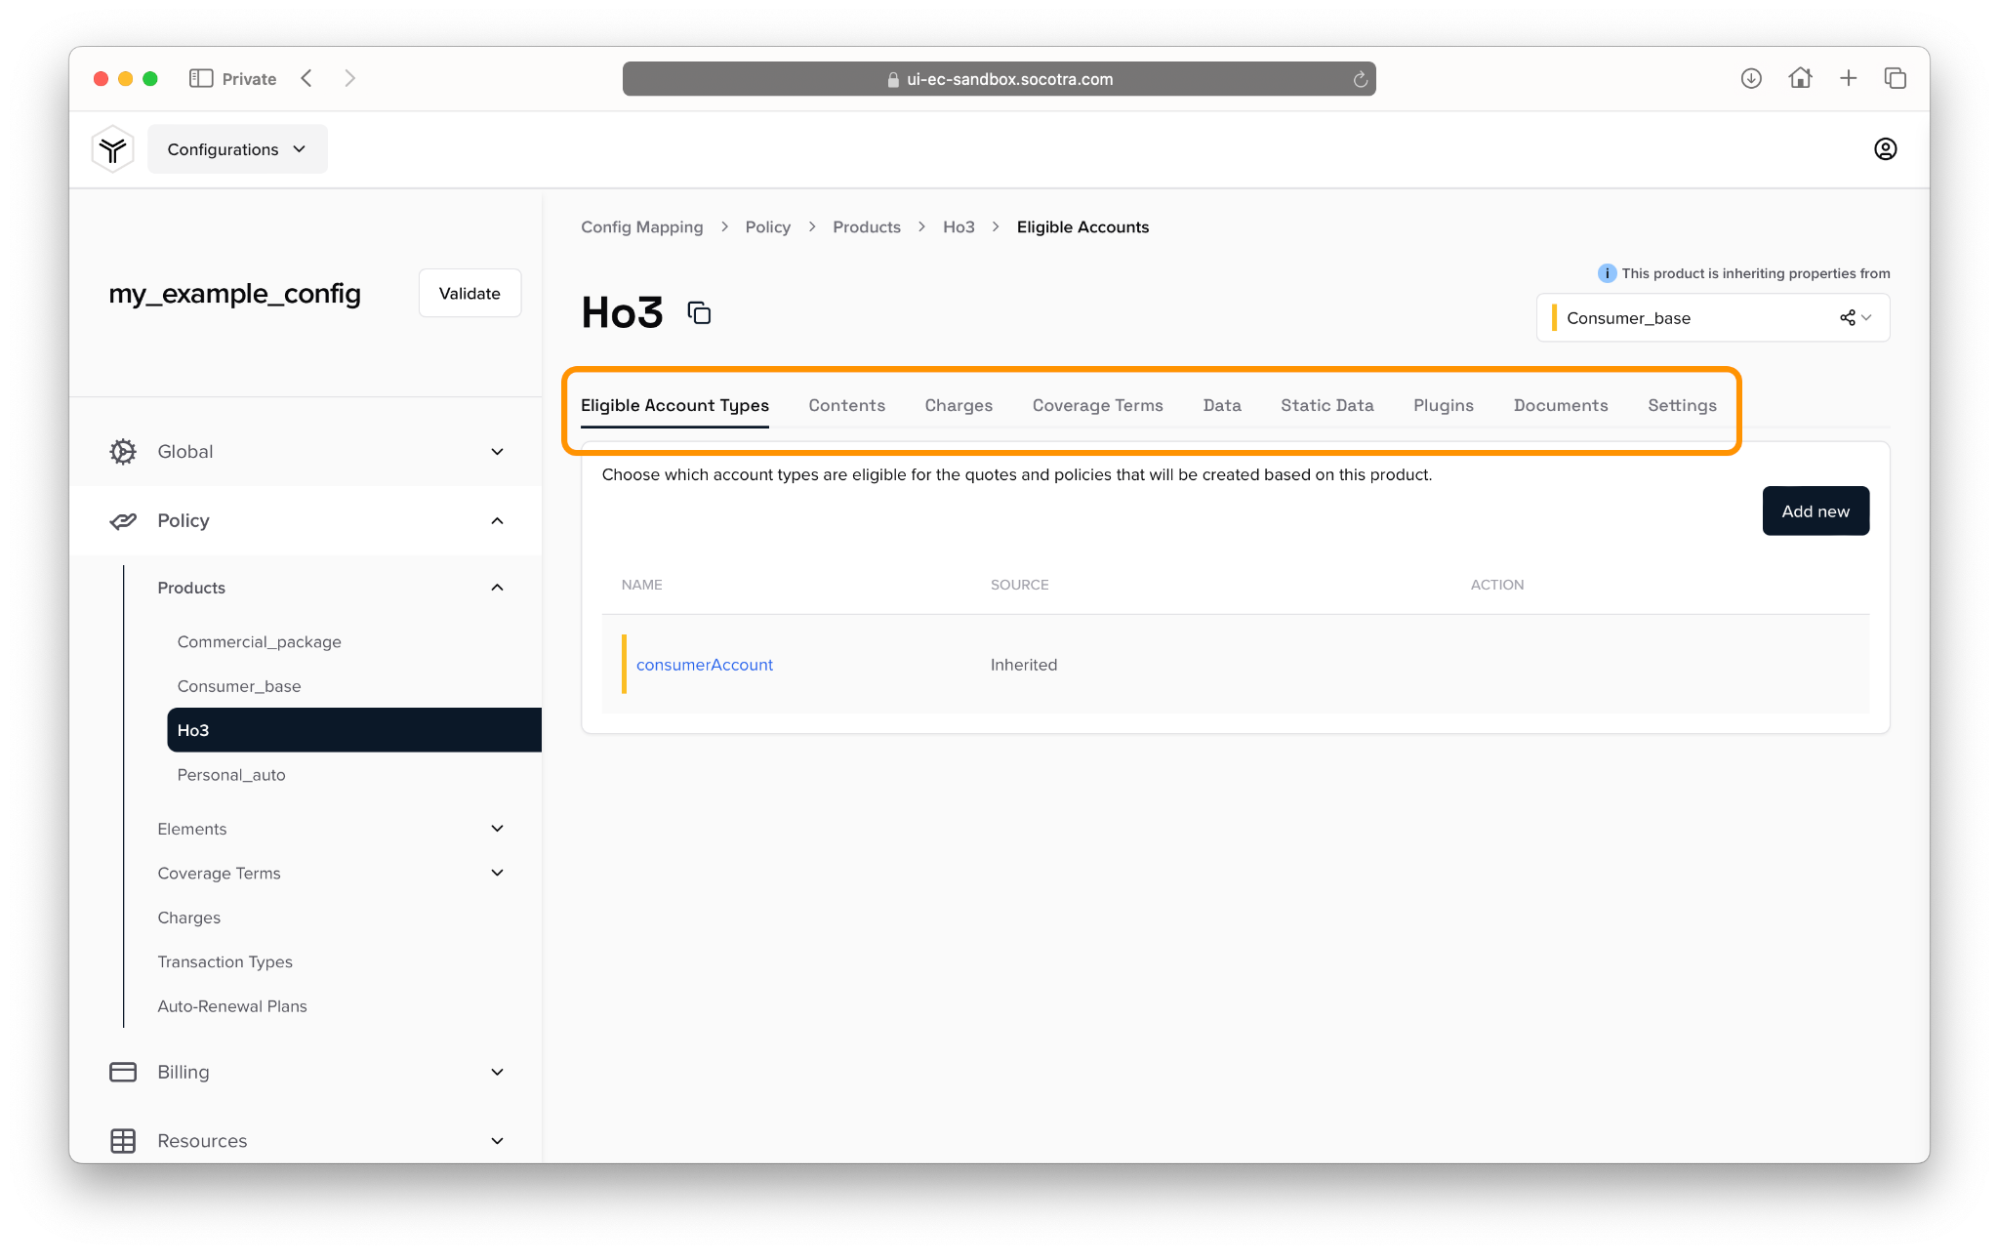
Before we dive in, let’s take a look at the top-right corner of the screen.
Concept - Abstract records and inheritance
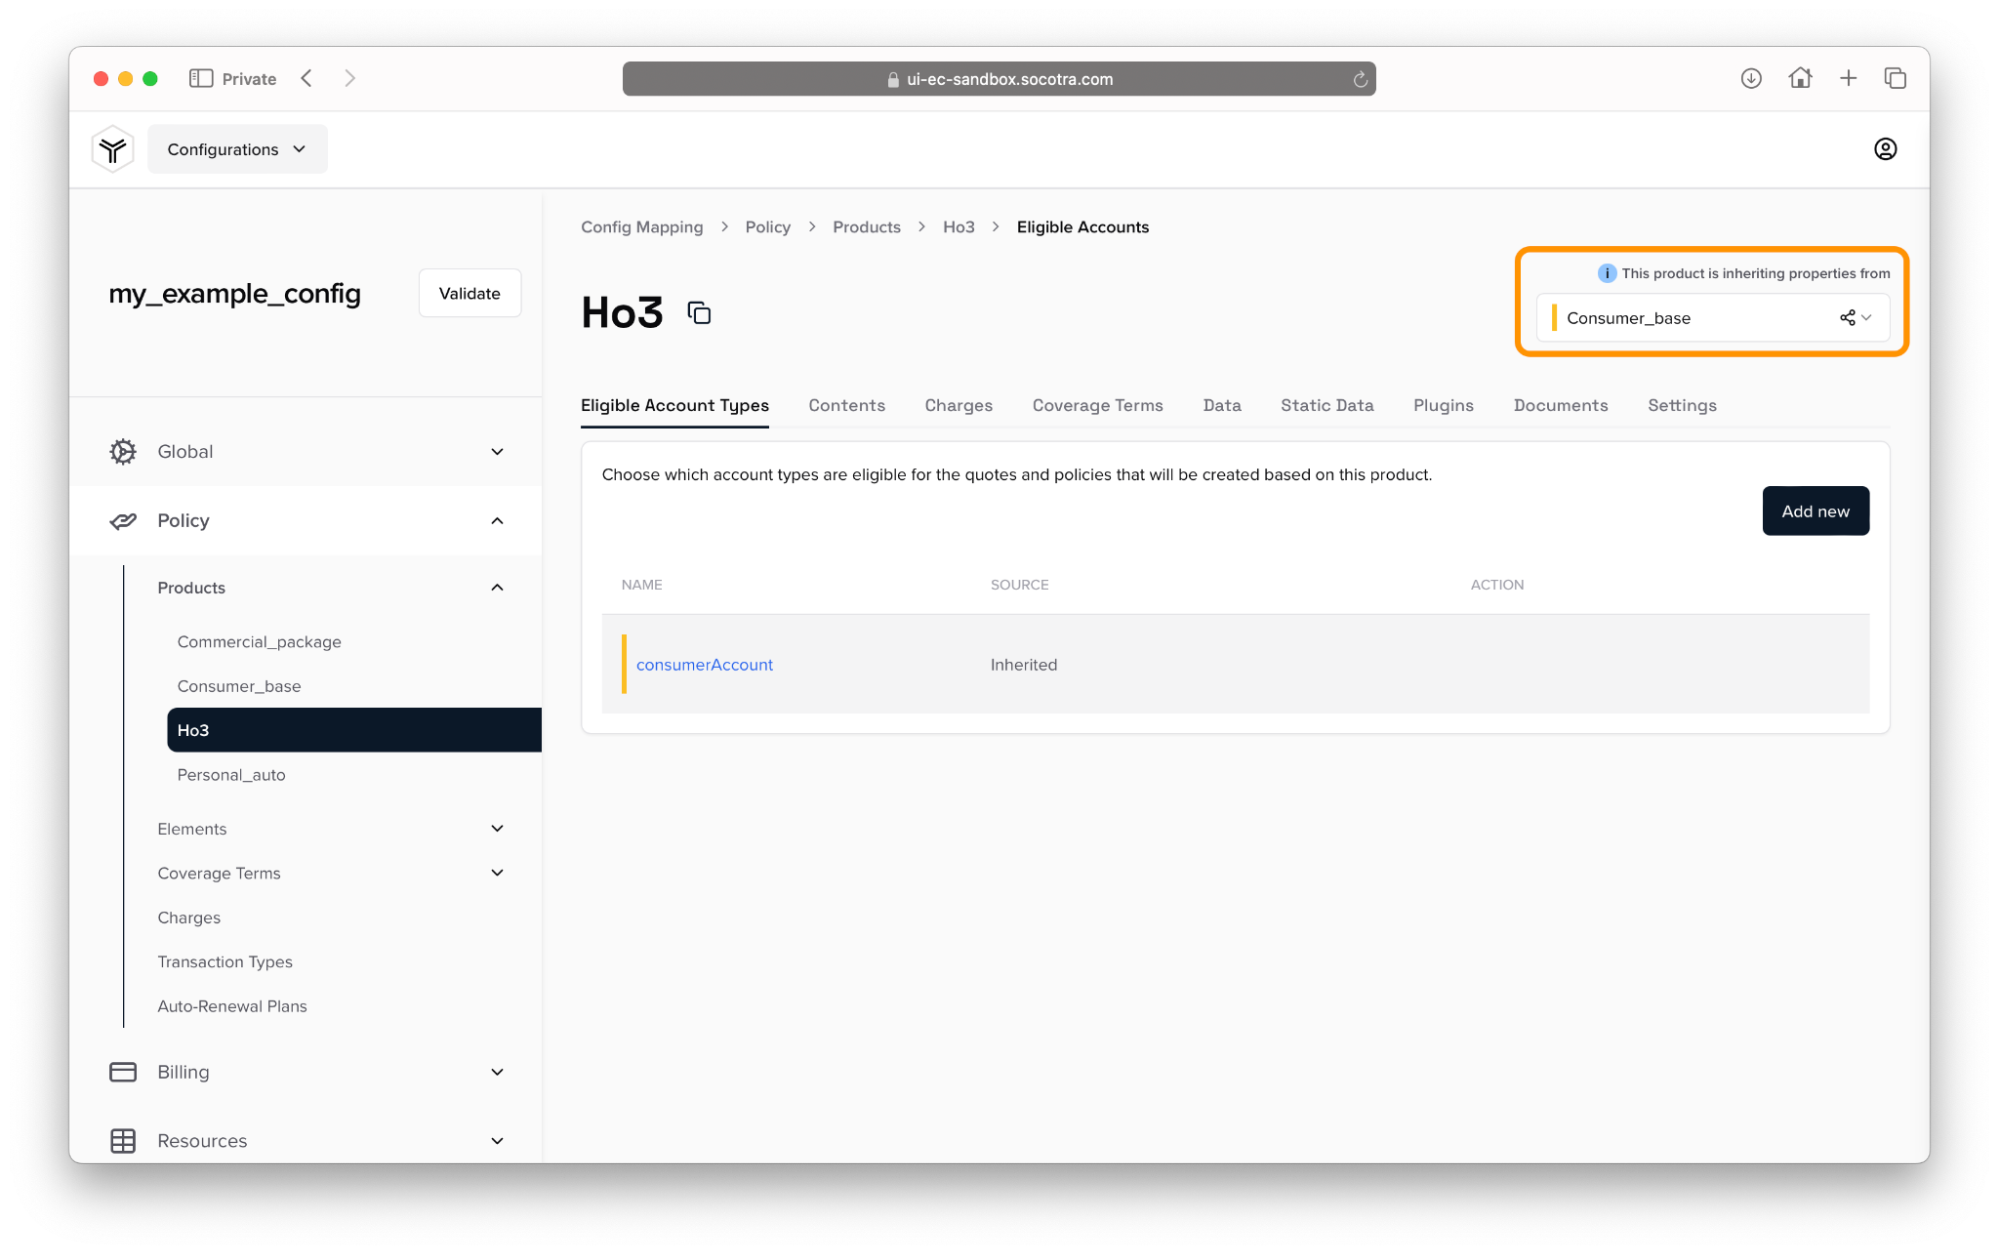
There’s a message and a dropdown menu that state the following:
This product is inheriting properties from Consumer_base
This refers to a feature of Socotra called Abstract records.
In Socotra, an abstract record is a record that isn’t used independently, but is instead used as a foundation that other records can inherit from.
In this case, Consumer_base isn’t intended to ever be used as an insurance product itself. Instead, it’s intended to help build other insurance products.
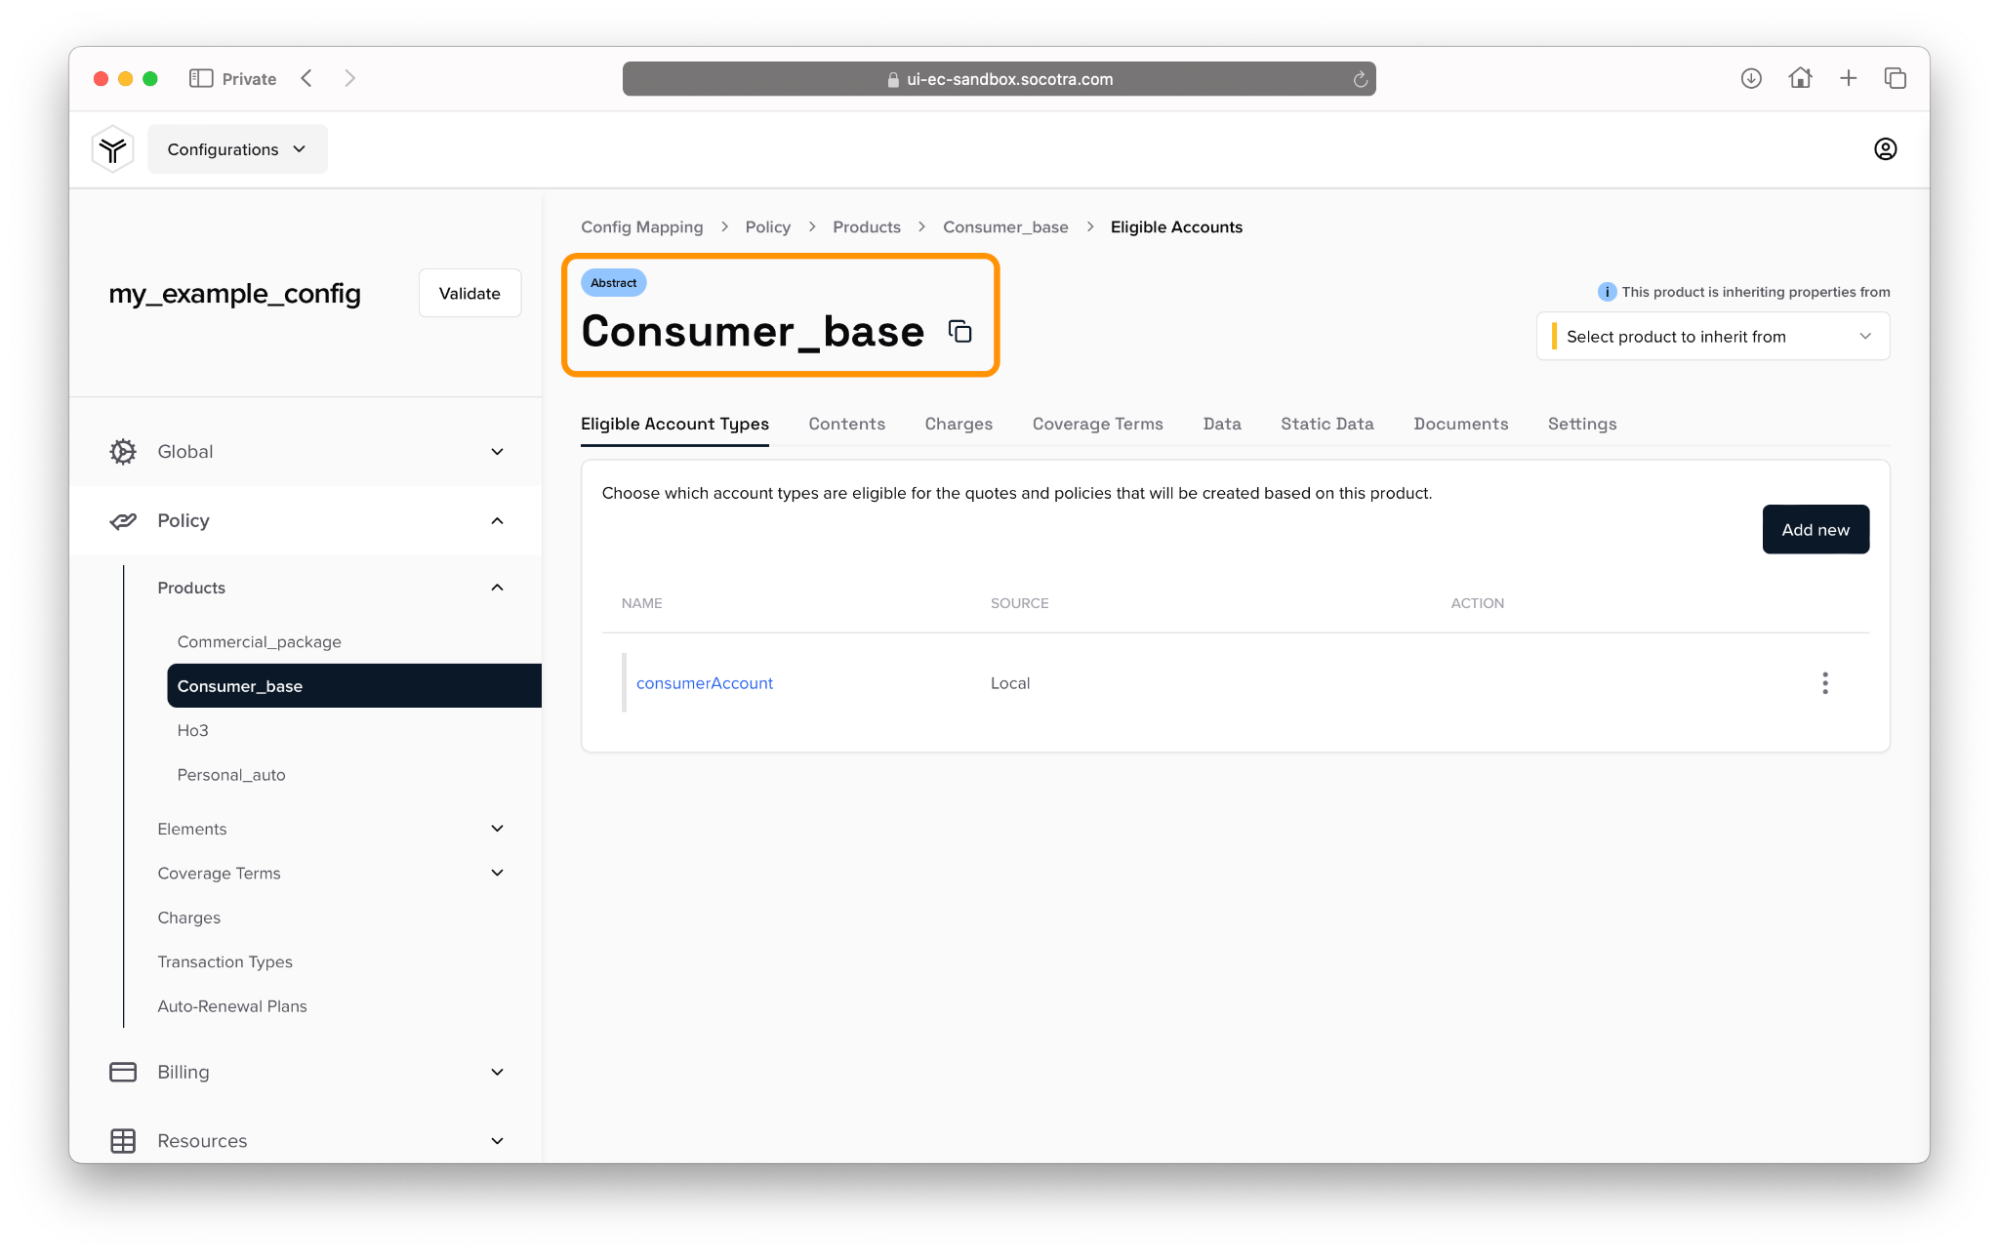 Note that Consumer_base is marked as Abstract.
On the Eligible Account Types tab, you’ll see that
theconsumerAccount field is inherited. This means that the
field is defined in the Consumer_base abstract product, but is being
inherited by the Ho3 product.
Abstract records are useful because they allow you to more efficiently plan your insurance products.
For example, if you know that you want to have four different insurance
products, and that each will be eligible for consumer policyholder
accounts, you can create an abstract record and configure it to contain
the common data parameters (the consumerAccount account). Then, when
you make any consumer insurance product, you can have it inherit values
from the abstract record.
Another way of thinking of abstract records is with a parent-child metaphor. In this scenario, Consumer_base is the parent record, while the other records are child records. The child records inherit from the parent record.
Tabs in the Product menu
Now that we’ve covered the basics of abstract records and inheritance, let’s return to products and do a quick tour of the Product menu. Remember that we’re looking at the interface for configuring an individual insurance product. The subsections below provide brief explanations of each tab.
 Tabs on the tenant configuration menu of a particular
insurance product
Tabs on the tenant configuration menu of a particular
insurance product
Eligible Account Types
The Eligible Account Types tab is where you choose which account types are eligible for the quotes and policies that will be created based on this product.
Account types are created in Global > Accounts.
Contents
The Contents tab is where you create hierarchical associations between elements.
In Socotra, an element refers to one the following:
Policy Lines
Exposure Groups
Exposures
Coverages
These elements can have hierarchical relationships with each other.
For example, an exposure contains one or more coverages.
While you define all of the attributes in the Attributes menu (Policy > Elements), the relationship between the elements is defined in the Contents tab. (Products > [Selected Product] > Contents).
Charges
The Charges tab is where you choose which charges are associated with the product. Charges are defined in the Charges menu (Policy > Charges).
Coverage Terms
The Coverage Terms tab is where you configure coverage terms. Coverage terms handle configurations related to:
Deductibles
Limits (split limits, aggregate limits, lifetime limits, etc.)
Benefits (like benefits for term life payouts)
Riders (like optional inclusion of additional coverage that doesn’t need a full Coverage attribute).
Coverage Terms are defined in the Coverage Terms menu (Policy > Coverage Terms)
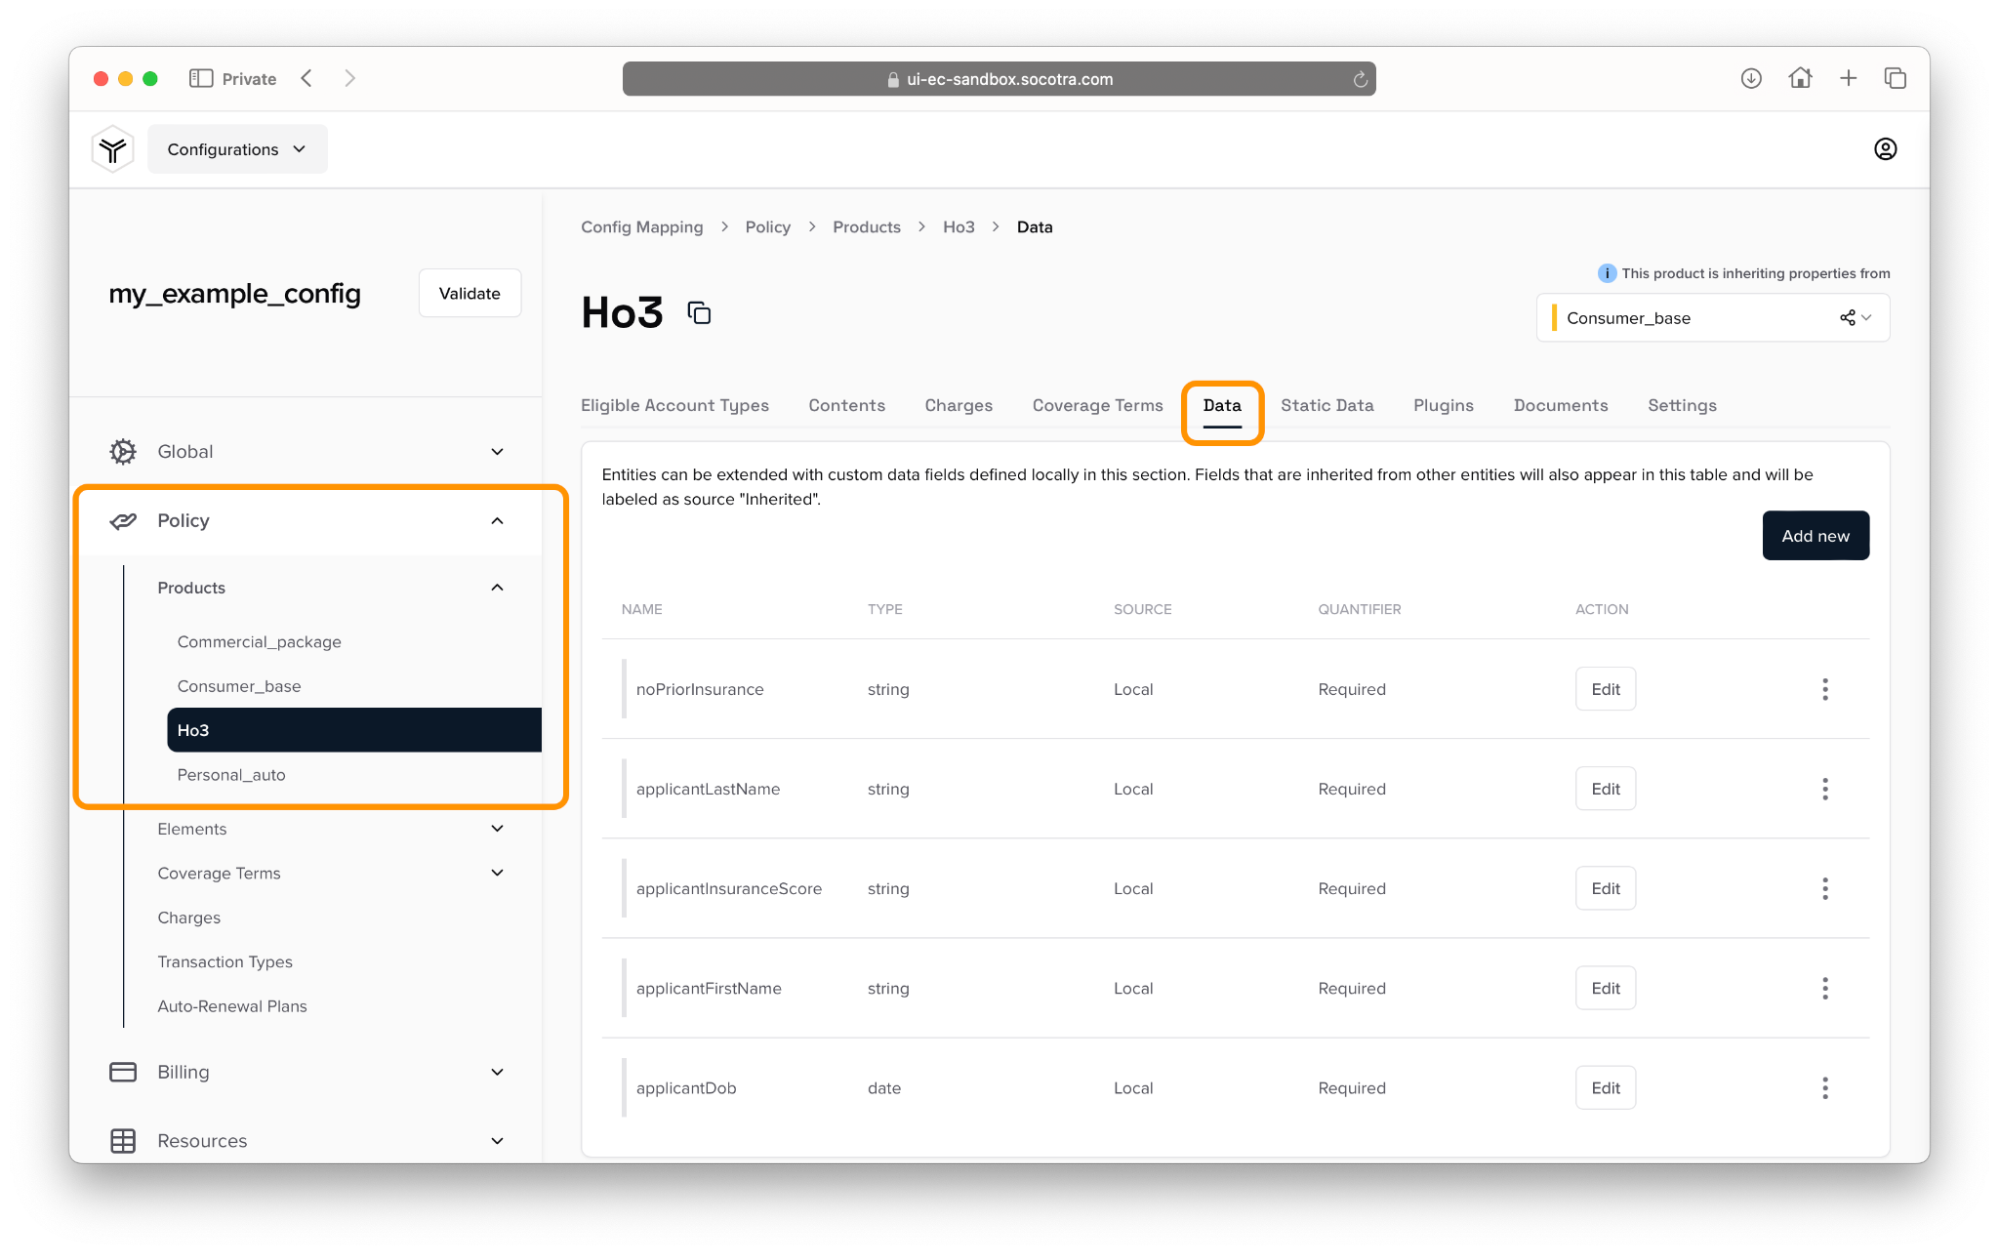
Data
The Data tab is where you can create any custom data you want associated with the insurance product. If a data value isn’t captured in one of the default menus, you can create a custom value in the Data tab.
This is also where you can see all of the fields that are inherited from other entities.
Static Data
The Static Data tab is where you can create custom data that you don’t want to be governed by the data revision rules of policy transactions. You can add or update data here even after a quote has become finalized and immutable.
A maximum of 10 static data fields can be added per product.
Plugins
The Plugins tab is where you manage product-specific plugins. These will overwrite any matching instances within Global Plugins for this product.
Documents
The Documents tab is where you manage documents that are generated for this insurance product. Documents are declared and stored on the Documents page (Resources > Documents).
Settings
The Settings tab is where you can overwrite the default attributes. Refer back to section 2.3: Concept: Default attributes for more information.
Making changes to the product
In this section, we’re going to cover how to add a new data field to a product.
For the purposes of this tutorial, you’re going to add a field that records the number of prior fraud convictions held by the customer.
While viewing your tenant configuration, navigate to Policy > Products > Personal Auto. Then, click the Data tab.
Click Add New.
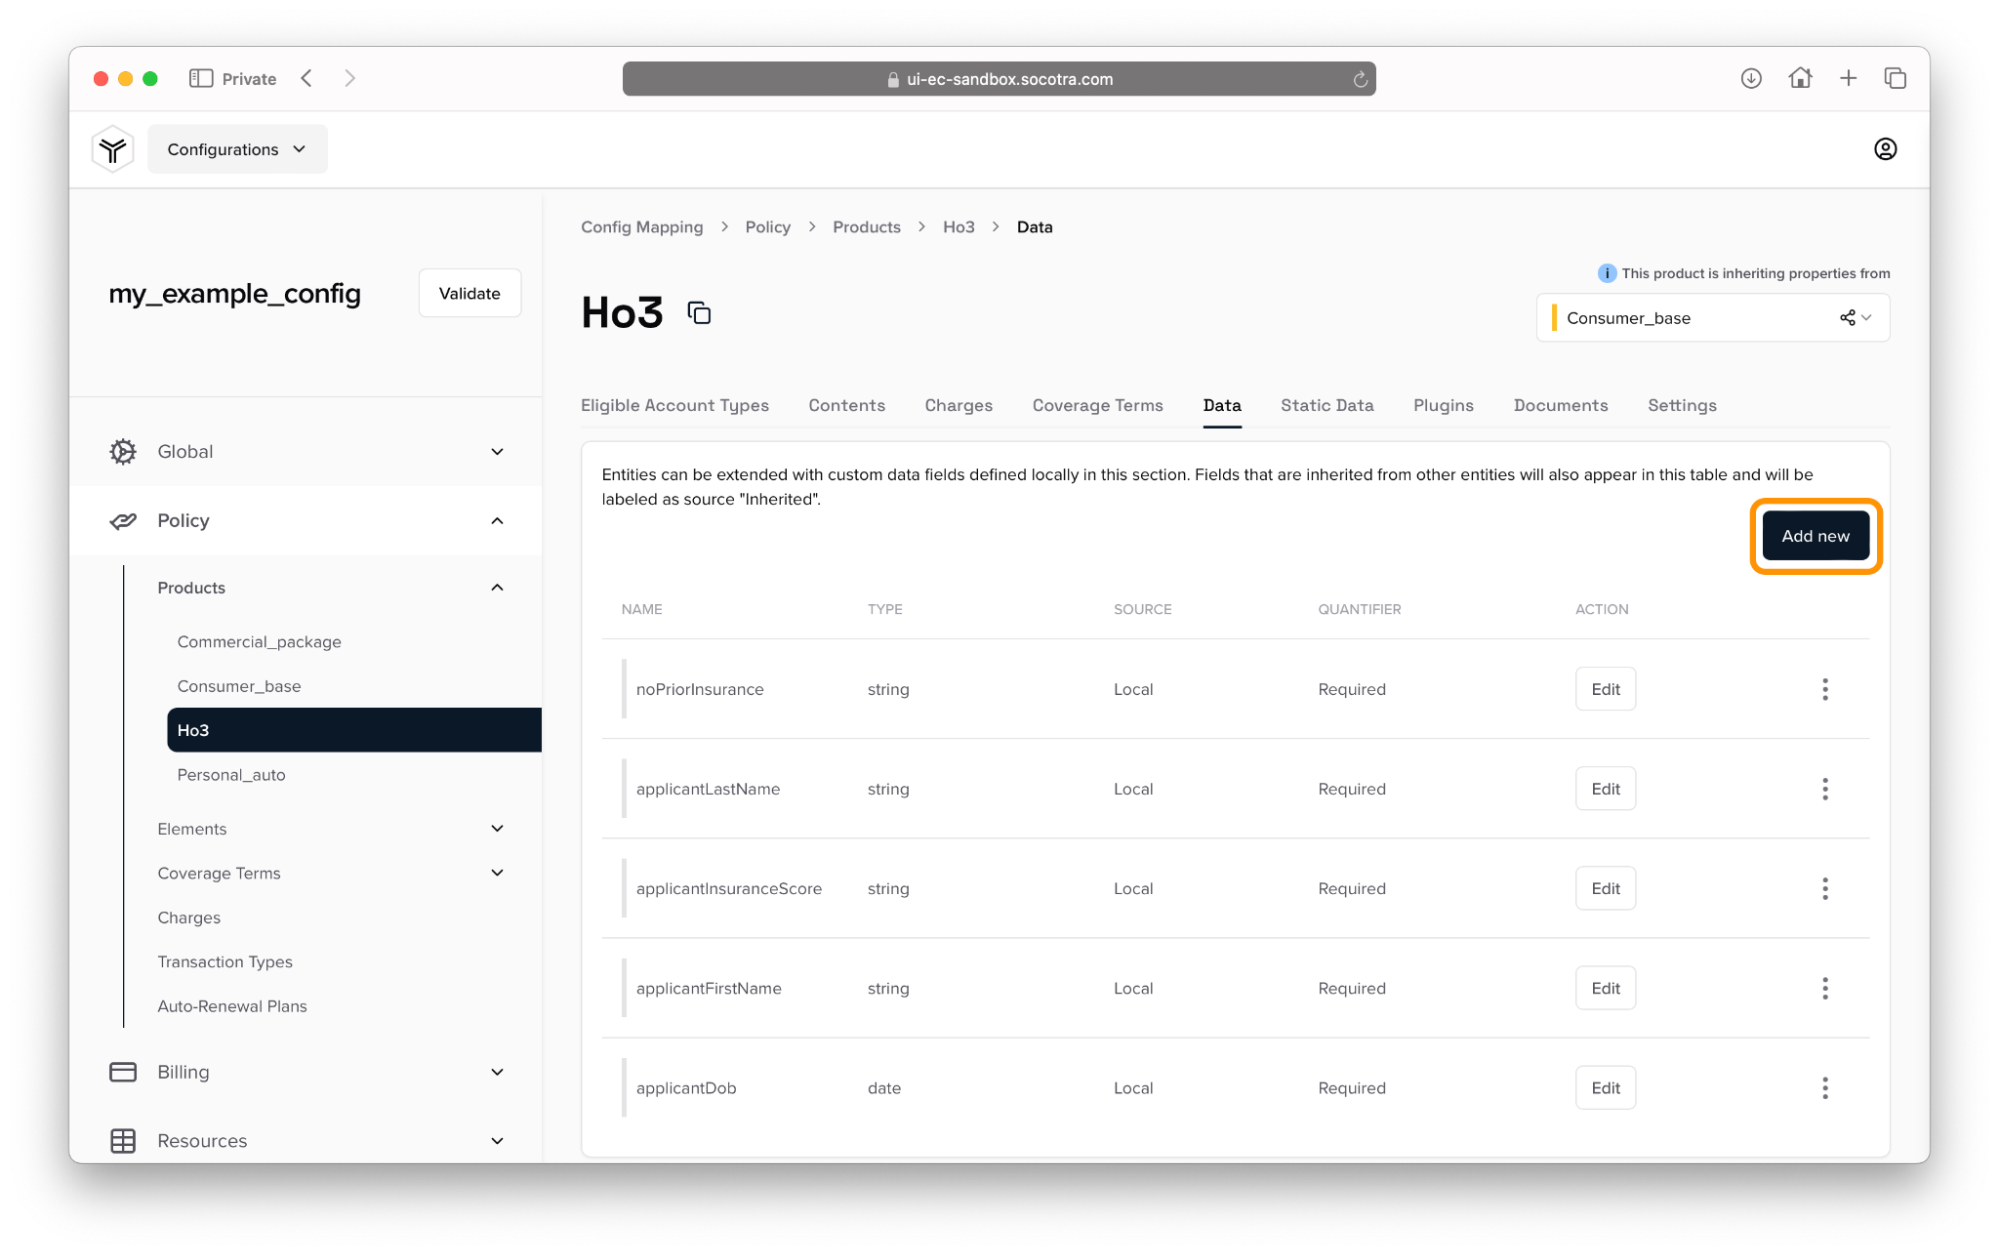
After you click Add New, a flyout window will appear.
Fill out the Name field.
This should typically:
Be description of the information the field is capturing.
Be in
camelCaseorPascalCase.
For this tutorial, we recommend providing the value
priorFraudConvictionsas the name.
Fill out the Display Name field.
This should typically be based on the Name field.
For this tutorial, we recommend providing the value
Prior Fraud Convictionsas the display name.
Select a value for the Type field.
The type is the kind of data captured by the field.
Examples include string (text), int (integer), etc.
For this tutorial, we recommend selecting string.
Select a value for the Quantifier field.
This sets whether the field must be provided when making a quote with this insurance product.
For this tutorial, we recommend selecting Optional (?).
Select a value for the Scope field.
This sets whether this data is used for generating quick quotes, quotes, or both policies and quotes.
For this tutorial, we recommend selecting Policy + Quote.
For the purposes of this tutorial, we can ignore the Tags, Default value, Min length, Max length, and Regex fields. We’ll cover these in future learning resources.
For the Options field, click Add.
This is where you can add selectable options to represent how many fraud convictions the customer has.
Enter “0” for the first value. Then, click Add again.
Repeat this process to add options 0, 1, 2, and 3+.
Review the screenshots below and compare it to what you have configured. If something doesn’t match up, review these steps.
 The Add new field flyout window (part 1)
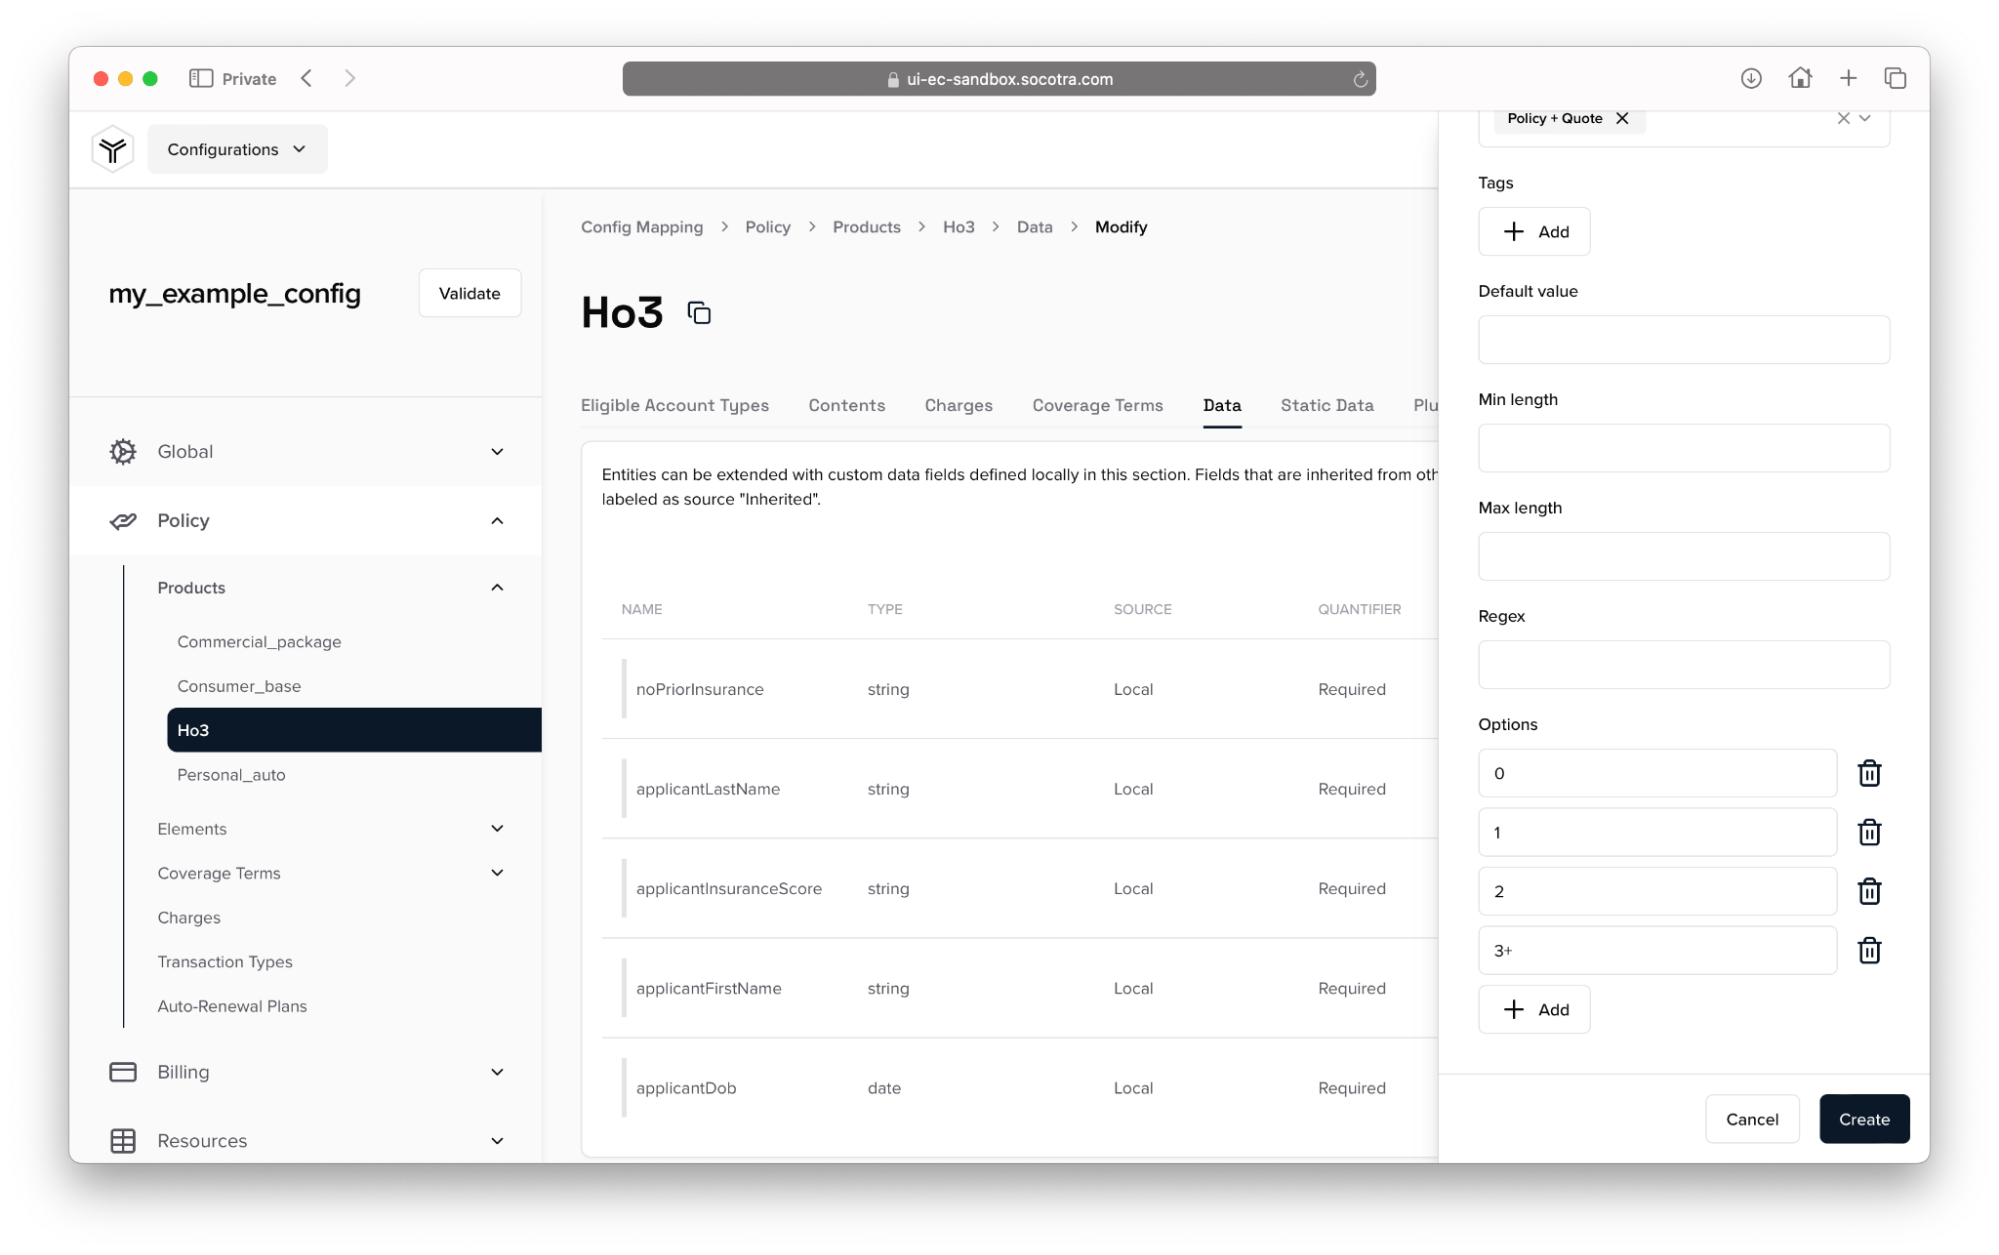 The Add new field flyout window (part 2)
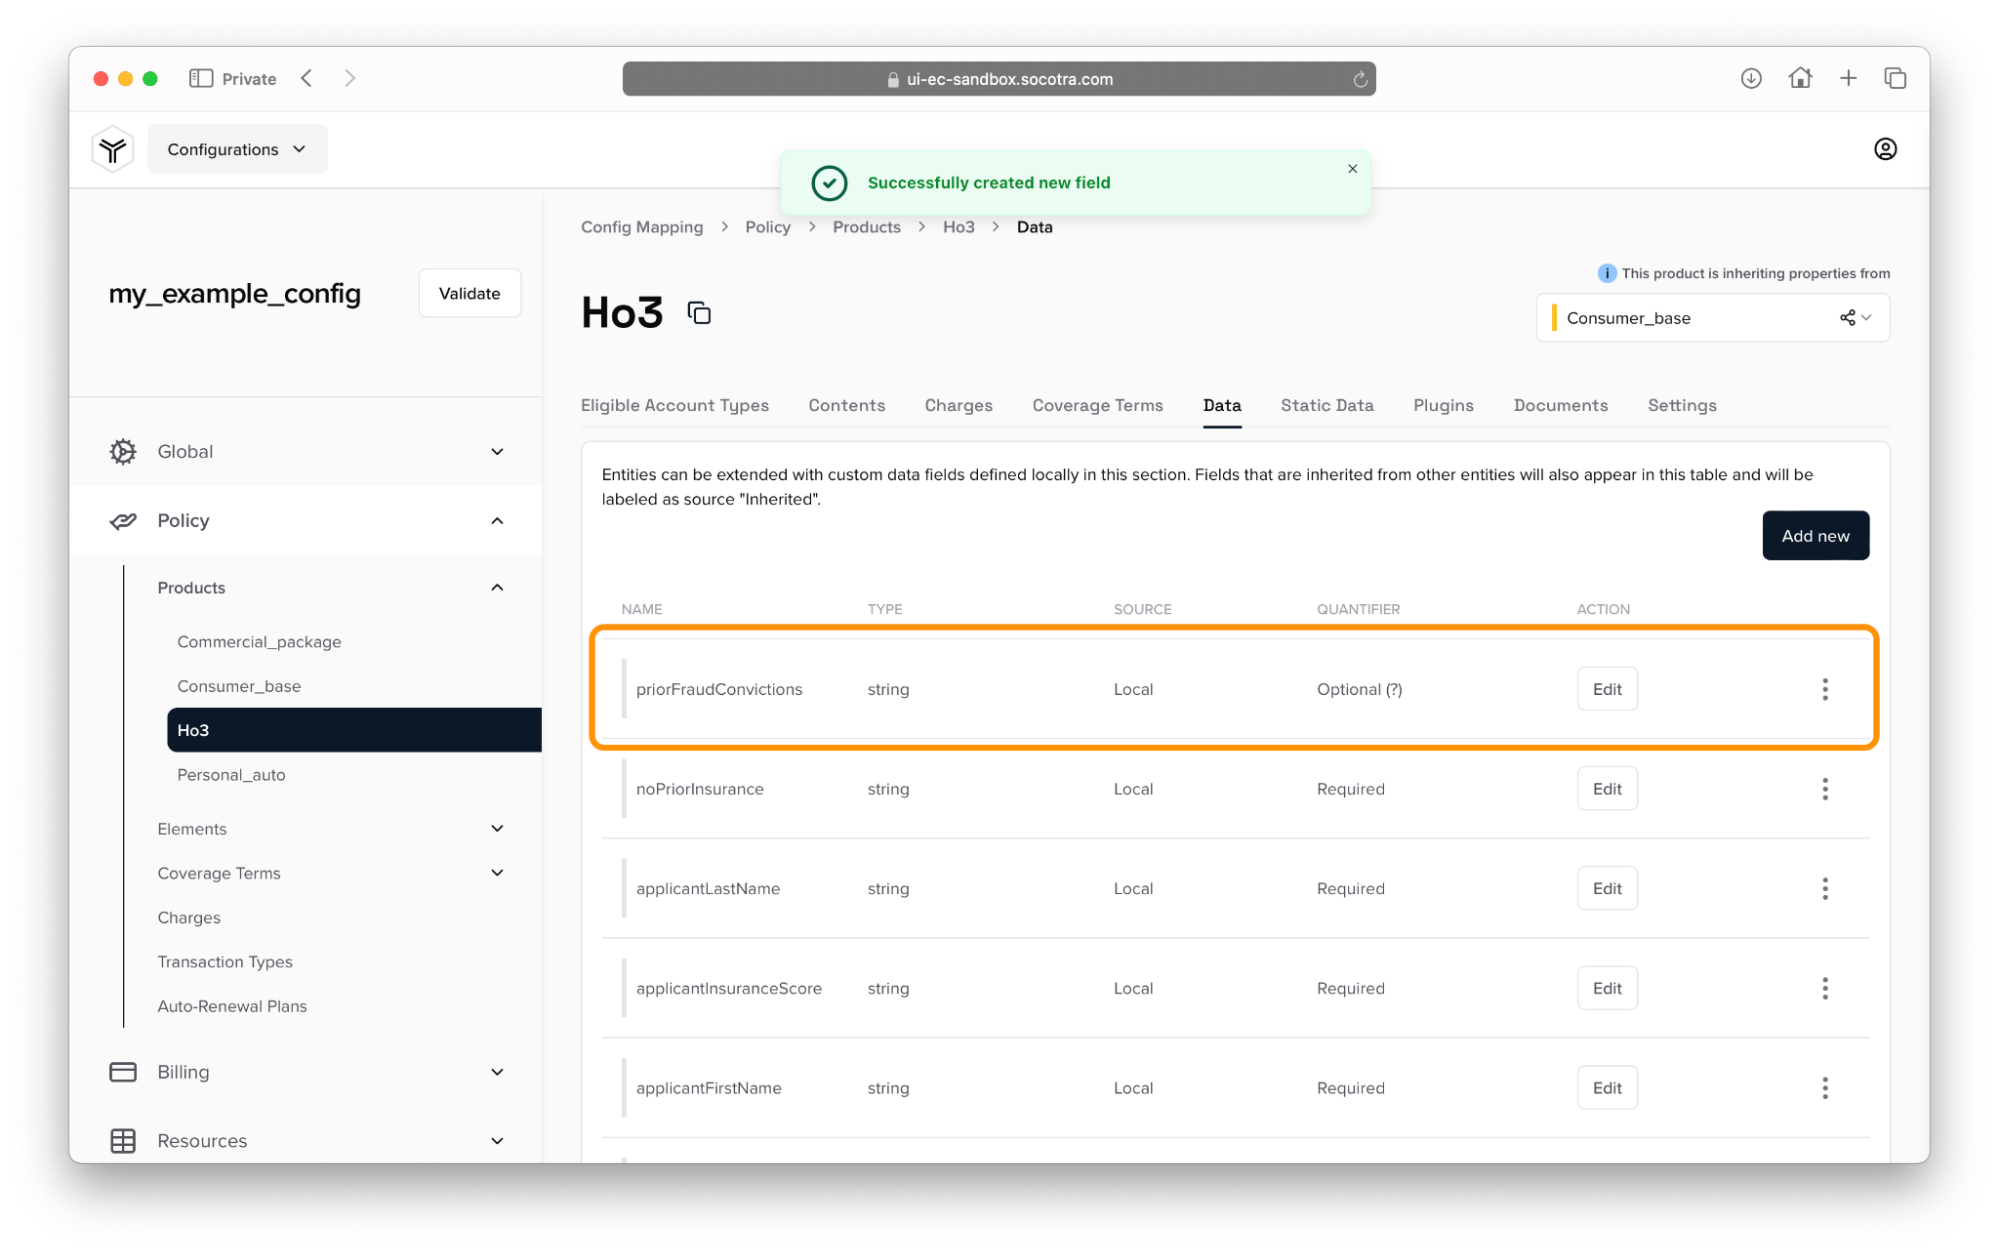
Click Create.
After clicking Create, the new data field should appear in the list of fields.
Recap
In this tutorial, we covered:
How to create a configuration file from a template
How to view and edit the basic settings of a configuration file
How to navigate the Products menu
How to add new data to configure the product
Now that we have a configuration representing insurance products, how do we put it into action? The next step is to deploy the configuration file to a tenant. But what is a tenant?
Ready for the next module?
See Overview - Tenants in Socotra to continue this learning path.