Create an Account
This article explains how to create an account in Socotra.
Overview
What will I learn?
By the end of this tutorial, you will know how to:
Create an account using the Socotra API
Modify an account using the Socotra API
Validate an account using the Socotra API
What will I need?
You will need the following:
A Postman account
A workspace configured to use the Socotra API.
For more information about using Postman, see: Set up Postman to use the Socotra API.
Key concepts
What is an account?
In Socotra, an account is a data object that represents a third-party entity (a person or a business) that is capable of being quoted for and being issued a policy for an insurance product.
Accounts associate individuals or businesses with the insurance products they’re covered by.
What is the process for creating an account?
There are broadly three steps for creating an account:
Create
Modify
Validate
Create
Once created, an account exists in a draft state. Accounts in a draft state aren’t finalized and can be updated without any restrictions.
Modify
In a draft state, it’s possible to modify an account. You may want to do this if you want to change any information associated with the account or fix any errors (misspelled names, values that don’t meet field requirements, etc.).
Validate
The final stage of account creation is validation. Once validated, an account can be issued insurance policies.
Accounts in a validated state cannot be updated as freely as those in a draft state. Any data provided must adhere to the account configuration, as well as any custom validation provided as part of the validation plugin.
Also note that, once validated, an account can never return to a draft state.
Ready to begin?
Continue onto the next section to learn how to create, modify, and validate an account using the Socotra API.
Steps
Create an account
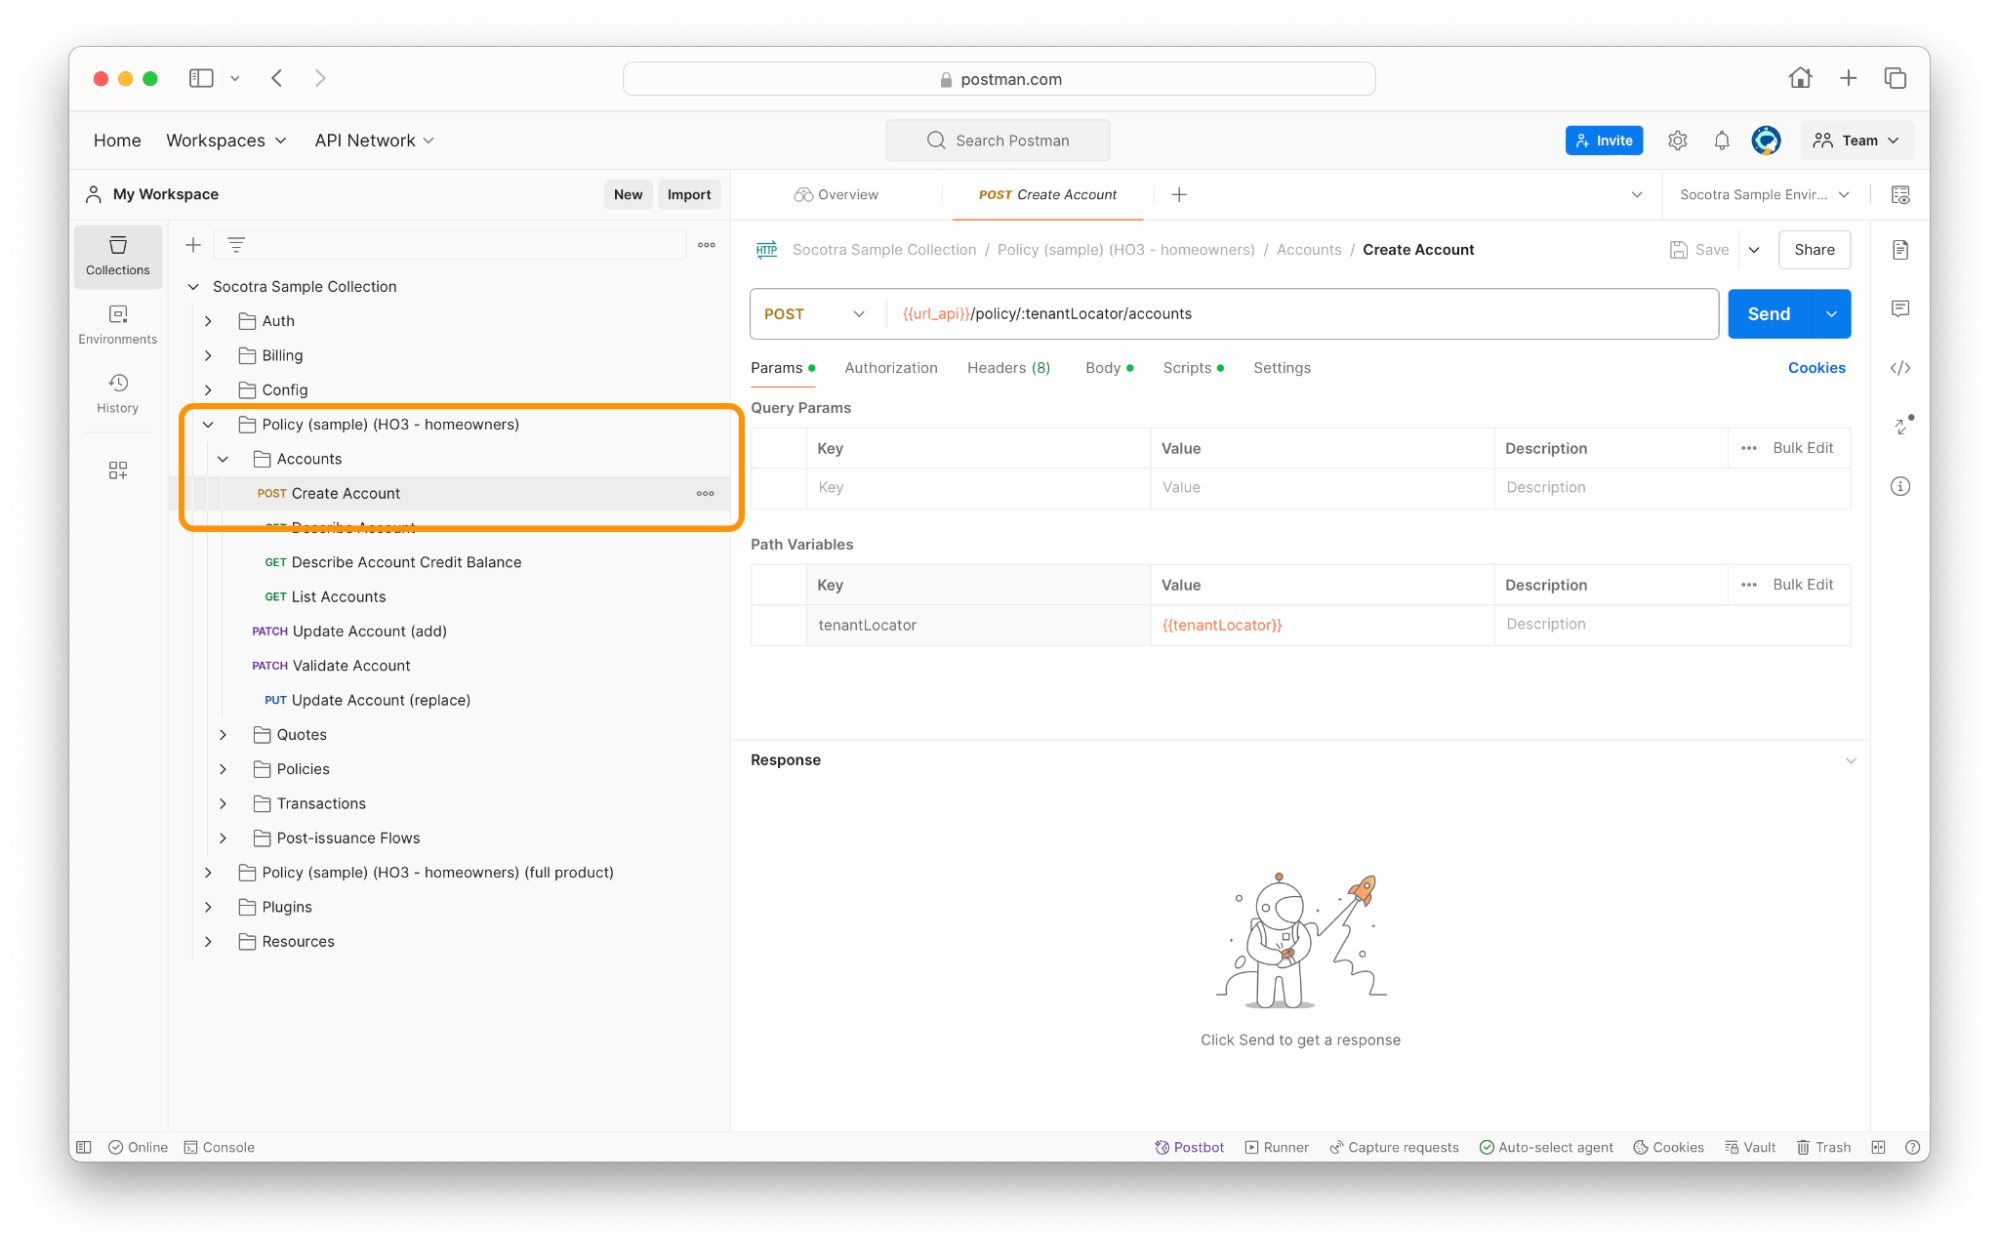
Log into your Postman account and navigate to your Socotra Sample Collection.
While viewing the Socotra Sample Collection, navigate to Policy > Account > Create Account.
Click the Body tab.
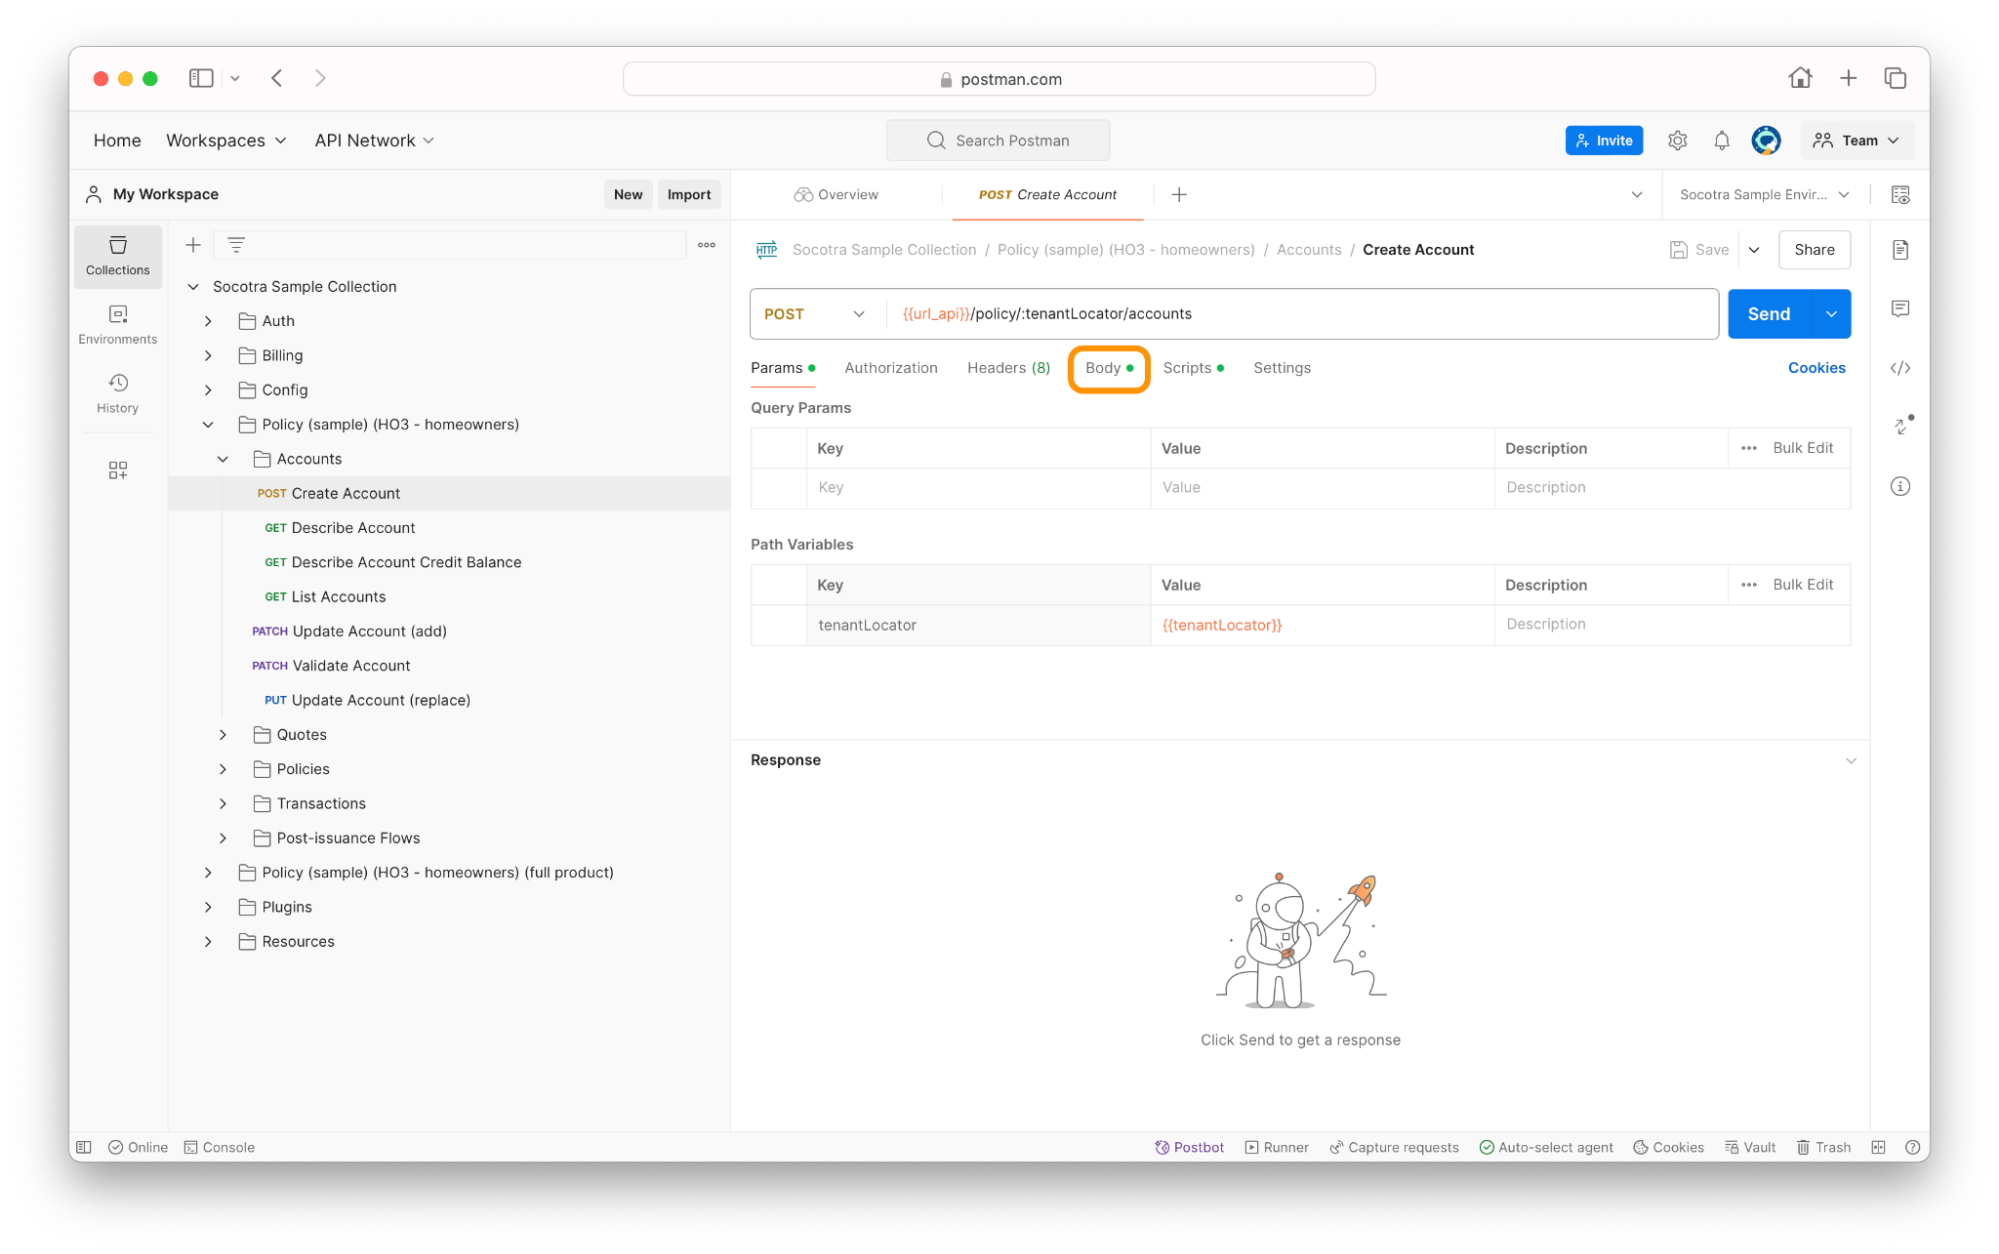
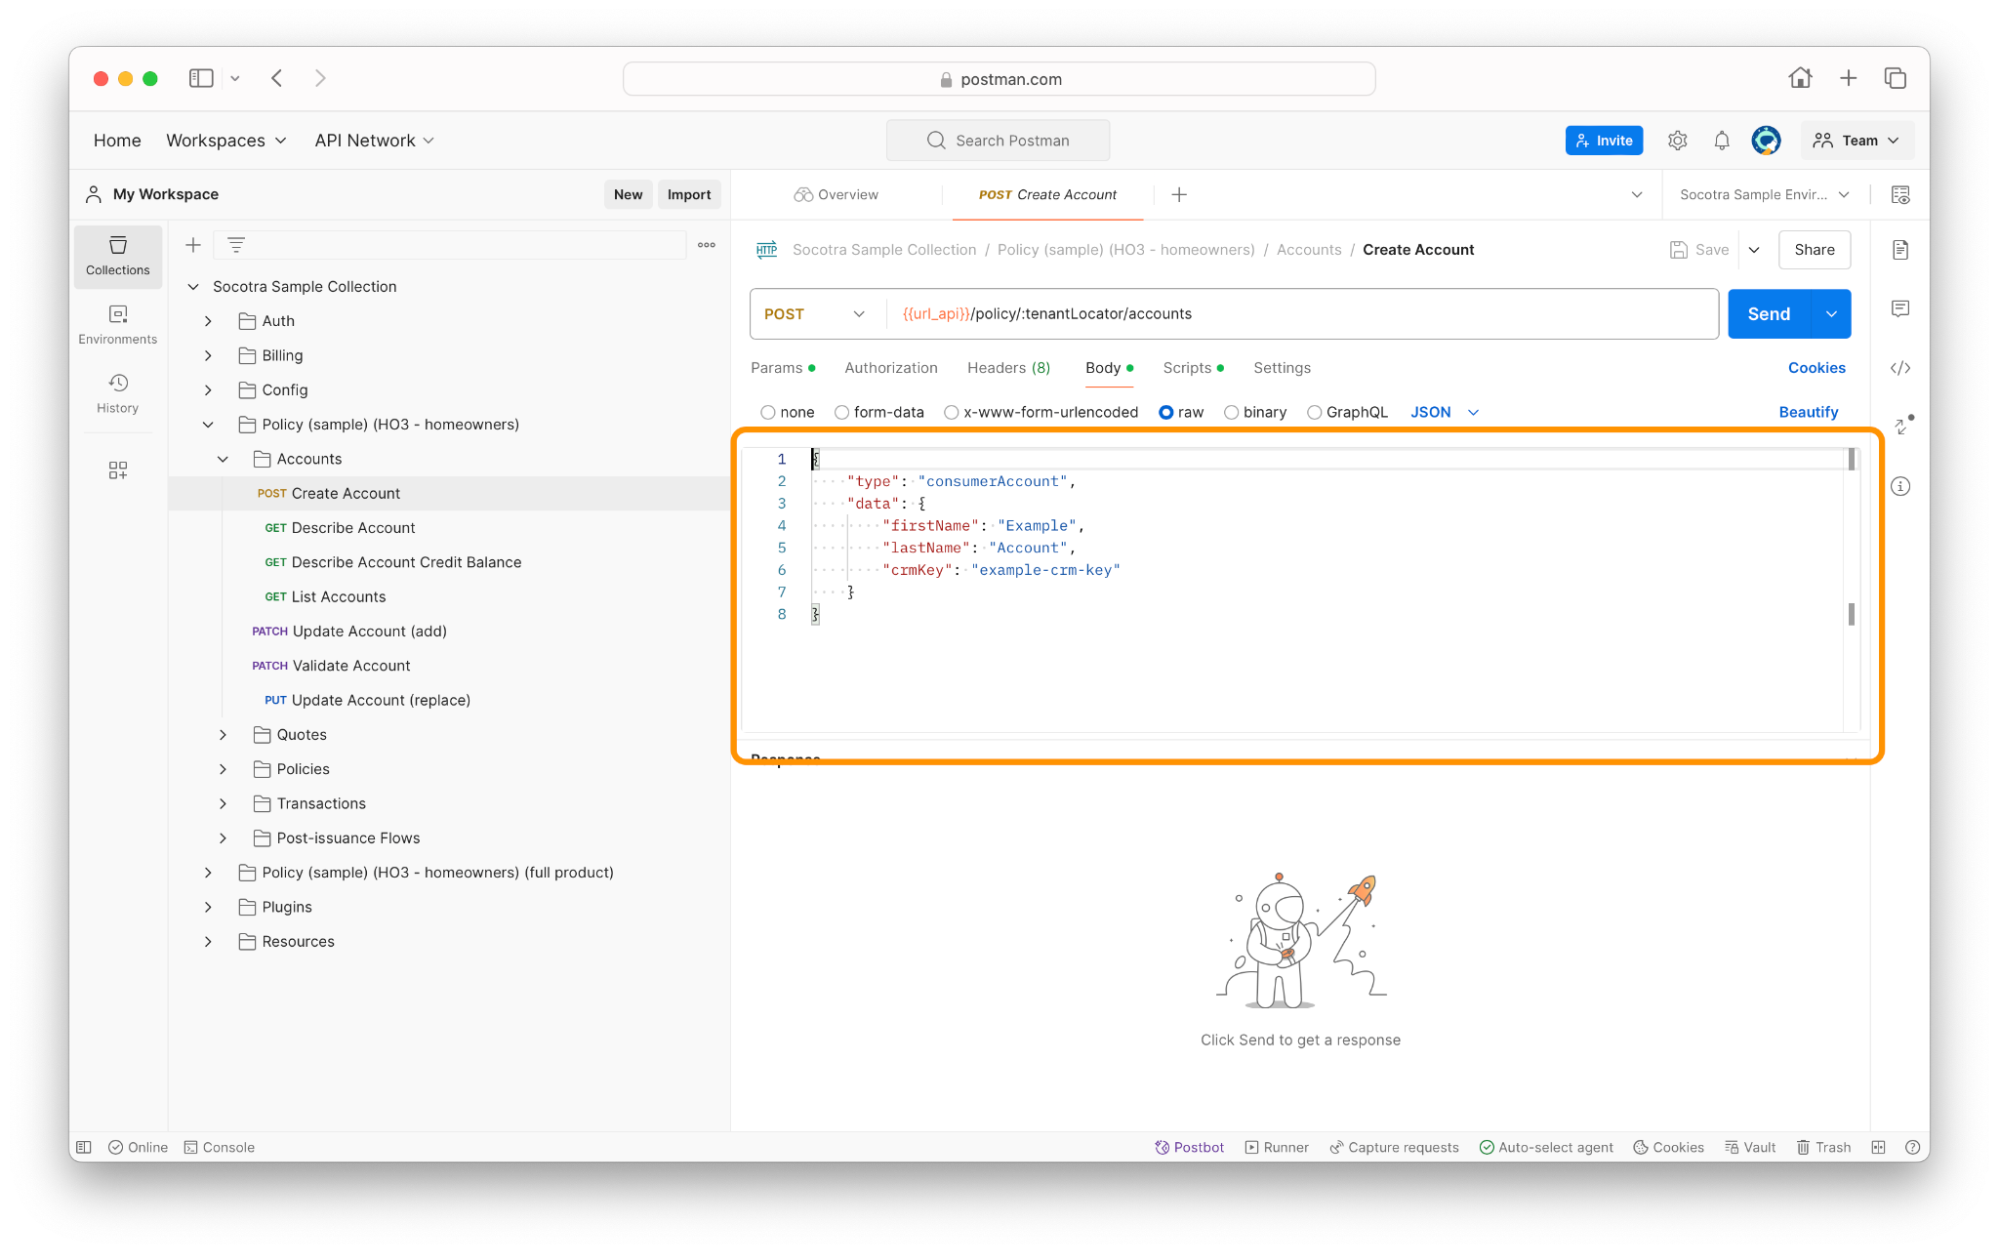
You should see a text editing field with some pre-populated JSON.
Before we continue, let’s quickly break down what we’re looking at.
The JSON code in the editing window of the request body mirrors the structure of an account in the tenant configuration.
The screenshot below shows what this account type looks like in the Socotra web application.
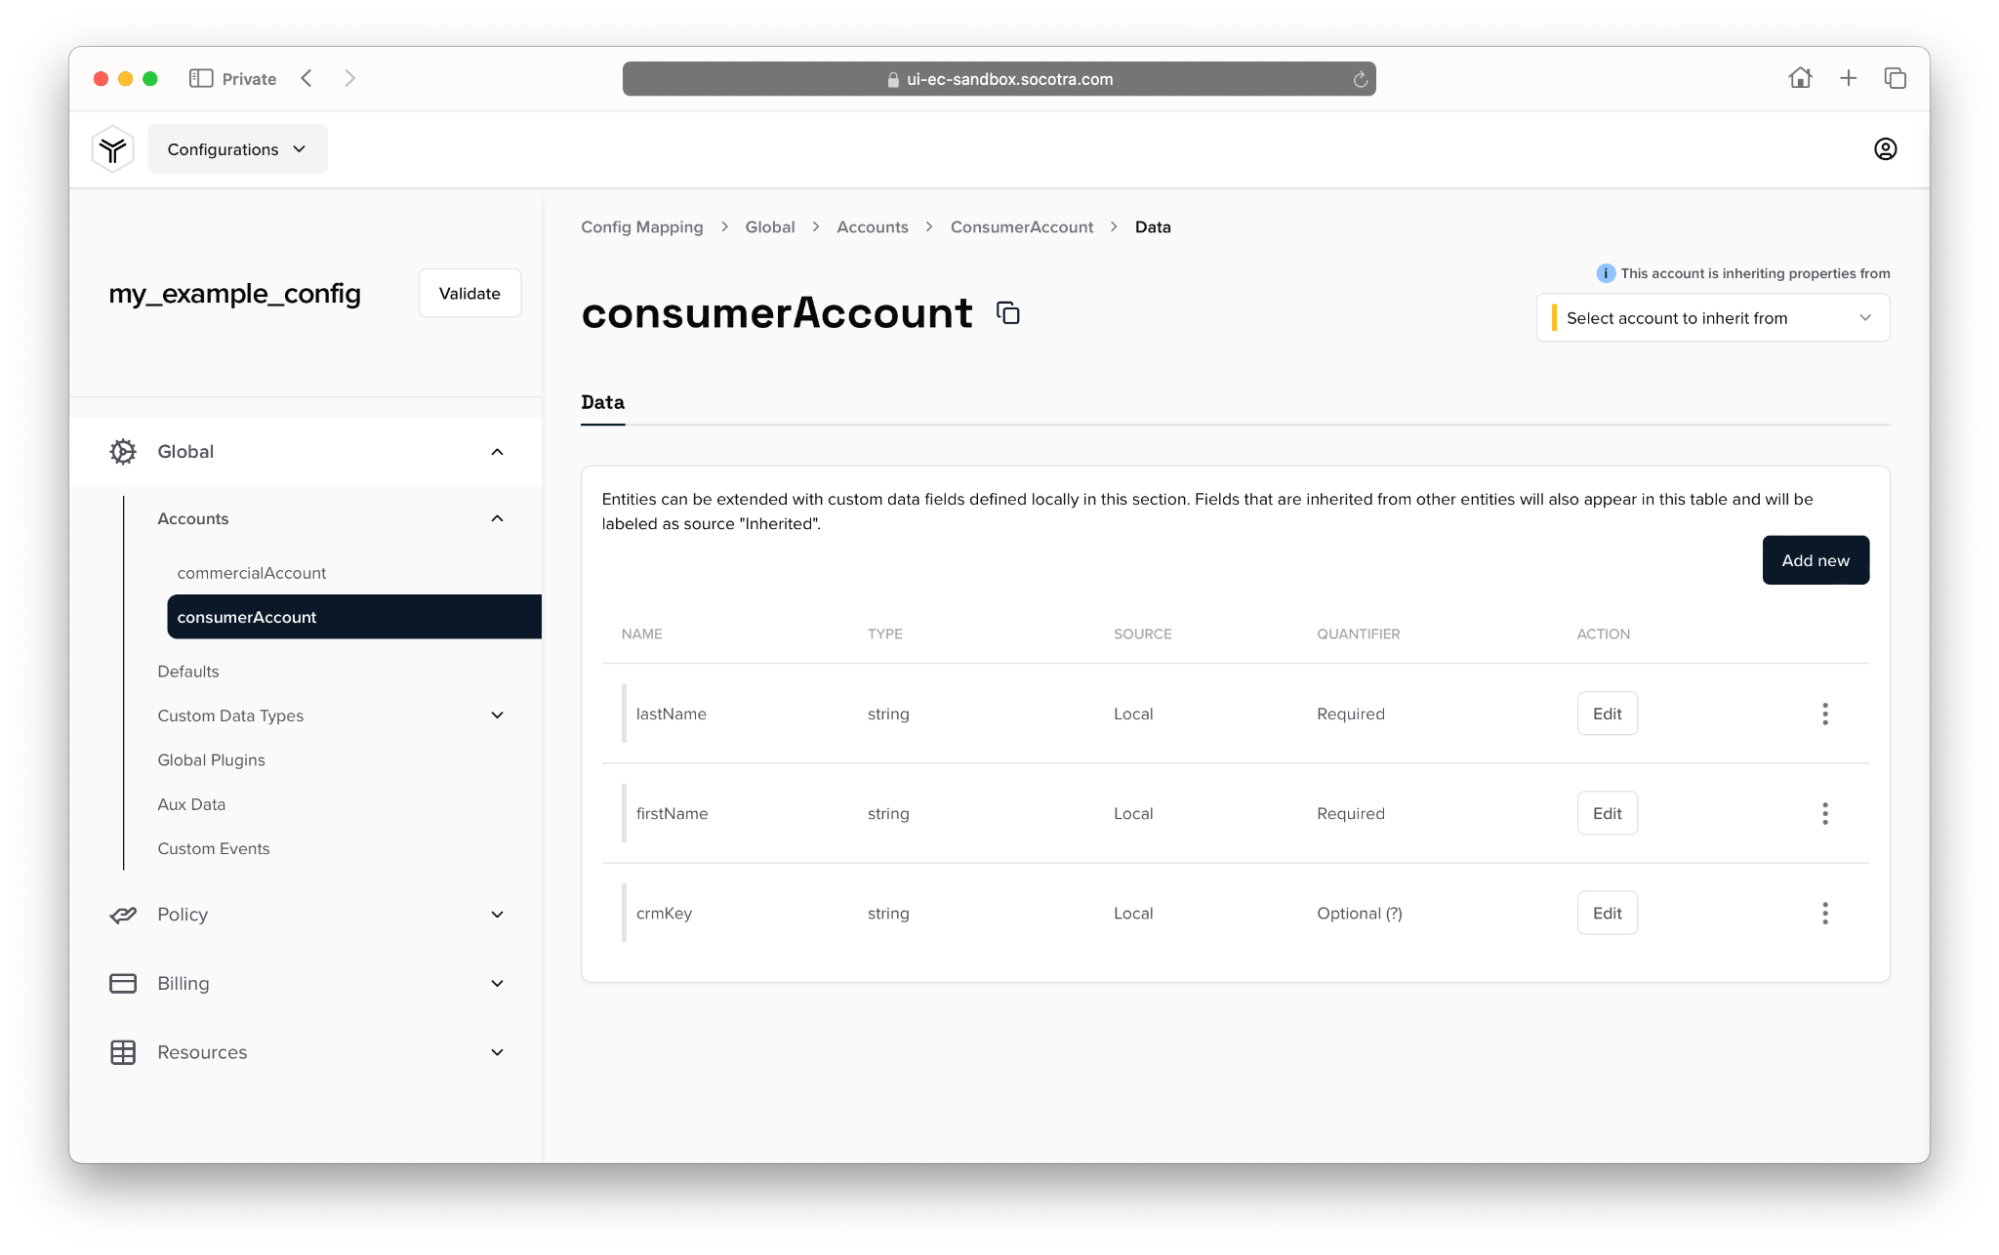
Note that the account type is “consumerAccount”. Also note the defined field values in the table:
lastName (required)
firstName (required)
crmKey (optional)
Let’s take a look again at the JSON view of this information in Postman:
In the request body, we specify the following:
A
typeofconsumerAccount(which matches the name in the web application).A
dataobject to contain the field information we want to provide, containing the following:A
firstNamefield to record the account holder’s first name.A
lastNamefield to record the account holder’s last name.A
crmKeyfield to record an API key for a CRM associated with the account holder. This field is optional, as defined in the data schema we saw in Socotra.
Provide the relevant data for the account holder. Or, if you just want to see how the request works, provide the default values to see the results.
Click Send.
If successful, the response message will look something like the screenshot below:
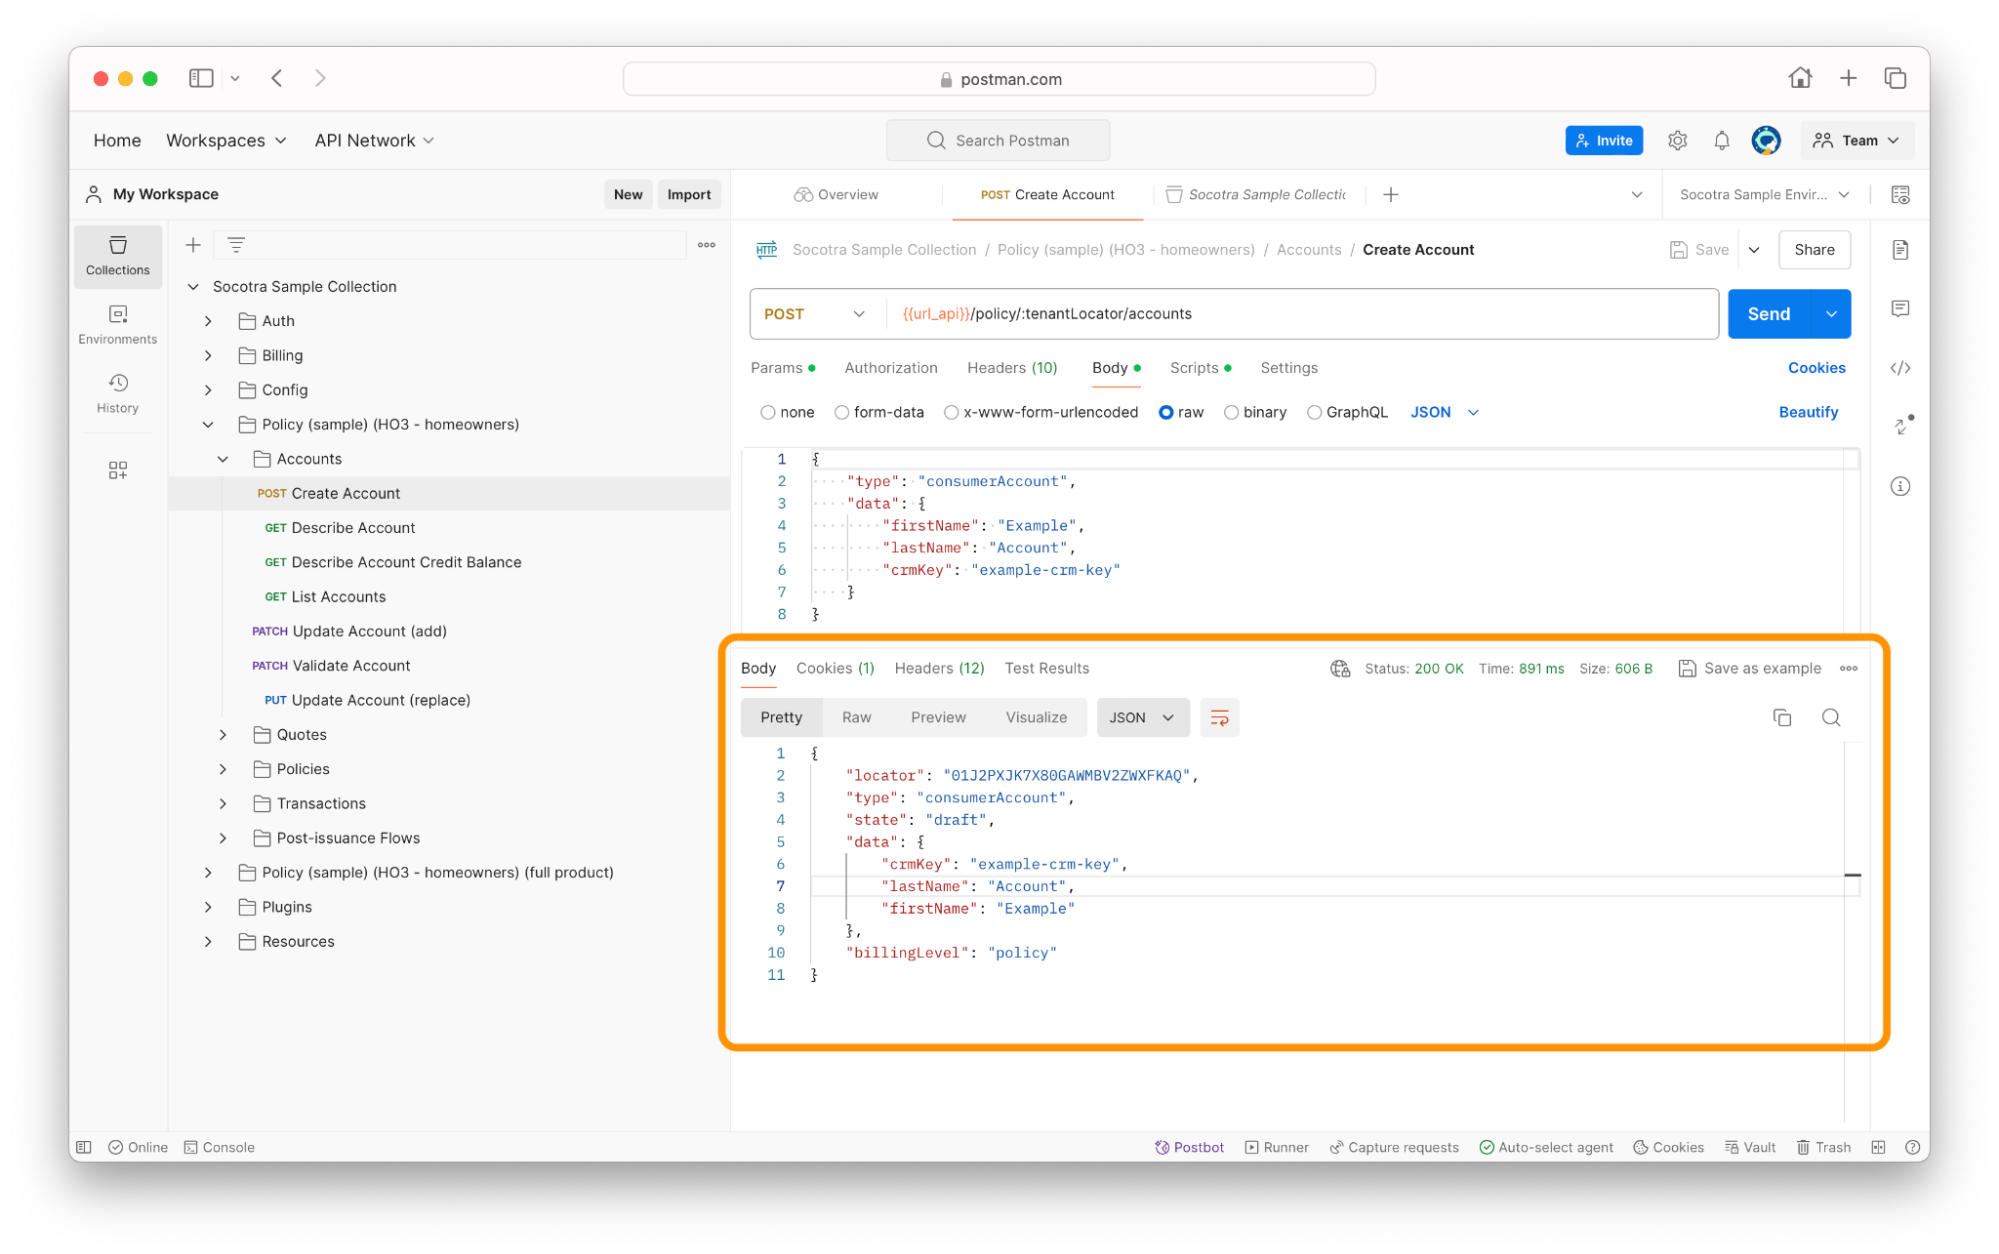
Let’s breakdown the response:
locator: This contains the unique identifier of the account.type: This contains the type of the account, in this case consumerAccount.state: This contains the account state. We can see that it’s a draft and has not yet been validated.data: This contains the data provided in the request body.billingLevel: This contains the billing level, which determines how the account is billed for its products.
Continue on to Part 2 to learn how to make modifications to the account.
Update an account
Once created, an account exists in a draft state. Before we validate the draft, let’s cover how to make changes to it.
If you look in the Postman collection under Policy > Account, you’ll see two endpoints labeled as Update Account.
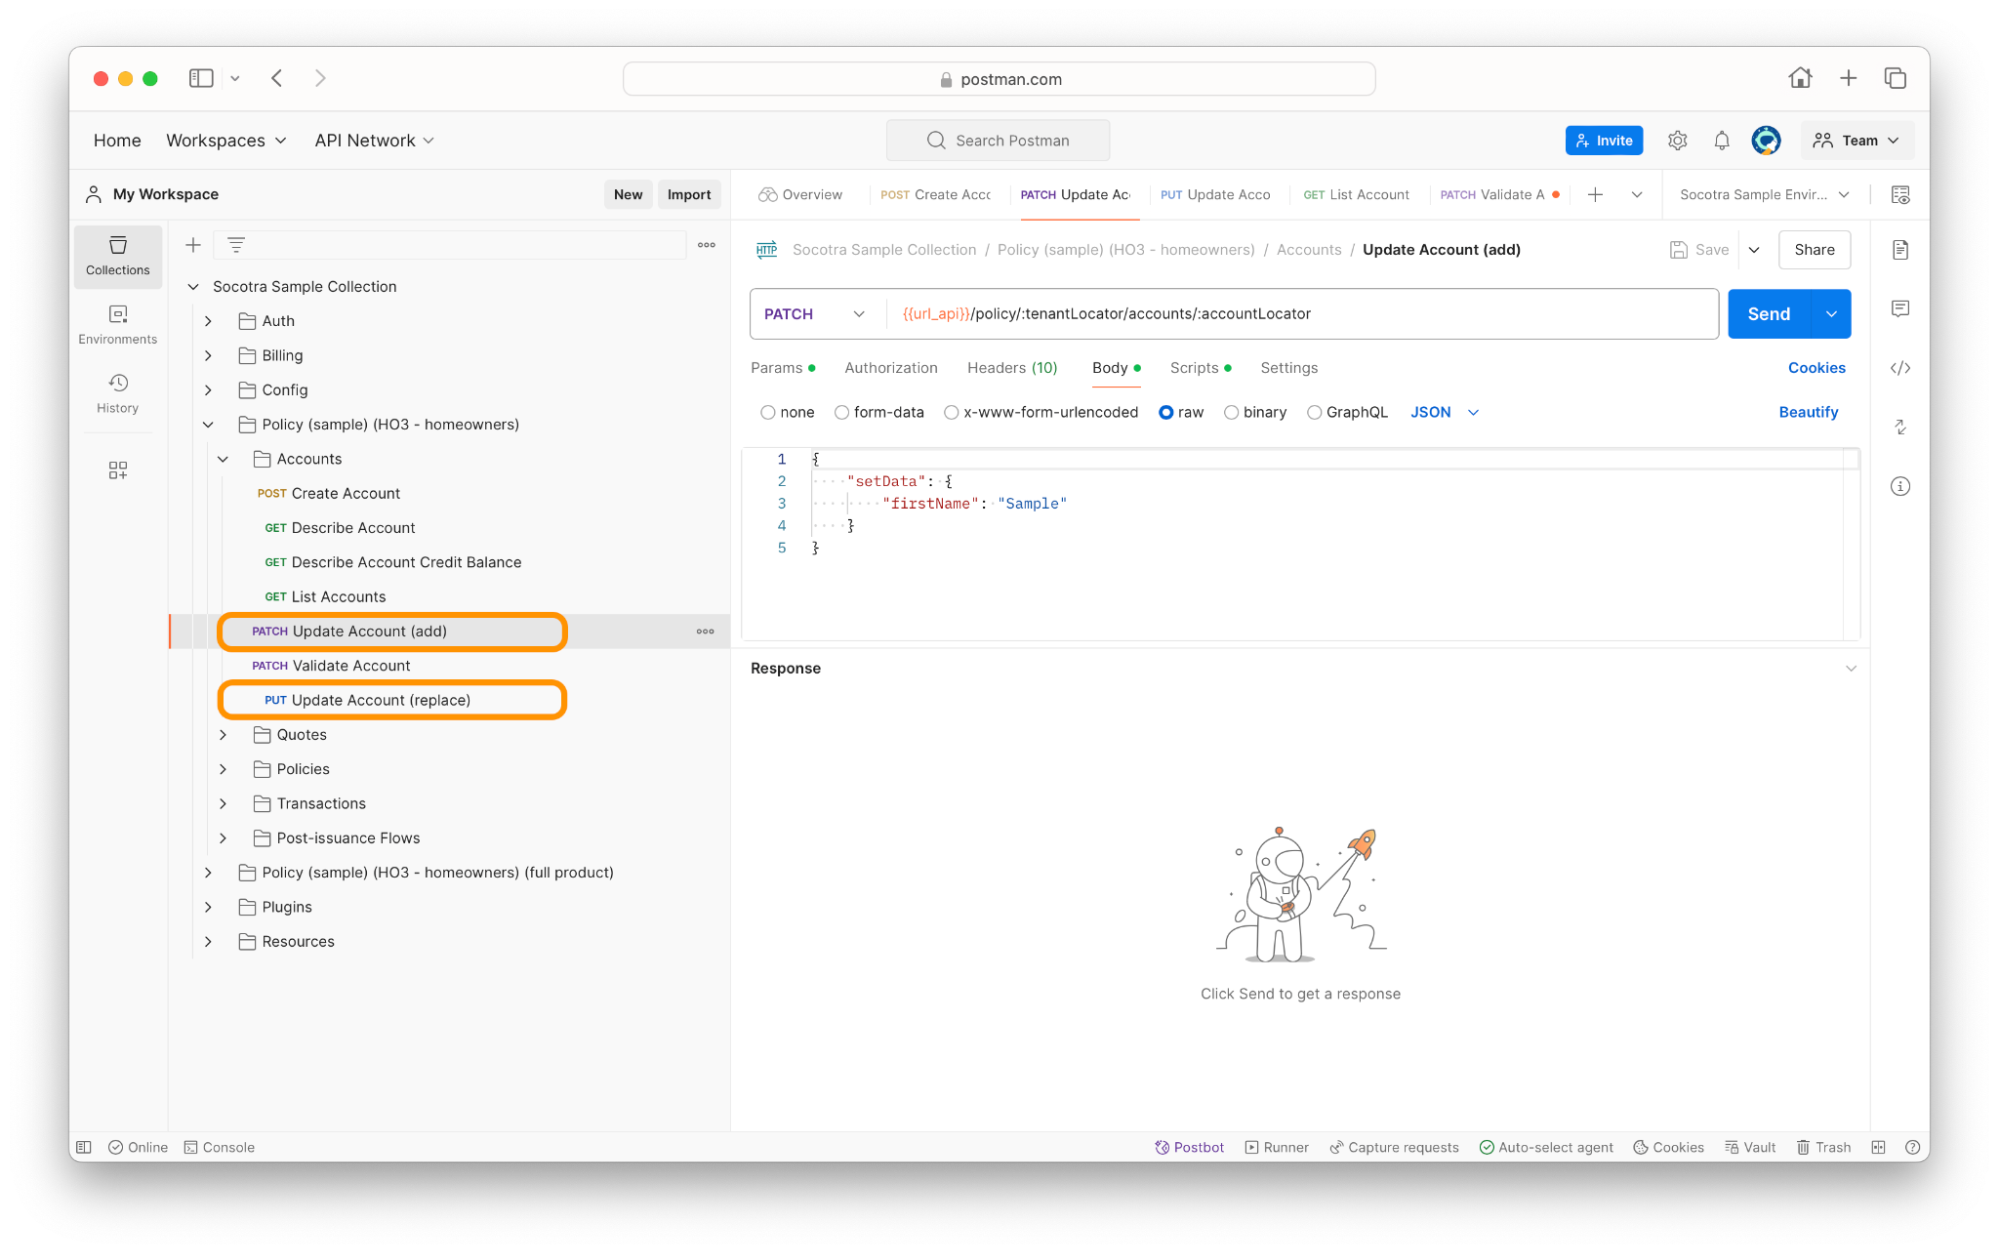
Update Account (add), with method PATCH
Update Account (replace), with method PUT
These endpoints achieve similar goals, but the difference is that the PATCH Update Account (add) endpoint adds data to an existing record, while the PUT Update Account (replace) endpoint replaces all of the data of an existing record with what’s provided in the request body.
For this tutorial, we’ll focus on using PATCH Update Account (add) to make partial changes to the account.
Note: Remember to update the accountLocator environment variable with the locator of the account you want to modify.
This endpoint modifies an account record by adding data to the existing record. Use this when you want to make a partial change to an account.
Let’s breakdown the request body of this endpoint:
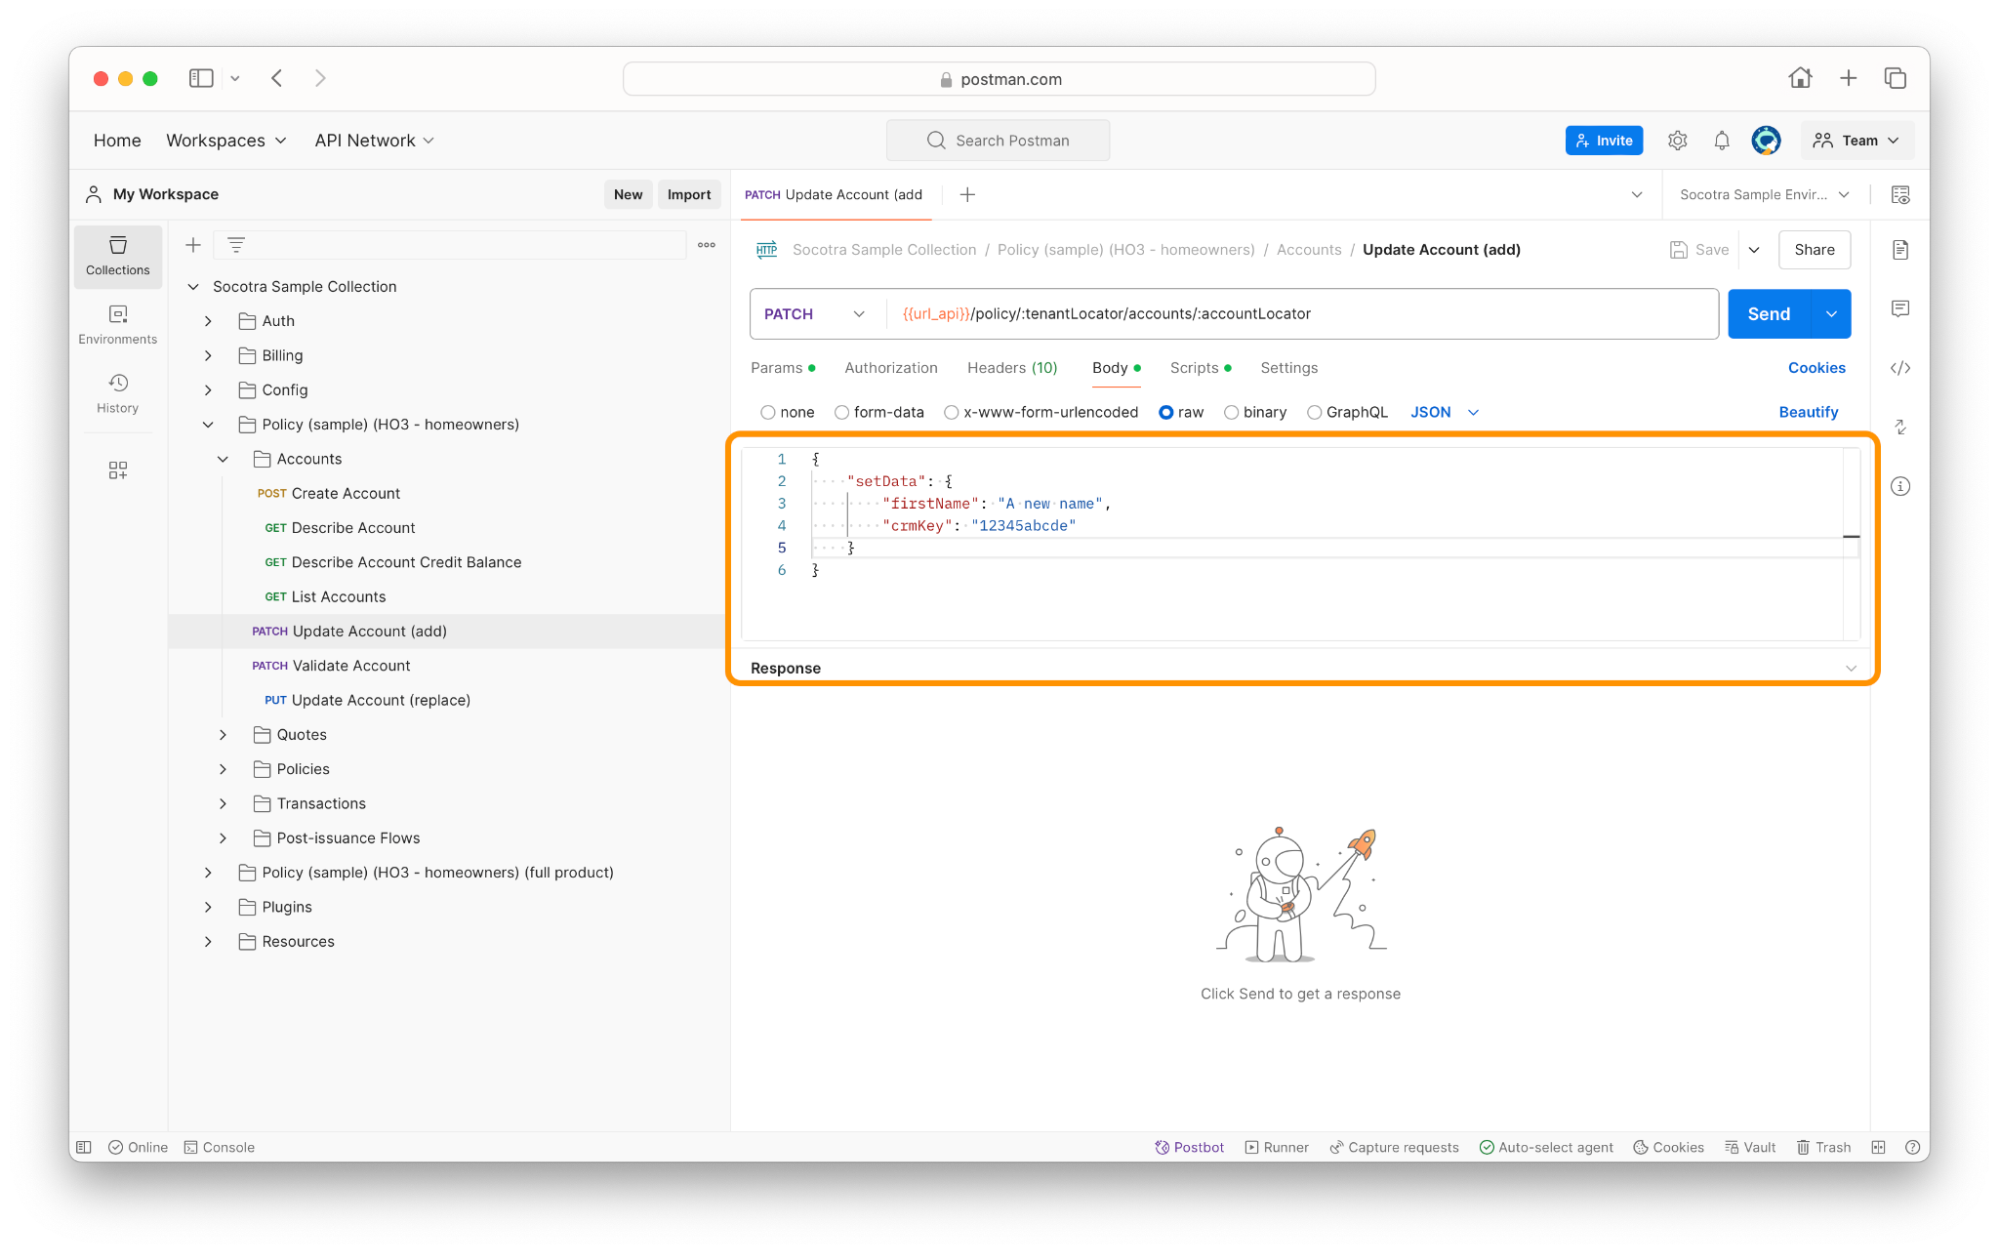
The body contains an object called
setData. This will contain the new data that we want the endpoint to use when updating the account.firstName: This contains the new value for the firstName field.crmKey: This contains the new value for the crmKey field.
After clicking Send to send the request, it should return the following response message upon success:
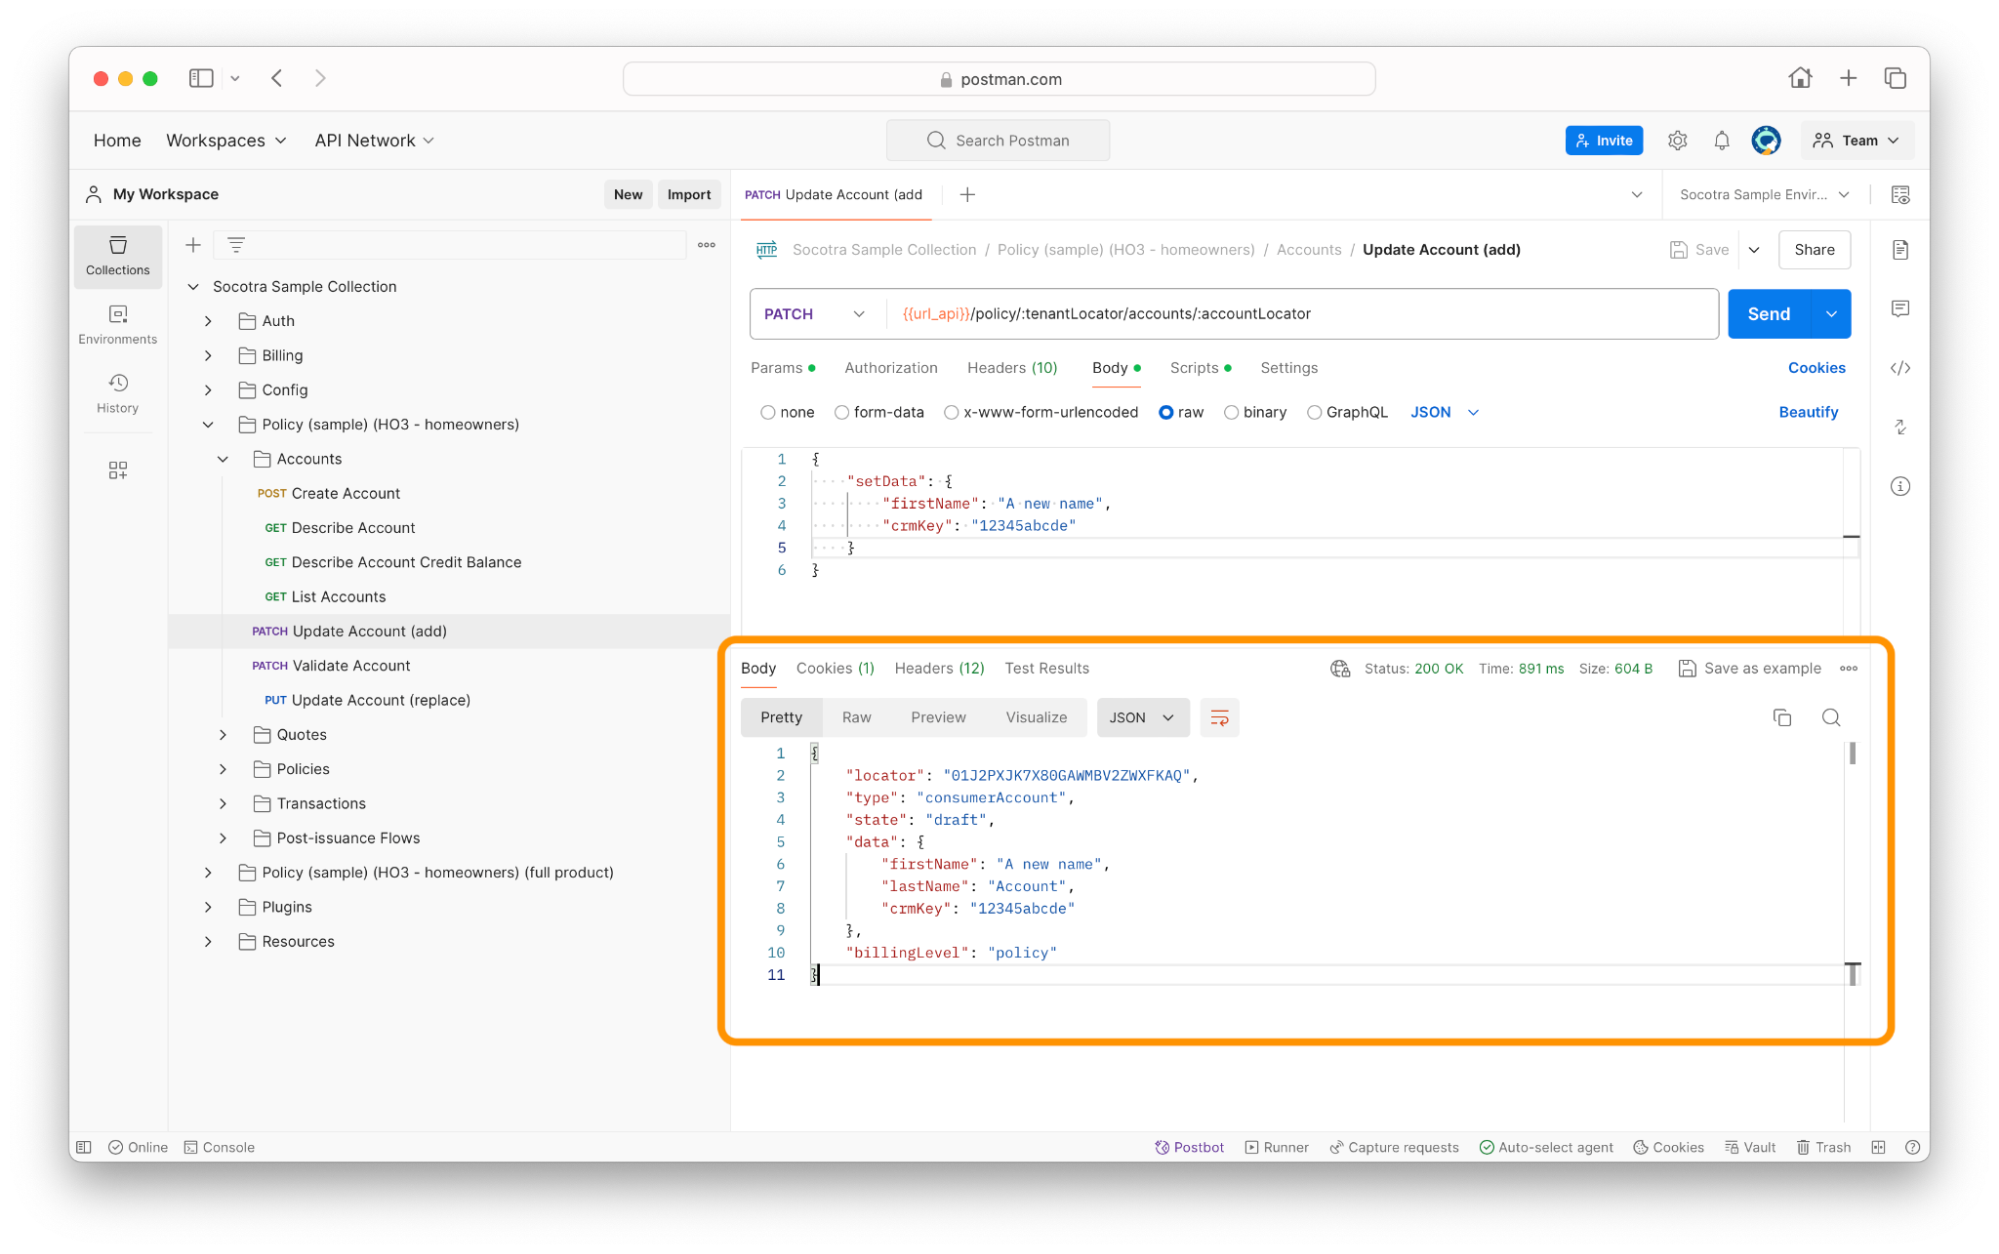
Note the updated values in the firstName and crmKey fields.
Validate an account
Now that you’ve created an account and successfully updated it, the next step is to validate it.
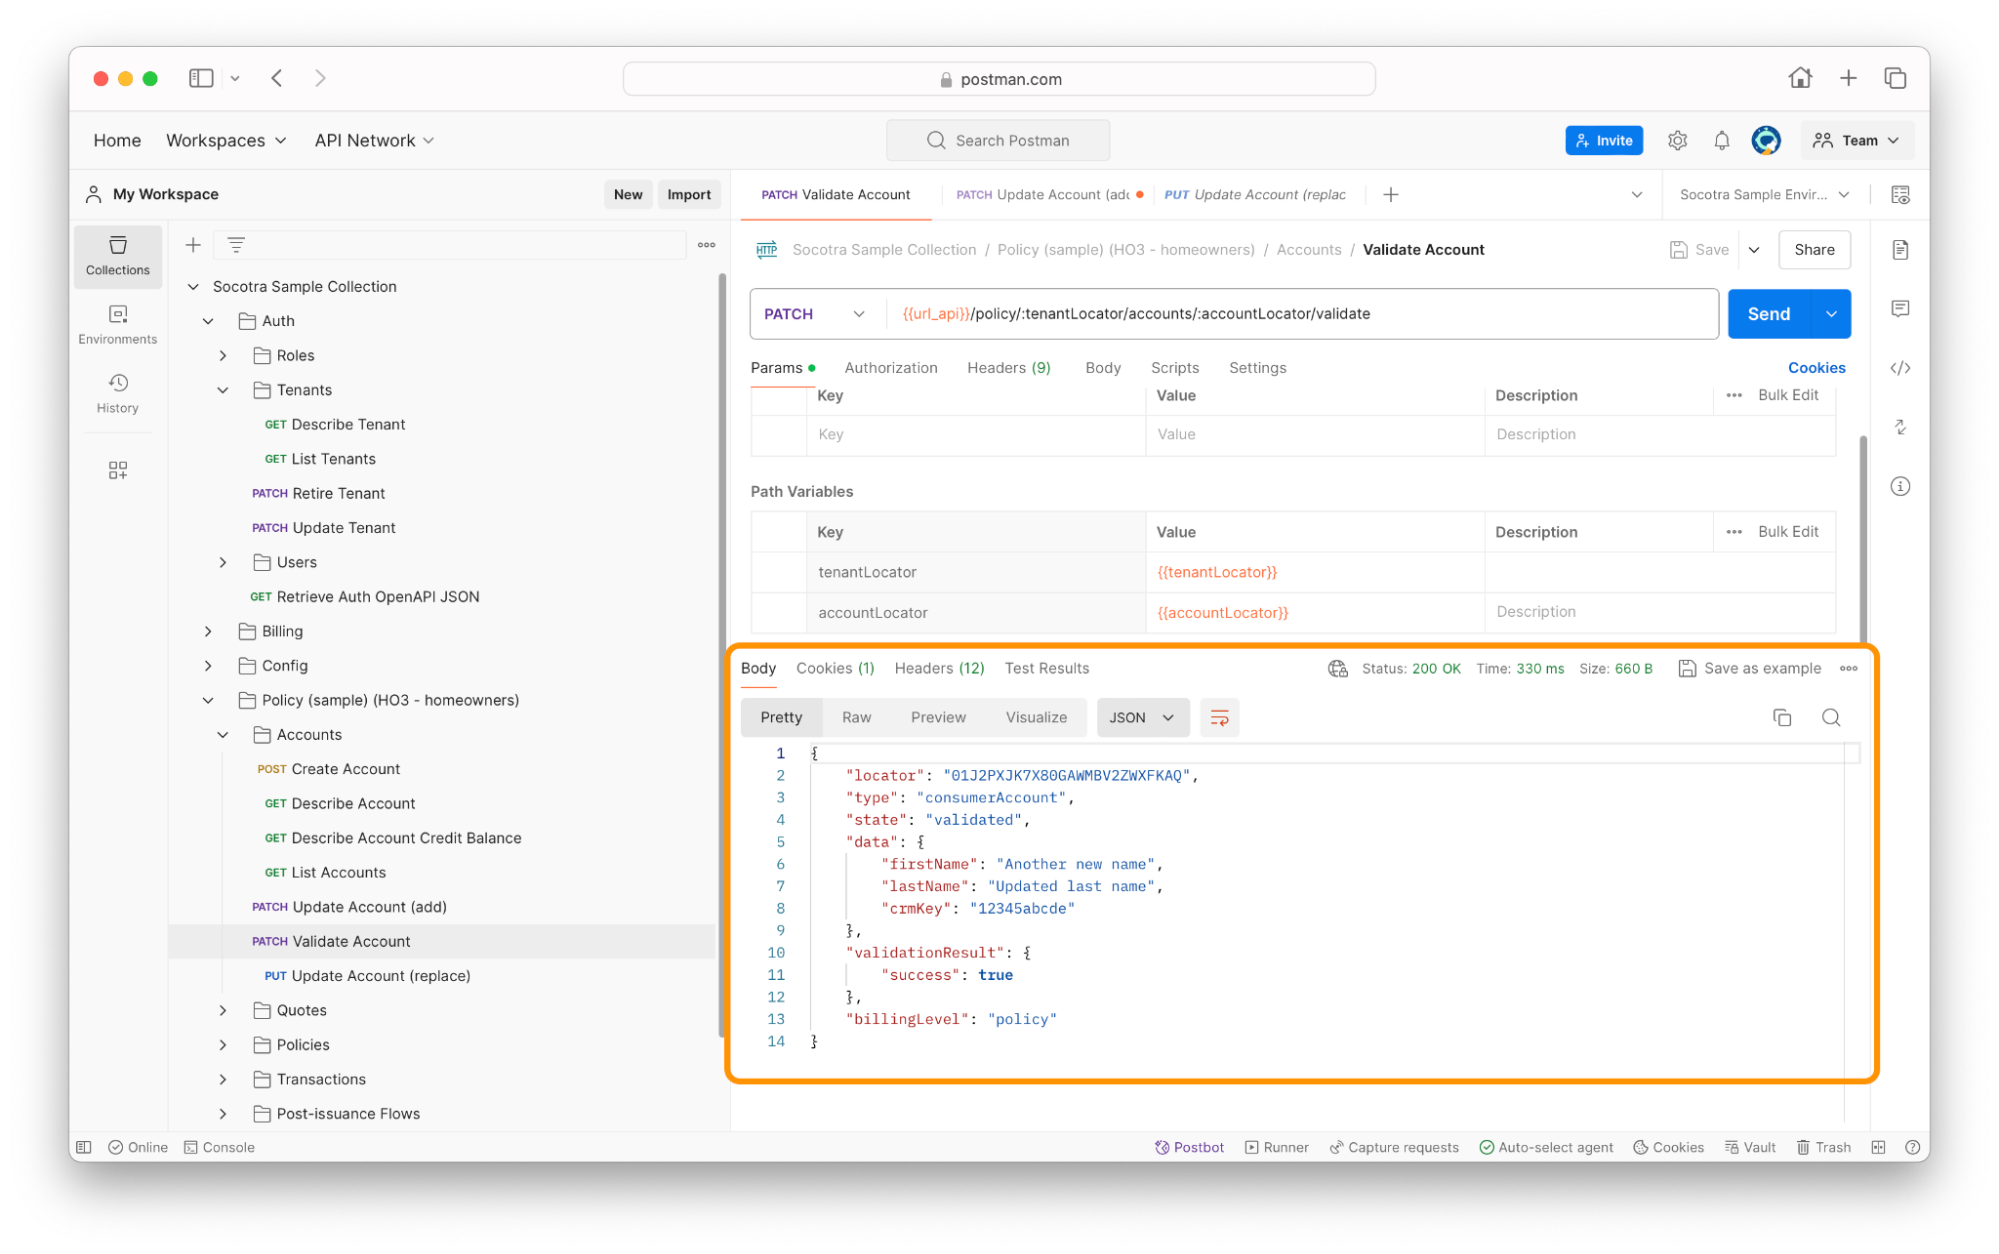
While viewing the Socotra Sample Collection, navigate to Policy > Account > Validate Account.
Make sure that the locator for the account is either input in the accountLocator environment variable.
Click Send.
The response body should show that the request was successful.
Recap
In this tutorial, we covered:
How to create an account using the Socotra API.
How to update an account using the Socotra API.
How to validate an account using the Socotra API.
Now that we have an who can be issued a quote, the next question is: How does Socotra issue quotes? Continue on to the next learning module to learn more.
Ready for the next module?
See Execute quote to bind in Socotra to continue this learning path.